Contents
If there’s one dessert that’s always met with smiles — whether you’re bringing it to a dinner party, surprising someone on their birthday, or just treating yourself on a Tuesday night — it’s chocolate-dipped strawberries. They have that perfect mix of elegance and comfort: beautiful enough to belong at a wedding, but easy enough to make in your own kitchen without breaking a sweat.

I’ve made them for everything from Valentine’s Day surprises to lazy Sunday snacks. I’ve served them on fancy platters with champagne, and I’ve eaten them straight off the parchment paper while standing in my kitchen (no regrets). That’s the beauty of them — they work in any situation.
And here’s the best part: they look like a complicated, bakery-level dessert, but in reality, they’re almost foolproof. With the right strawberries, good chocolate, and a few little tricks, you can make a batch that looks and tastes like it came straight from a chocolatier’s display case.
🍓 Choosing the right strawberries
Let’s start with the obvious: the strawberries are the star. No amount of expensive chocolate will save a bad berry.
When you’re shopping, here’s what you want to look for:
- Color: Deep, uniform red all over. If the tips are pale or greenish, they were picked too early and won’t have that full, sweet flavor.
- Firmness: They should feel firm but give slightly when pressed — that means they’re juicy without being overripe.
- Fragrance: This might sound obvious, but strawberries that smell sweet almost always taste better. If you have to bring them to your nose to get any aroma, they’re probably not at peak flavor.
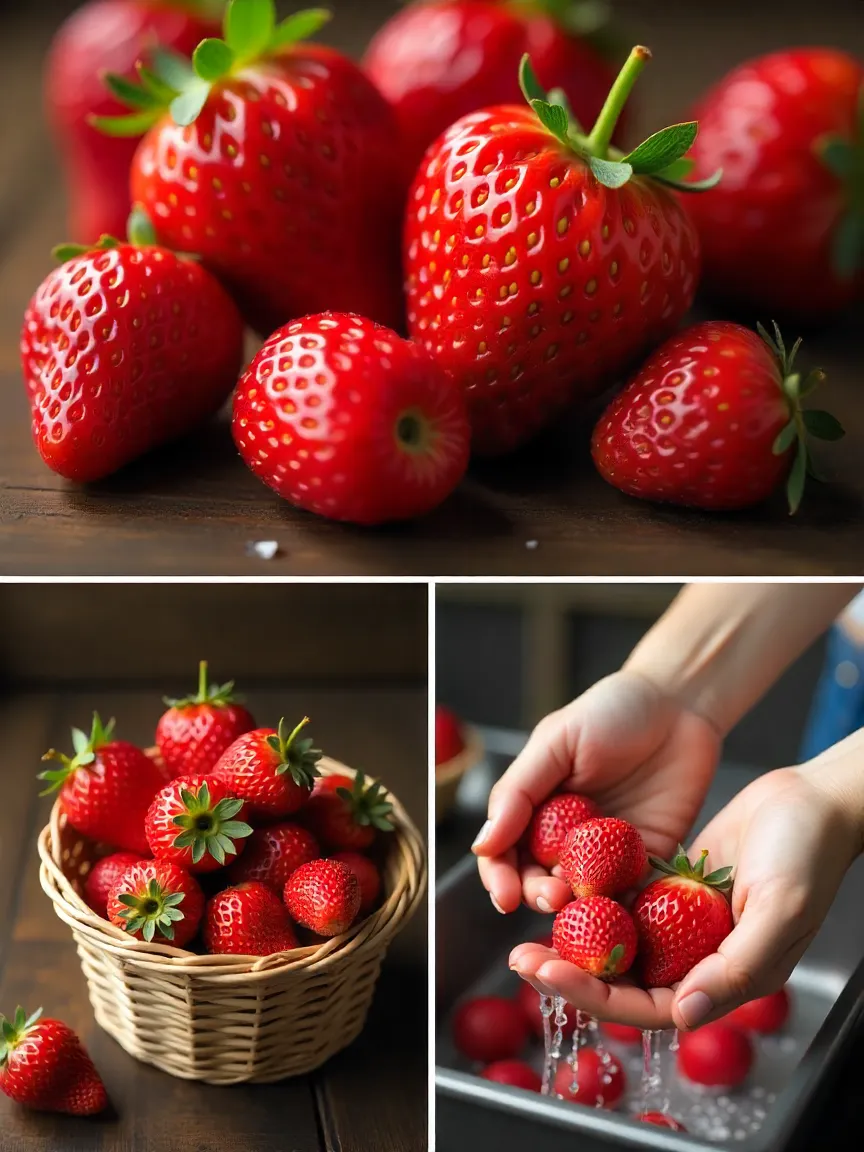
💡 Pro tip: If you can buy them from a local farm stand during peak season (spring or early summer), do it. The difference in flavor is night and day compared to out-of-season berries shipped halfway around the world.
Once you’ve chosen your berries, don’t skip the drying step. Even the tiniest drop of water can cause chocolate to clump or slip right off. I usually wash mine gently under cool water, spread them out on a clean kitchen towel, and then pat them dry one by one. It’s a little tedious, but trust me — worth it.
I also keep the green leafy tops on. Not only do they look beautiful, they make the dipping process so much easier. Plus, they give the finished strawberries that fresh, just-picked look.
🍫 Picking your chocolate
Chocolate is the other half of the equation, and just like with strawberries, quality matters.
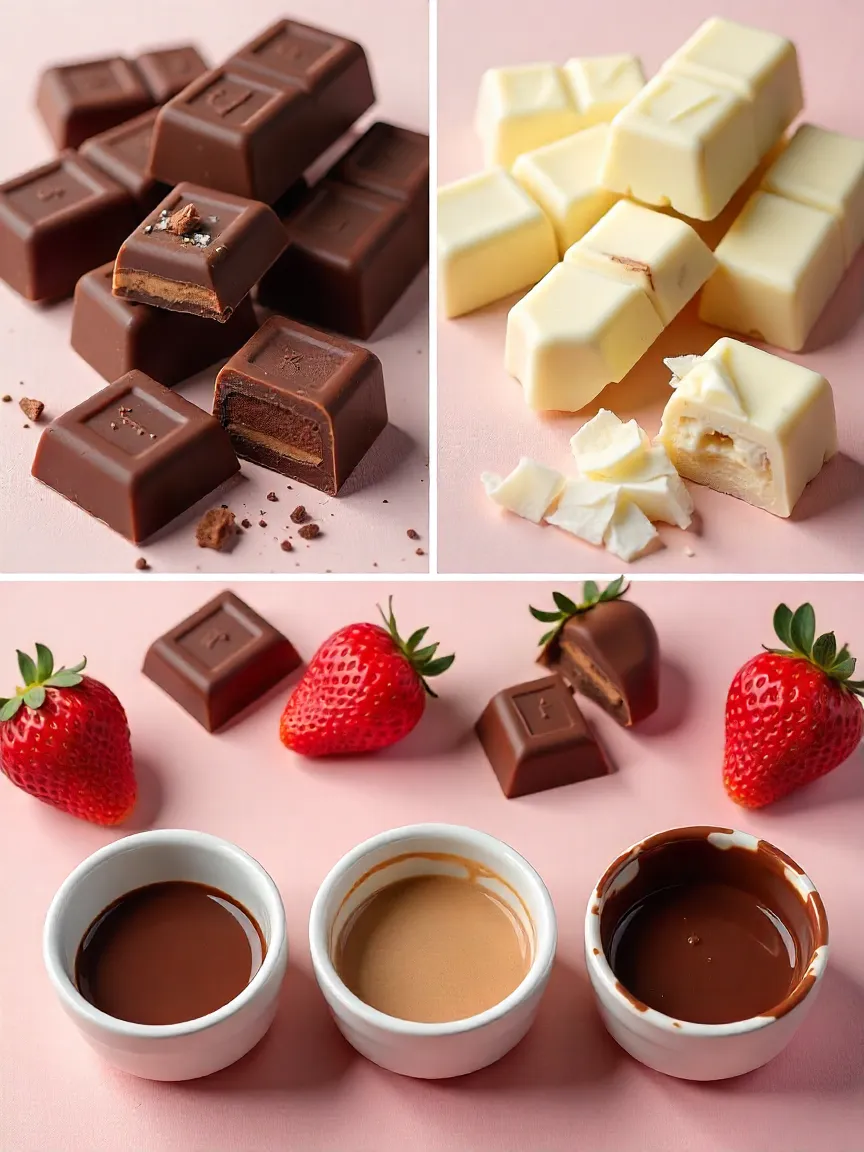
Here’s my quick guide:
Dark chocolate (60–70% cocoa): Rich, slightly bitter, and incredible with sweet, ripe berries. If you want that classic “grown-up” flavor, this is the way to go.
Milk chocolate: Sweet, creamy, and nostalgic — it’s the version most kids (and plenty of adults) love best.
White chocolate: Technically not real chocolate, but its buttery vanilla flavor makes it perfect for decorative drizzles or for people who prefer a sweeter bite.
💡 Melting tip: Add about a teaspoon of coconut oil or cocoa butter when melting. It makes the chocolate silkier, shinier, and easier to bite through once it sets.
🔥 How to melt chocolate without ruining it
There are two classic methods:
1. The double boiler
- Place a heatproof bowl over a pot of gently simmering water, making sure the bottom of the bowl doesn’t touch the water.
- Add your chopped chocolate, stirring occasionally until it’s smooth.
- Keep the heat low — chocolate is delicate, and high heat can burn it.

2. The microwave method
- Put chocolate in a microwave-safe bowl.
- Heat in 15–20 second bursts, stirring each time. Stop when it’s almost melted, then stir until completely smooth (residual heat will do the rest).
⚠️ Common mistake: Overheating. Chocolate that gets too hot will “seize” and turn grainy. There’s no fixing it once that happens.
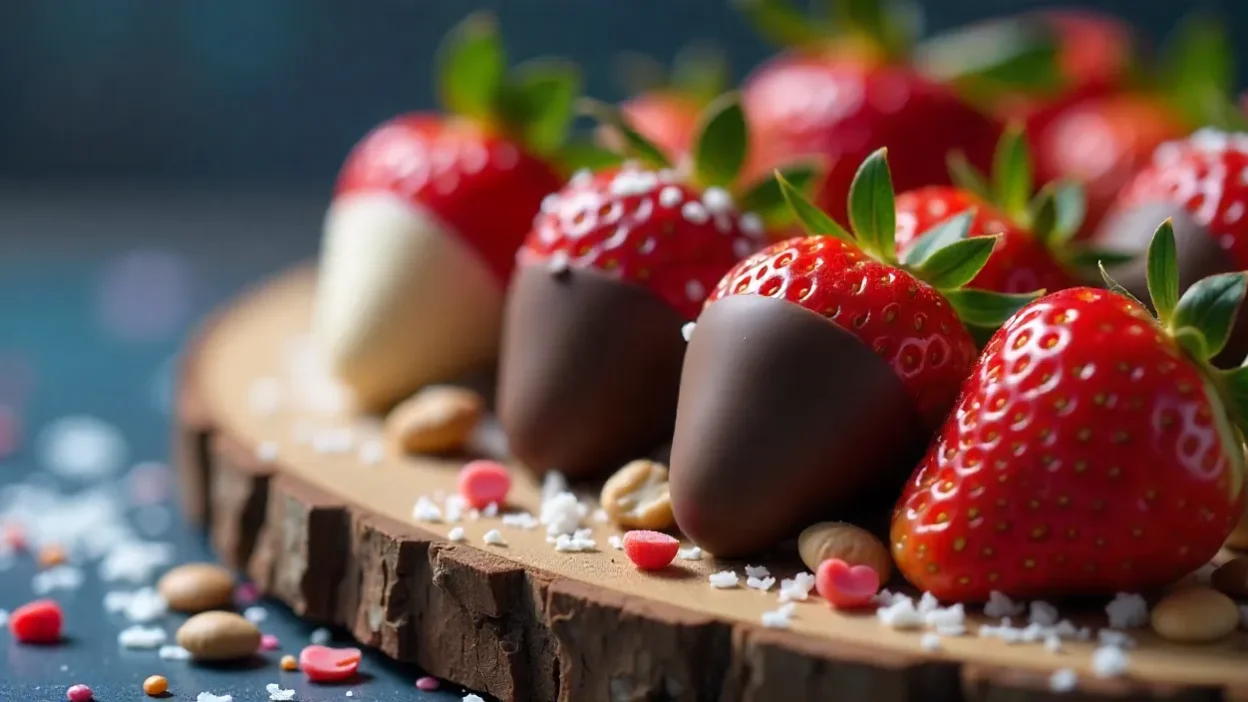
🎨 Dipping and decorating
Okay, now the fun really starts! Honestly, I love this part — it feels a bit like playing in a chocolatey art studio. You grab a strawberry by the leafy top (or use a skewer if you’re feeling fancy or just want to avoid sticky fingers), and dip it into that smooth, melted chocolate.
Take your time swirling it around, making sure every little nook and cranny gets covered. Don’t be shy about letting the extra chocolate drip off naturally — trust me, it makes a big difference in how the final treat looks and feels. Then gently place your dipped berry onto parchment paper.
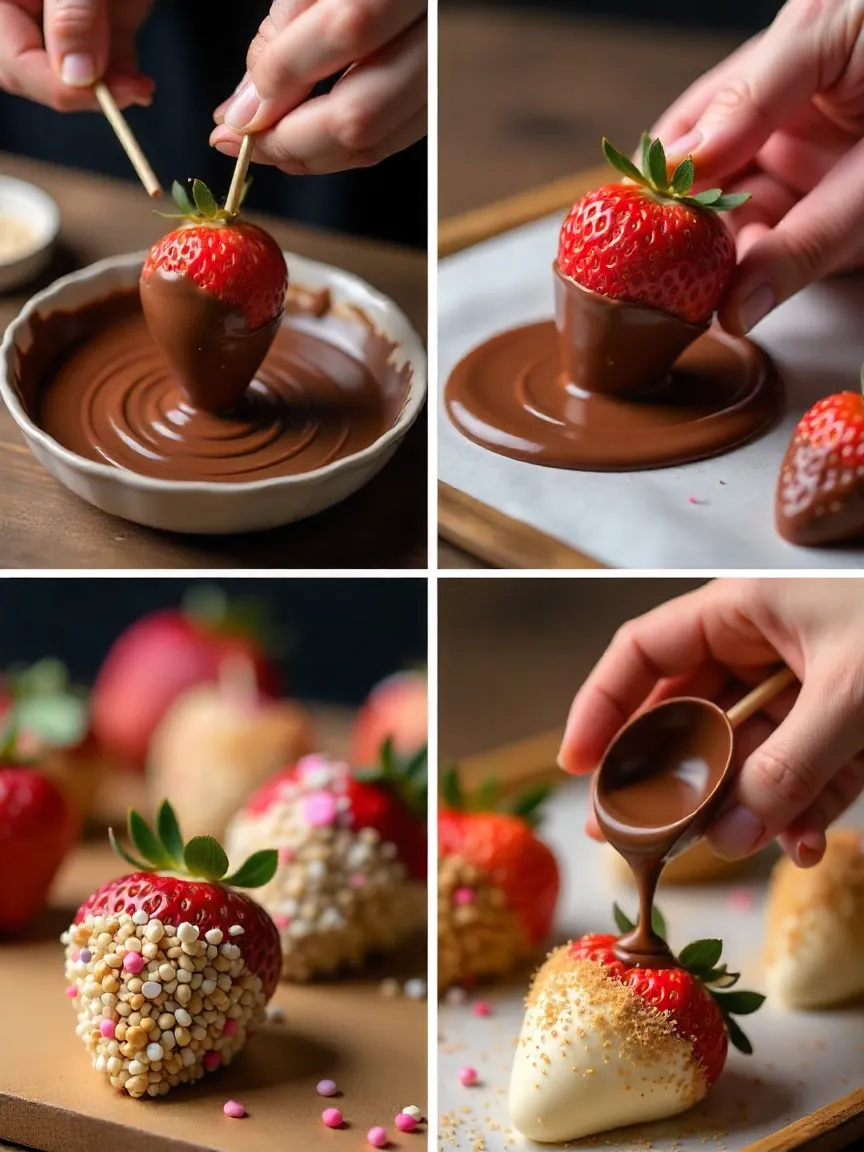
Now, here’s where you can really make these strawberries your own. When the chocolate is still soft and wet, roll them in whatever makes you happy. Nuts? Yes! Almonds, pistachios, or hazelnuts add such a nice crunch 🥜. Coconut flakes? Absolutely, especially if you want a tropical vibe 🥥. Or go wild with sprinkles — the more colorful, the better 🌈.
If you want to go full-on fancy, wait until the chocolate hardens and then drizzle some white or dark chocolate over the top. I once tried sprinkling edible gold dust on mine for a birthday party — maybe a bit over the top, but hey, it made me feel like a chocolatier for the night!
❄ Letting the chocolate set
Once dipped and decorated, you’ll need to let your strawberries sit so that the chocolate can firm up nicely. The easiest way is just to leave them at room temperature for about 30 to 40 minutes. Just don’t try to rush it — I’ve learned the hard way that if you eat them too soon, the chocolate is all melty and messy (not terrible, but less elegant).
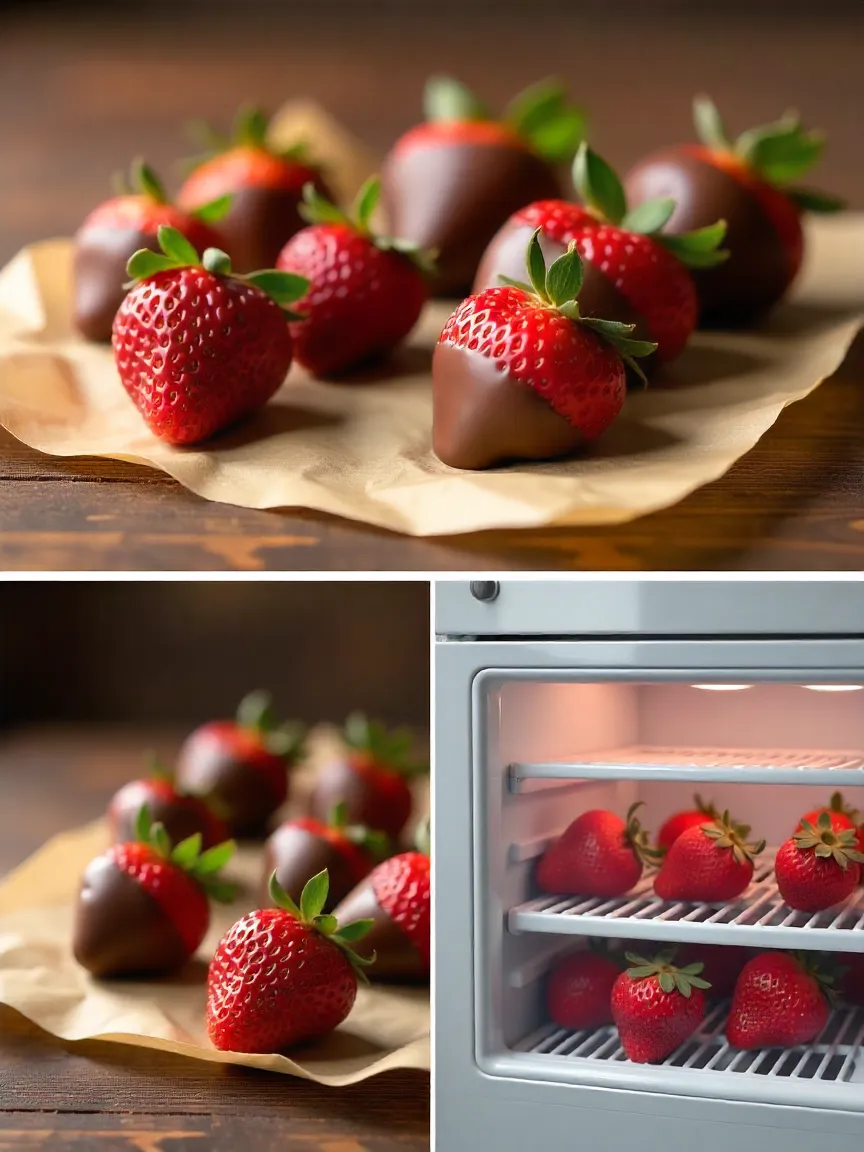
If you’re pressed for time, pop them in the fridge for 10 to 15 minutes, but be careful! Leaving them in too long can cause condensation to form when you take them out, which makes the chocolate look dull and sometimes sticky. And nobody wants that.
🎁 Presentation ideas that impress
When I bring these to parties or give them as gifts, I always try to step up the presentation game. A simple trick? Arrange them neatly in a pretty box lined with parchment paper. It immediately feels thoughtful and fancy, even if you just made them in your pajamas five minutes ago.

If you’re hosting, try threading the strawberries on wooden skewers — it makes them easy for guests to grab and eat, and adds a playful touch.
Want to impress even more? Make a “berry bouquet” by sticking the skewers into floral foam or a sturdy vase. It looks stunning and is always a conversation starter.
For romantic occasions, serve them on a silver tray alongside a chilled bottle of champagne 🥂. Instant class!
🌟 Fun variations to try
Once you’ve nailed the basics, it’s fun to experiment:
- Marble effect: Dip in one type of chocolate, then swirl in another while it’s still wet for a beautiful marbled pattern.

- Layered coating: Dip in dark chocolate first, let it set, then dip half of each berry in white chocolate for a two-tone look.
- Flavored chocolate: Add a few drops of natural extracts like orange or peppermint to the melted chocolate for a little twist.
Honestly, the possibilities are endless — just have fun with it!
💬 Final thoughts
Chocolate-covered strawberries are one of those simple pleasures that never fail to make me smile. They’re quick, easy, and let you get a little creative in the kitchen without stress. Plus, they always taste like a little celebration in every bite.

So next time you want to treat yourself or someone special, don’t overthink it. Grab some strawberries, melt some chocolate, and enjoy the process as much as the delicious results. You’ve got this. 🍓


OMG, yes! Totally agree. Chocolate-dipped strawberries are the ultimate dessert chameleon! That description perfectly captures their magic – fancy enough for a celebration, yet ridiculously simple and satisfying for a solo indulgence. And I’m with you on the eating-them-straight-off-the-parchment-paper thing…no judgment here! 😉 Love this recipe – can’t wait to try it!