Contents
- 📜 Origins, legends, and kitchen gossip
- 🌈 Why charlotte is the most flexible cake you’ll ever make
- 🛒 Let’s talk ingredients (because they matter more than you think)
- 🔪 Tools that make life easier
- 👩🍳 How i make mine (step-by-step, with love)
- 🎀 The art of serving charlotte
- 💡 Troubleshooting & little secrets
- 🥂 Why charlotte will always have my heart
Some desserts are just quick sugar hits — the kind you grab when you want a fast sweet fix. But Charlotte cake? It’s never been that for me. It’s always been something more. A kind of little ceremony, really. I think of it as a dessert that carries a story every time it’s brought out. It’s not just about the ladyfingers or the creamy mousse; it’s the way you see people’s faces light up when you take it out, all tied up neatly with a ribbon 🎀. That moment when everyone leans in, curious to see what’s inside — that’s the magic.
I still remember the first time I tried making Charlotte, standing in my grandmother’s kitchen. She didn’t follow recipes the way we do now — more like sharing wisdom through the years. “You’ll know when the cream’s right by the way it feels,” she told me. And, “Add fruit until it tastes good to you, no need to count grams.” At the time, I was frustrated — I wanted precise instructions, exact measurements, and a clear list of steps. But now, I get it. She was teaching me how to trust my senses, not just a recipe. And honestly, that’s why my Charlotte never tastes the same twice — but it always tastes like hers ❤️.
📜 Origins, legends, and kitchen gossip
Charlotte cake’s past is a bit of a mystery, sprinkled with a few competing stories — like a dessert soap opera.
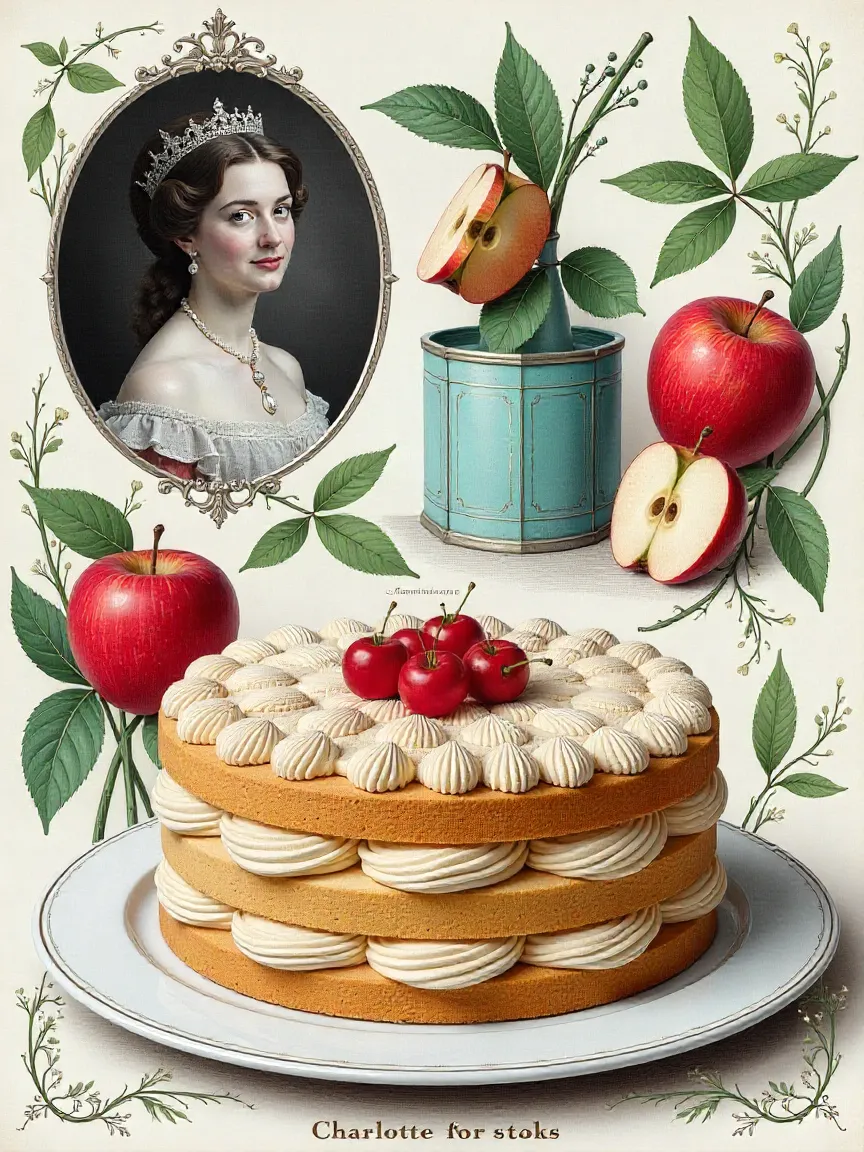
One popular story says the cake got its name from Queen Charlotte, wife of King George III of England, back in the late 1700s. She loved apples, so the first Charlottes were more like apple bread puddings — simple, hearty, and very homey. Then French chefs came along and gave it a makeover: swapping bread for delicate sponge biscuits, turning the filling into silky Bavarian cream, and serving it cold for a fancy finish.
There’s also a tale about Marie-Antoine Carême, one of history’s first celebrity chefs. He supposedly took this English dessert idea and gave it a French twist to wow the Russian aristocracy. That’s where the famous Charlotte Russe was born — a creamier, more elegant version.
So whether you think of Charlotte cake as English, French, or Russian, it feels like a dessert that traveled across borders, picking up influences and flavors along the way. For me, that makes it all the more special.
🌈 Why charlotte is the most flexible cake you’ll ever make
I’ve been baking for years, and I can honestly say that not many desserts can switch gears as effortlessly as a charlotte. It’s like a little blank slate that welcomes all sorts of flavors, textures, and moods. Depending on what you’re craving or what’s on hand, you can tailor it completely differently every time — and that’s what makes it so special.
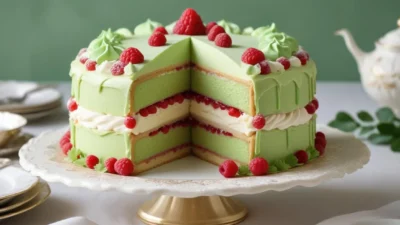
Picture this: a charlotte bursting with fresh summer berries, light and refreshing, perfect for a lazy weekend brunch in the sun. 🍓 Or maybe you want something a little richer, something velvety and chocolatey, with deep espresso notes to cozy up your evening. 🍫 For chilly winter holidays, a bright citrus charlotte can bring a sunny zest that lifts everyone’s spirits. 🍊 And if you’re throwing a kids’ party, why not have fun with colors, layers, and playful fruit combinations that make the cake as joyful to look at as it is to eat? 🎉
Here are some of my all-time favorite combos that I’ve played around with:
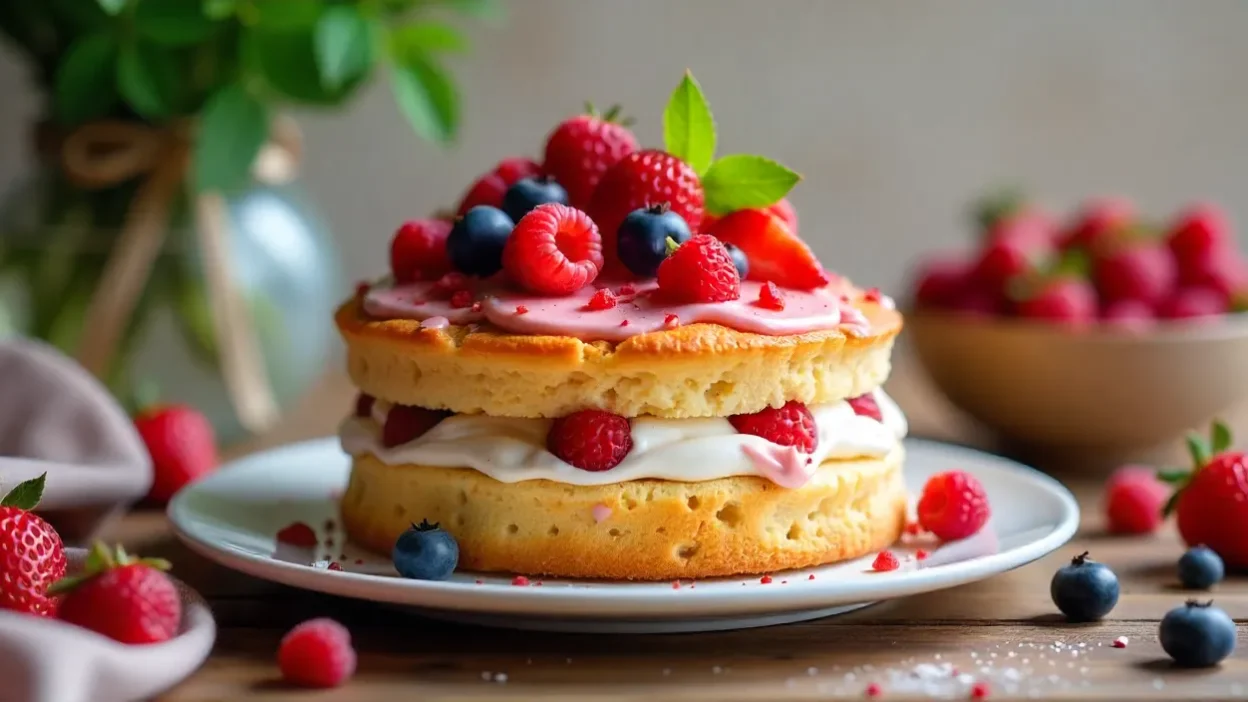
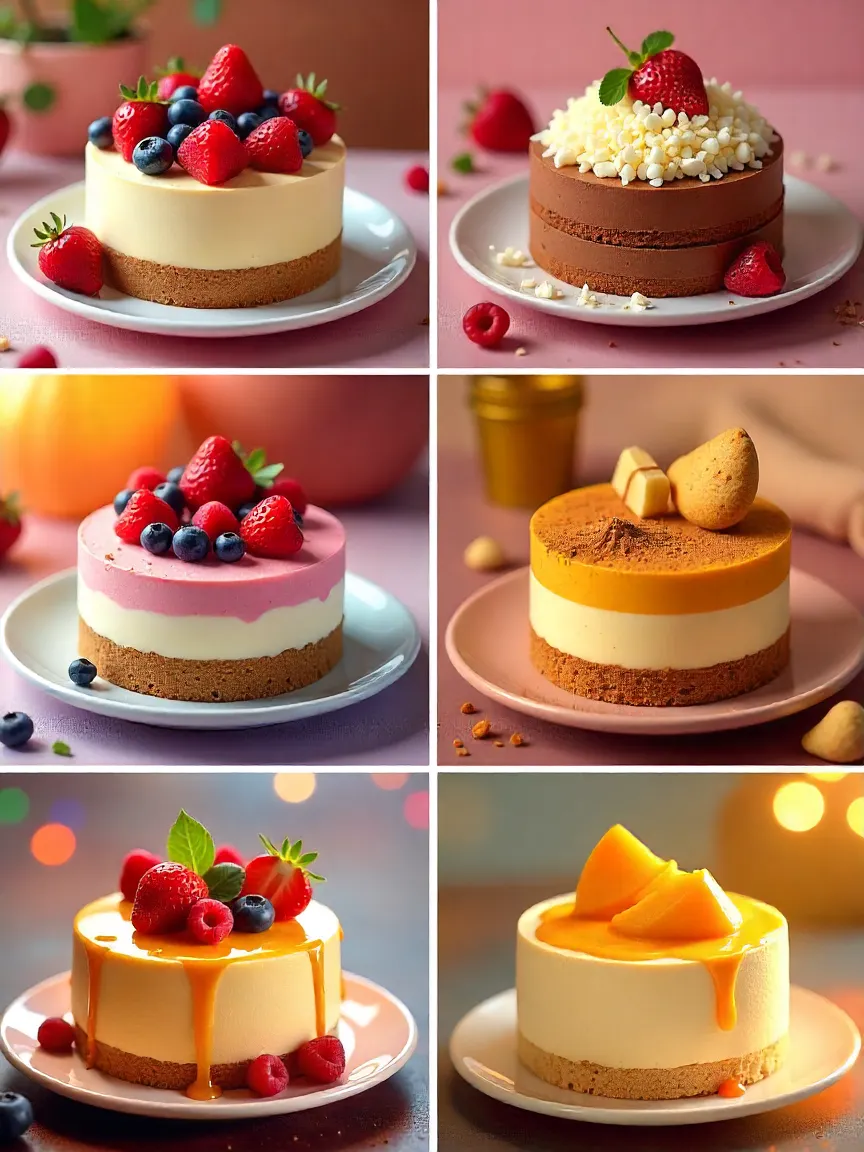
- Berry garden delight — layers of strawberries, raspberries, and blueberries folded into a dreamy vanilla cream that tastes like summer wrapped in a cake.
- Mocha magic — rich chocolate mousse with just a whisper of espresso, dusted with cocoa powder for that perfect bittersweet finish.
- Tropical escape — mango and passion fruit mousse, topped with shredded coconut flakes that instantly transport you to a beachside holiday.
- Spiced autumn — pumpkin mousse with warm cinnamon and nutmeg, finished with a drizzle of caramel that makes your kitchen smell like fall.
And if you want to try something wild, you can even make a savory charlotte! Swap the sweet filling for a smooth cheese spread and use savory biscuits or thin slices of bread instead. It’s unexpected, but absolutely delicious — and always a great conversation starter at gatherings.
🛒 Let’s talk ingredients (because they matter more than you think)
You can definitely throw together a charlotte using whatever’s at your local store, and it’ll turn out okay. But if you’re hoping for those “wow” moments, the kind that makes people ask for seconds, then paying attention to the details makes a huge difference.
- Ladyfingers (Savoiardi) — I won’t lie, store-bought ones are super convenient, but if you have the time, homemade ladyfingers have this delicate crunch and soak up syrup so much better without turning soggy. It’s a little extra effort that really pays off.
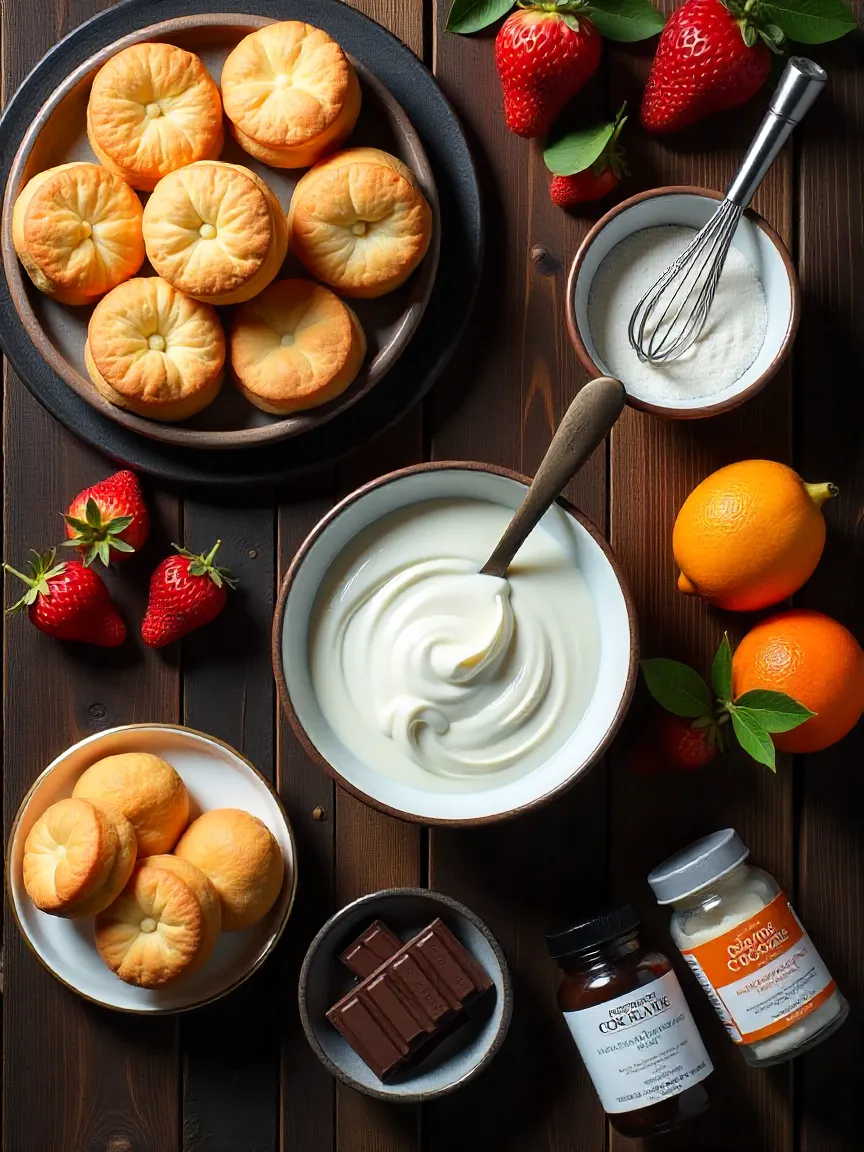
- Cream — don’t skimp on the fat content here. High-fat cream (around 33-35%) whips up fluffier and richer. Also, chilling your mixing bowl and whisk before whipping makes the cream whip faster and hold its shape longer — a neat little trick.
- Fruit — always taste your fruit before adding it to the mix. If it’s too tart, add a bit of sugar; if it’s overly sweet, a tiny squeeze of lemon juice will balance it out perfectly.
- Chocolate — if you’re using chocolate, go for one with at least 60% cocoa. It’s richer and less sickly sweet than cheaper cooking chocolates, which can ruin the delicate balance.
- Gelatin vs. agar — gelatin gives a soft, creamy texture that’s classic, while agar is plant-based, sets firmer, and is perfect if you want a vegan version.
🔪 Tools that make life easier
Making a charlotte isn’t hard, but having the right tools helps you avoid frustration and achieve that perfect finish. Here’s what I always keep on hand:
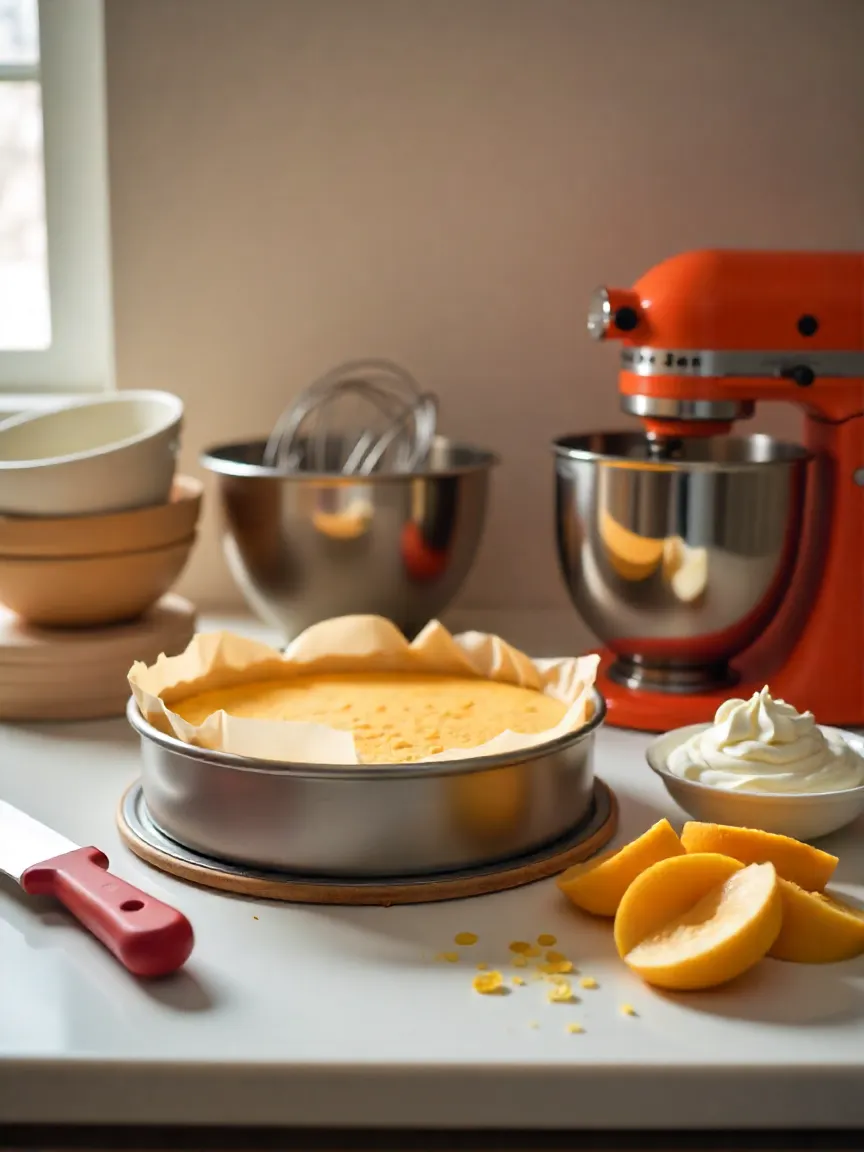
- A springform pan or a dedicated charlotte mold — this is a lifesaver when it comes to unmolding the cake cleanly.
- An electric mixer — unless you’re really into arm workouts, this gadget will save you loads of time when whipping cream or mousse.
- Several mixing bowls in different sizes — because you’ll usually have to prep your cream, mousse, and fruit separately.
- A rubber spatula — perfect for folding ingredients gently, keeping your mousse light and airy. Wooden spoons just aren’t quite as gentle.
- A sharp knife for trimming ladyfingers to size and neatly slicing fruit for that perfect presentation.
👩🍳 How i make mine (step-by-step, with love)
Step 1 – Building the biscuit fortress
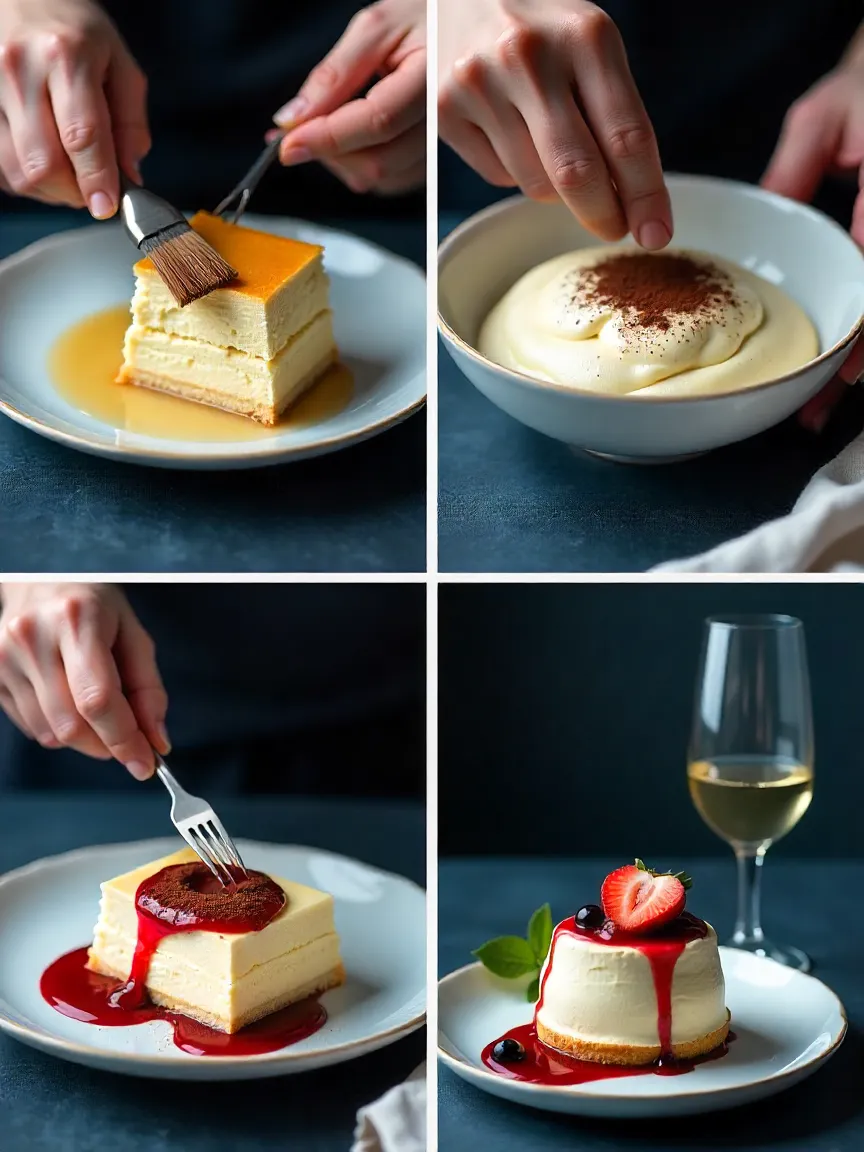
First things first: Line your mold with cling film to keep everything neat and make unmolding a breeze. Then, take your ladyfingers and stand them upright all around the edges of the mold — it’s like constructing a crunchy, sweet castle wall! If some ladyfingers are taller than the mold, don’t worry — just trim the tops carefully so the rim is perfectly even. Next, fill the base of the mold with a single layer of ladyfingers laid flat, creating a sturdy, delicious floor for your dessert kingdom. This step sets the stage for everything that comes next! 🏰
Step 2 – Whipping up the mousse magic
For the chocolate lovers: Gently melt good-quality chocolate over a double boiler, stirring until smooth. Let it cool just a bit so it doesn’t melt your cream when you mix them. Meanwhile, whip cold heavy cream until soft peaks form — chill your bowl and whisk beforehand to make it easier! Then, carefully fold the melted chocolate into the whipped cream, making sure to keep the texture light and fluffy. This silky mousse is the heart of your charlotte. 🍫
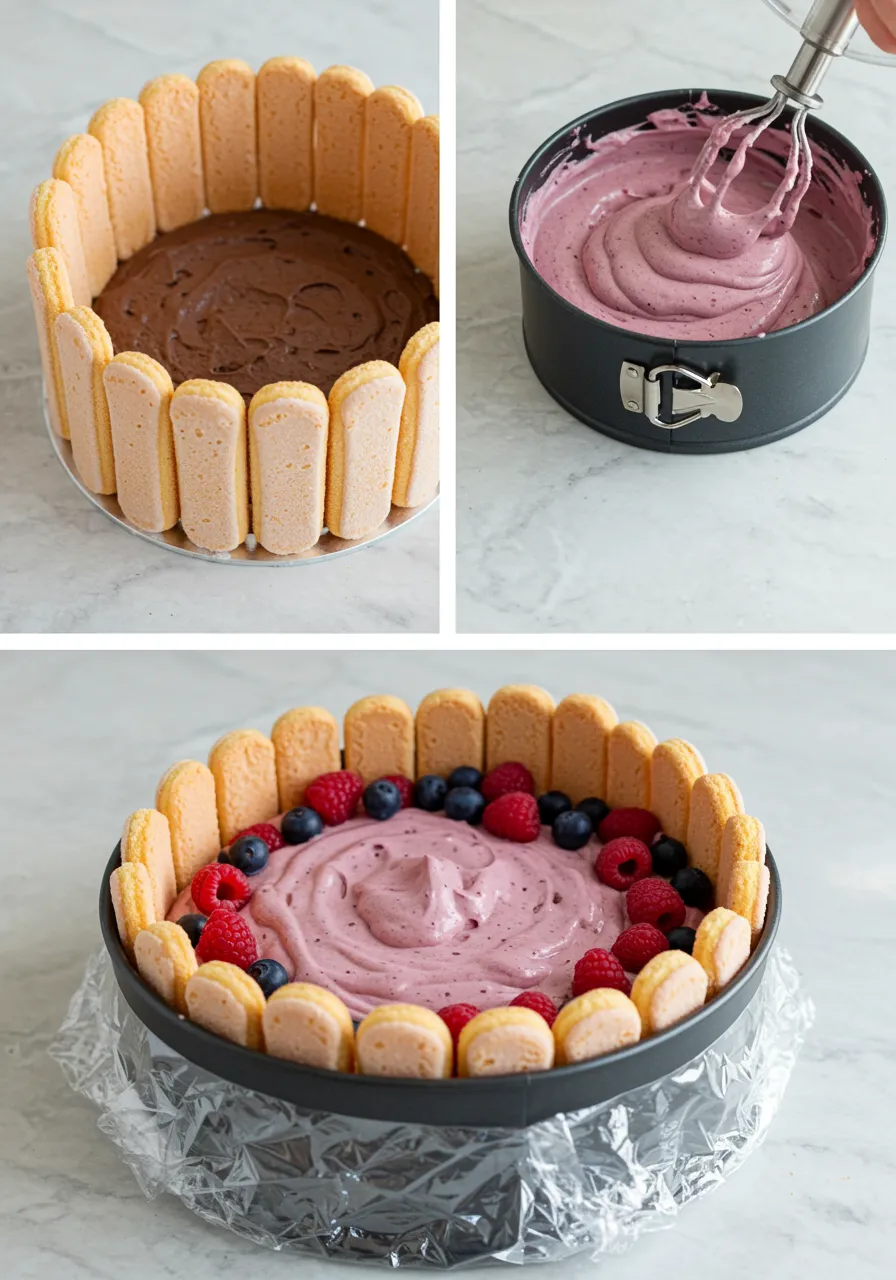
For the fruit fans: Blend fresh berries into a smooth puree. If you want an ultra-smooth texture, strain out the seeds. Taste it, then sweeten lightly if needed — it’s all about balance here! Gently stir in dissolved gelatin to help the mousse set perfectly. Finally, fold the berry puree into whipped cream, creating a fruity, airy filling bursting with fresh flavor. 🍓
Step 3 – Layering the story
Now comes the fun part: Layering! Start by spreading about half of your mousse evenly over the ladyfinger base. Then add a layer of fresh fruit or perhaps a drizzle of fruit syrup for an extra burst of flavor. Follow this with the remaining mousse, smoothing it out carefully. If you want to add a bit of crunch and texture, slip in an extra layer of ladyfingers right in the middle — a delightful surprise for anyone lucky enough to get that slice! 🥄
Step 4 – The all-important chill factor
Cover the whole masterpiece tightly with cling film or a lid and pop it into the fridge. It needs to rest for at least 6 hours, but honestly, overnight is even better. This wait lets the mousse set perfectly and the ladyfingers soften just enough, soaking up the flavors but staying wonderfully tender — patience really is a virtue here! ❄️
🎀 The art of serving charlotte
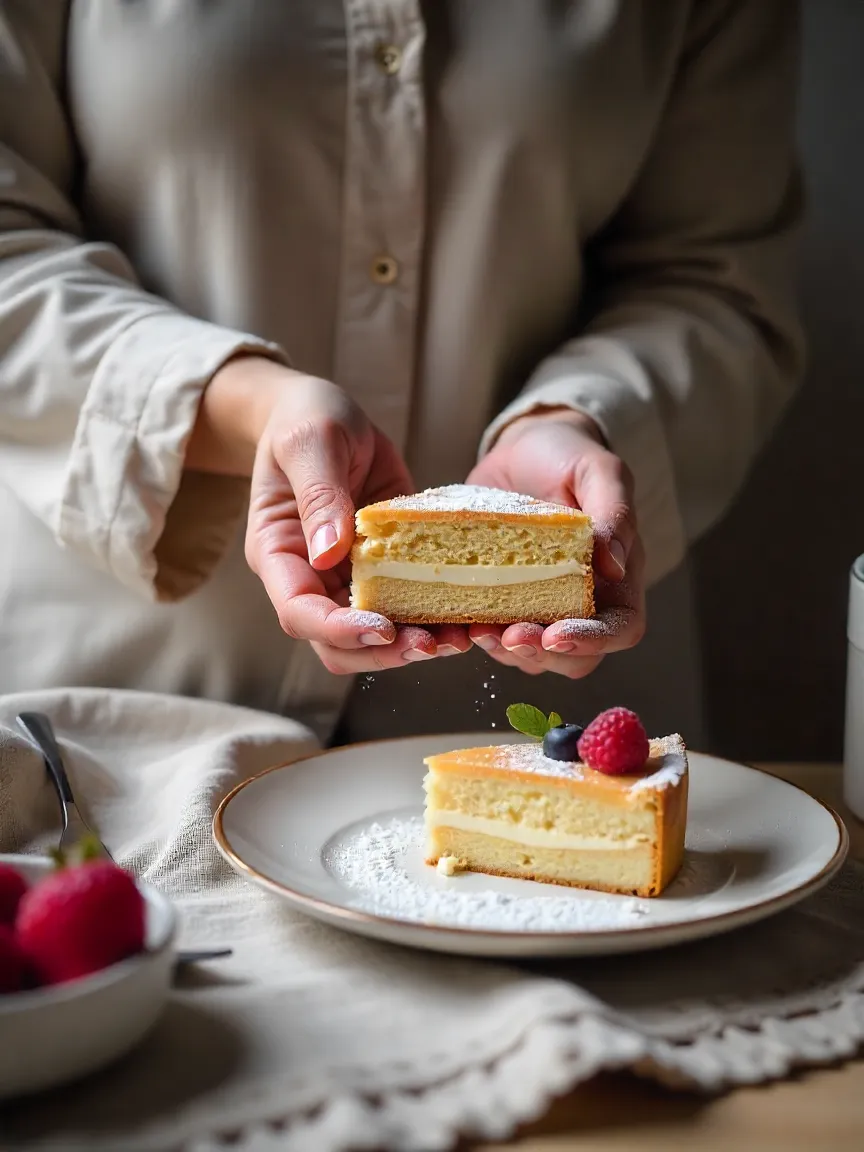
Serving your charlotte is just as important as making it — it’s all about presentation and those little finishing touches that wow your guests!
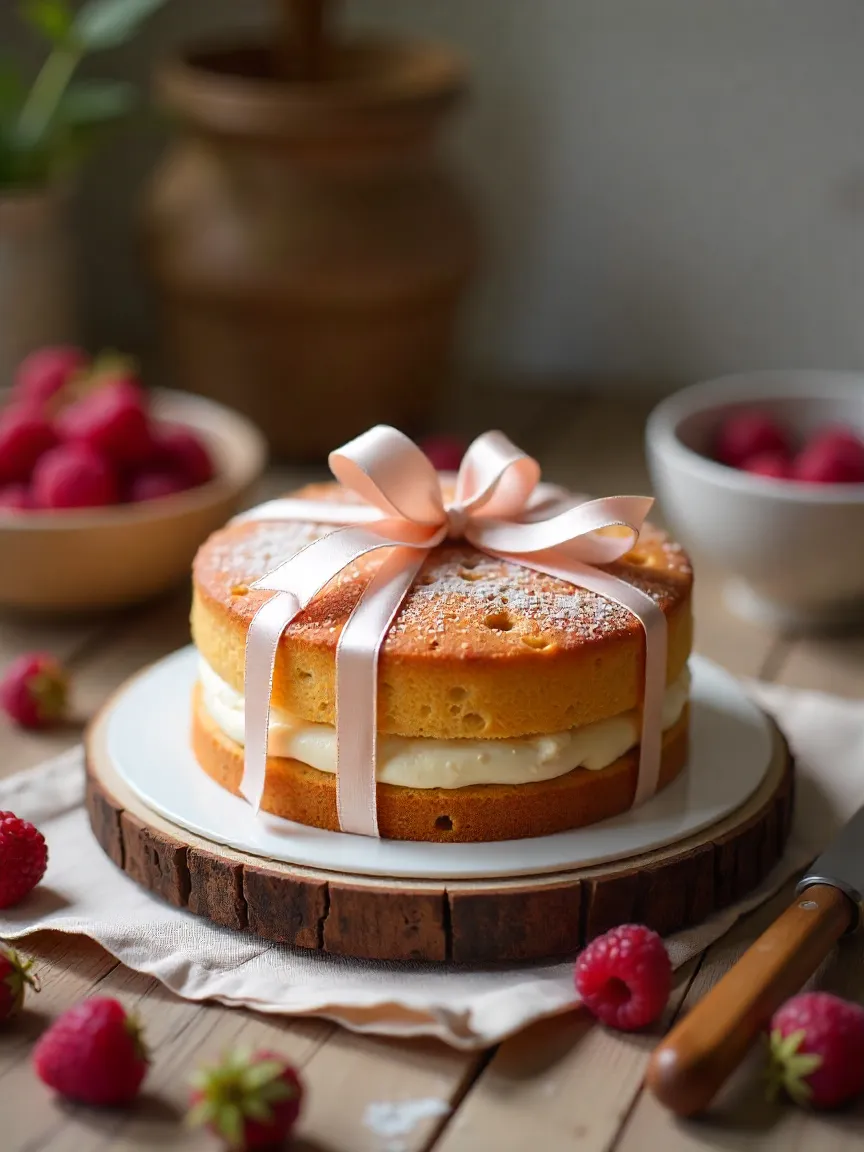
- Tie a satin ribbon around the outside of the mold before you unmold it. It adds an instant touch of elegance and builds anticipation for the big reveal! 🎀
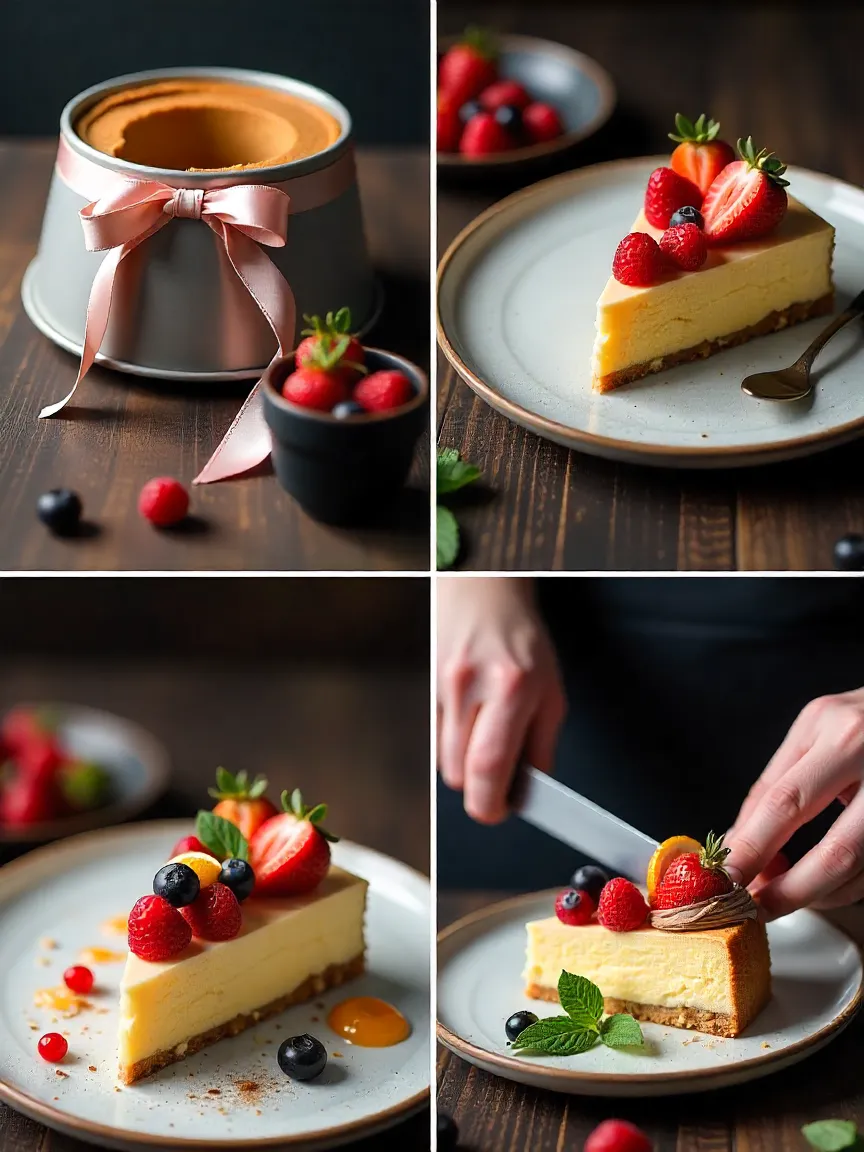
- Match your toppings to the filling inside — fresh berries for berry mousse, delicate chocolate curls for the chocolate version, or vibrant citrus slices for tropical flavors. A few mint leaves can also add a refreshing pop of color and aroma. 🍋🍫🍓
- Serve your slices on chilled plates to keep the mousse cool and firm — nothing worse than a melty mess!
- When slicing, wipe your knife clean between each cut. This simple trick keeps the edges of each slice neat and clean, perfect for sharing those “Instagram-worthy” moments. 📸
💡 Troubleshooting & little secrets
- Biscuits collapsing? They’re over-soaked. Brush with syrup instead of dunking.
- Mousse too loose? Use slightly less cream or add a touch more gelatin.
- Too sweet? Balance with tangy fruit or a dusting of unsweetened cocoa.
- Want to impress? Serve with a drizzle of matching coulis and a glass of sparkling wine.
🥂 Why charlotte will always have my heart
Every time I make a Charlotte, I think of my grandmother — her hands dusted with powdered sugar, her voice telling me “Don’t rush it, let the cream tell you when it’s ready.” I love that no matter how many times I make it, no two Charlottes are exactly alike. The fruit changes, the flavors shift, and so does the mood of the day.
It’s a dessert that invites creativity, forgives mistakes, and rewards patience. And the best part? Watching people’s faces light up as they take that first bite.
If you’ve never made one before, trust me — this is the kind of recipe that will make you wonder why you didn’t try it sooner.


I do not even know how I ended up here, but I thought this post was great. I don’t know who you are but definitely you’re going to a famous blogger if you are not already 😉 Cheers!