Contents
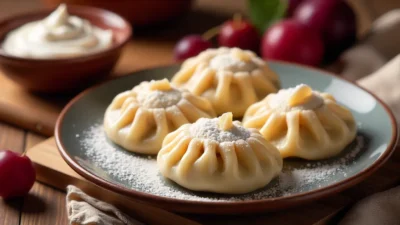
If you’re someone who loves rich, cozy desserts but hates the idea of spending hours in the kitchen, you’re going to adore these Biscoff truffles. Seriously, they’re little balls of joy — creamy, sweet, and wrapped in smooth white chocolate, with just the right touch of crunch that makes every bite so satisfying. And the best part? No oven needed. None. Zip. Just mix, roll, chill, and dip, and you’re done.
What’s awesome about these truffles is how easy they are to make. No fancy equipment, no complicated steps, no baking skills — just a few simple ingredients and your hands doing the work. Honestly, once you make them, you’ll want to keep making them again and again because they’re that addictive.
They’re perfect for any occasion, whether you need a quick dessert for friends, a cute homemade gift, or just a little something sweet to enjoy after a long day. These truffles have this magical way of making you feel cozy and spoiled at the same time — like a little edible hug. And hey, don’t feel guilty if you end up eating half the batch yourself; these treats are meant to be enjoyed.
🛍️ 🛒 The magic behind the flavor: what you’ll need
You don’t need a ton of ingredients for these truffles, but every item matters. The mix of textures and flavors is what makes them special — smooth, crunchy, sweet, and warm with spice.
🌟 Core ingredients:
- Biscoff spread: This is the soul of the recipe. It’s a creamy, spiced cookie butter made from speculoos biscuits.
- Cream cheese: Adds a soft tang and makes the filling creamy enough to shape.
- Biscoff cookies: Crushed and folded into the mix for a little texture and that unmistakable caramelized crunch.
- White chocolate: Used for coating. Sweet, smooth, and great for contrast.
- Nuts (optional but wonderful): Hazelnuts or almonds chopped into tiny pieces. Adds crunch and nuttiness.
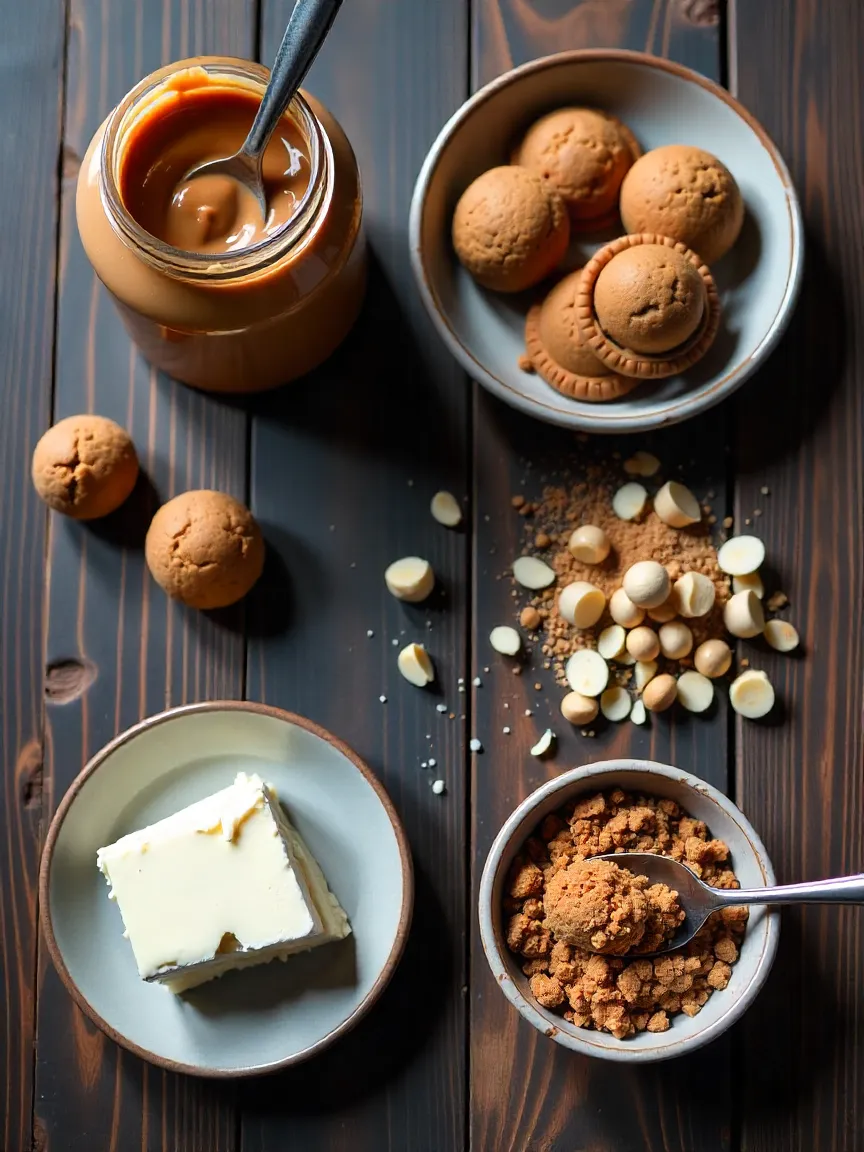
These five ingredients, once blended and chilled, become something way more than the sum of their parts.
🧠 Fun fact: Biscoff cookies were originally served on airplanes in Europe. Now they’re everywhere — and thank goodness for that.
🔄 Ingredient substitutes that actually work
Can’t find exactly what the recipe calls for? Or want to add your own twist? No worries! These truffles are surprisingly flexible. Here are some easy swaps that won’t mess up the flavor or texture:
Biscoff spread alternative:
- Any cookie butter works great — it brings a cozy, sweet vibe even if the flavor isn’t classic Biscoff.
- Feeling adventurous? Peanut butter adds a salty-sweet combo that’s tasty, but keep in mind it changes the flavor quite a bit.
No nuts?
- Simply leave them out for a smoother bite.
- Or try crushed pretzels instead — the salty crunch pairs surprisingly well with the sweet filling.
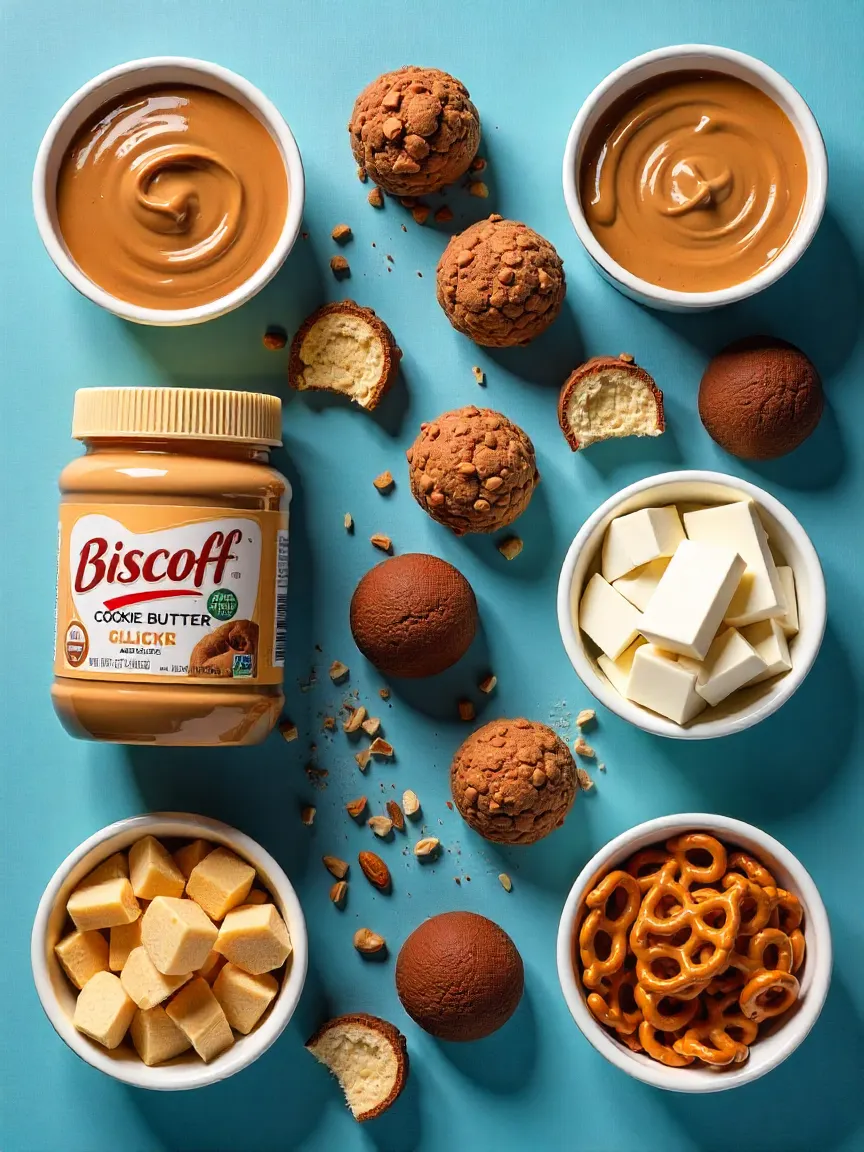
Lactose intolerant or vegan?
- Swap regular cream cheese for vegan cream cheese.
- Use dairy-free white chocolate.
- The texture might be a bit softer, but the taste stays delicious.
🛒 Where to find the goods:
Biscoff spread is usually shelved right next to peanut butter in most grocery stores.
Sometimes it hides in the “international foods” aisle, so check there if you can’t find it.
Want to skip the store? It’s easy to order online from Amazon, iHerb, and many other retailers all year round.
No matter what you have in your pantry or your dietary needs, these truffles are easy to customize and still turn out amazing. Give it a shot — you might find a new favorite twist!
🧳 🥄 Mixing, rolling, coating — aka, the fun part
So now that we’ve got our ingredients, it’s time to bring them together into something beautiful. There’s something oddly therapeutic about this stage. Stirring, scooping, dipping — it’s like crafting, but with dessert. And trust me, it smells amazing the entire time. Like warm cookies, melted chocolate, and the faint scent of “I deserve this.”
You don’t need a stand mixer, a candy thermometer, or any fancy gadgets. Just a bowl, a spoon (or spatula), and a little bit of patience while the fridge does most of the work.
🍃 Step 1: mixing the filling (aka your future addiction)
Okay, here’s the real talk: I’ve made these truffles more than once (more than five times, actually). And every time I make them, I forget just how good the filling tastes before it’s even rolled or coated.
So if you sneak a spoonful while mixing? No judgment. I do it too. Just… maybe don’t eat the whole batch raw.
Here’s How You Do It:
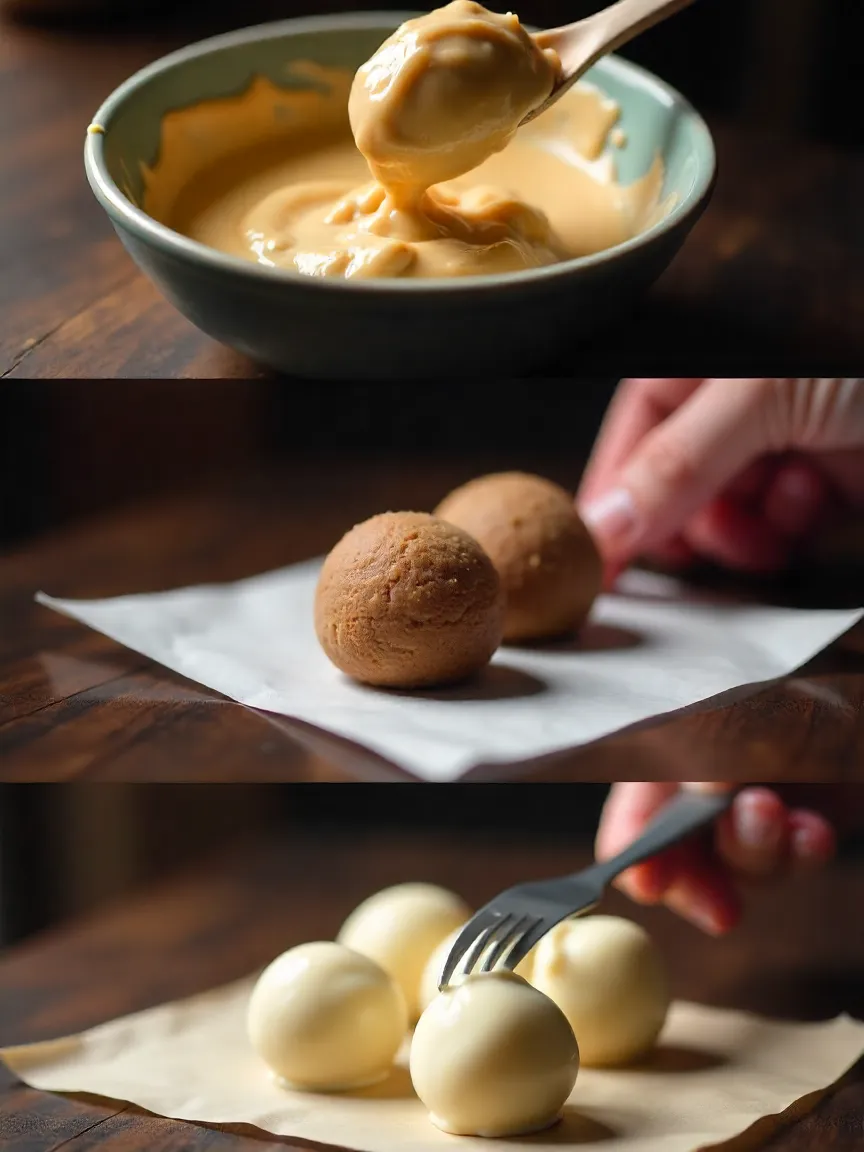
- In a medium-sized bowl, drop in your softened cream cheese. (If it’s cold, it won’t mix well — trust me.)
- Add your Biscoff spread. About twice as much as the cream cheese, give or take. Some people like it heavier on the cookie butter. You do you.
- Stir until the texture is really smooth — like frosting. You don’t want little chunks of cream cheese hiding in there.
- Once blended, fold in the crushed Biscoff cookies. You’re looking for a soft dough consistency. It should be scoopable but not wet.
- Optional: Toss in some chopped nuts now, or hold them for the topping later.
✅ Note: If the mix feels loose or sticky, pop it in the fridge for 15–20 minutes before shaping. It firms up fast.
🌠 Step 2: shaping the truffles
There’s something really satisfying about this part. It reminds me of making snowballs as a kid — only these smell like heaven and don’t give you frostbite.
Here’s what I do:
- Scoop out a bit of the chilled dough with a spoon or small cookie scoop.
- Roll it between your palms until you get a round-ish shape — doesn’t have to be perfect. This is dessert, not a geometry exam.
- Aim for about 1-inch balls — that’s bite-sized, but still satisfying.
- Place each one on a tray lined with parchment paper so they don’t stick.
- Once you’ve rolled them all, put the tray in the fridge for at least an hour.
Why the fridge? Because cold truffles hold their shape better when dipped. Warm truffles = chocolate coating disaster.
⏰ Can’t wait an hour? Stick them in the freezer for 20 minutes. Just don’t forget them in there — you don’t want frozen-solid centers.
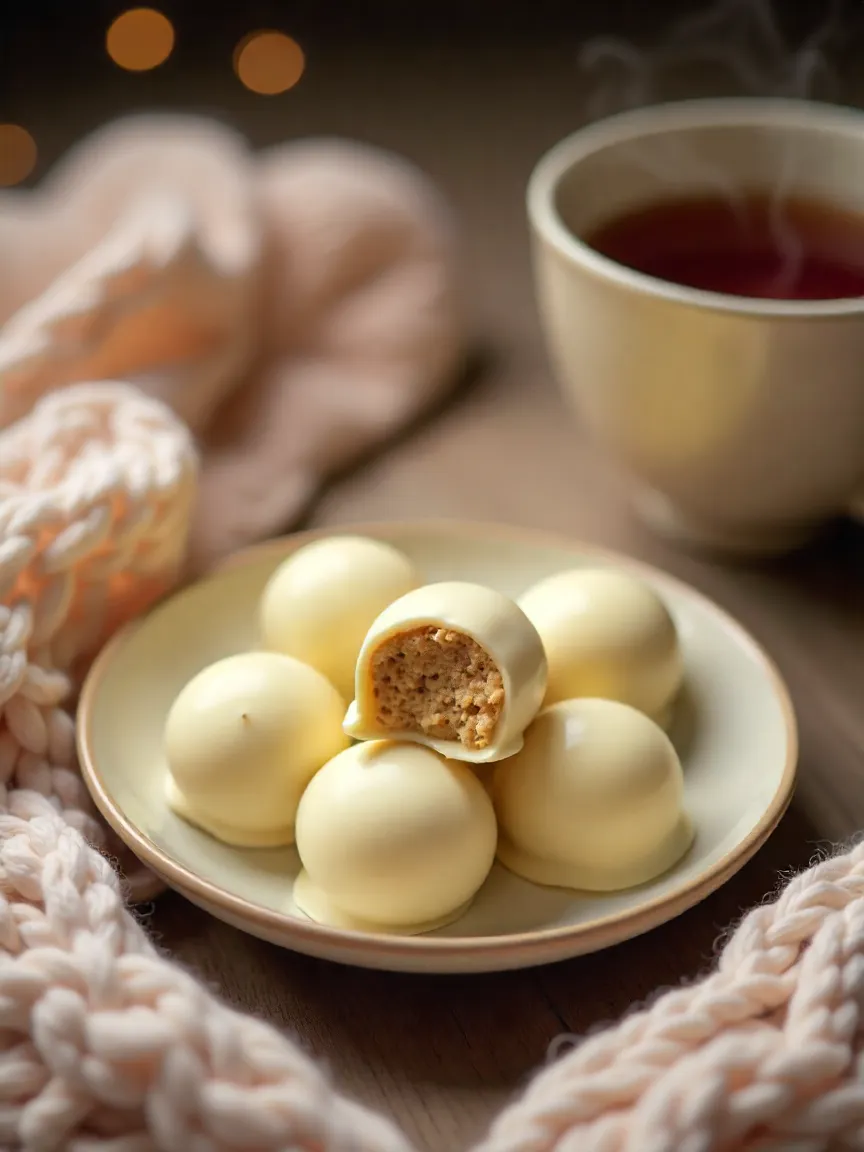
🍫 Step 3: dipping them in white chocolate (without losing your mind)
This is where things get messy. Fun, but messy. Have napkins nearby. And maybe a podcast in the background — this part is meditative.
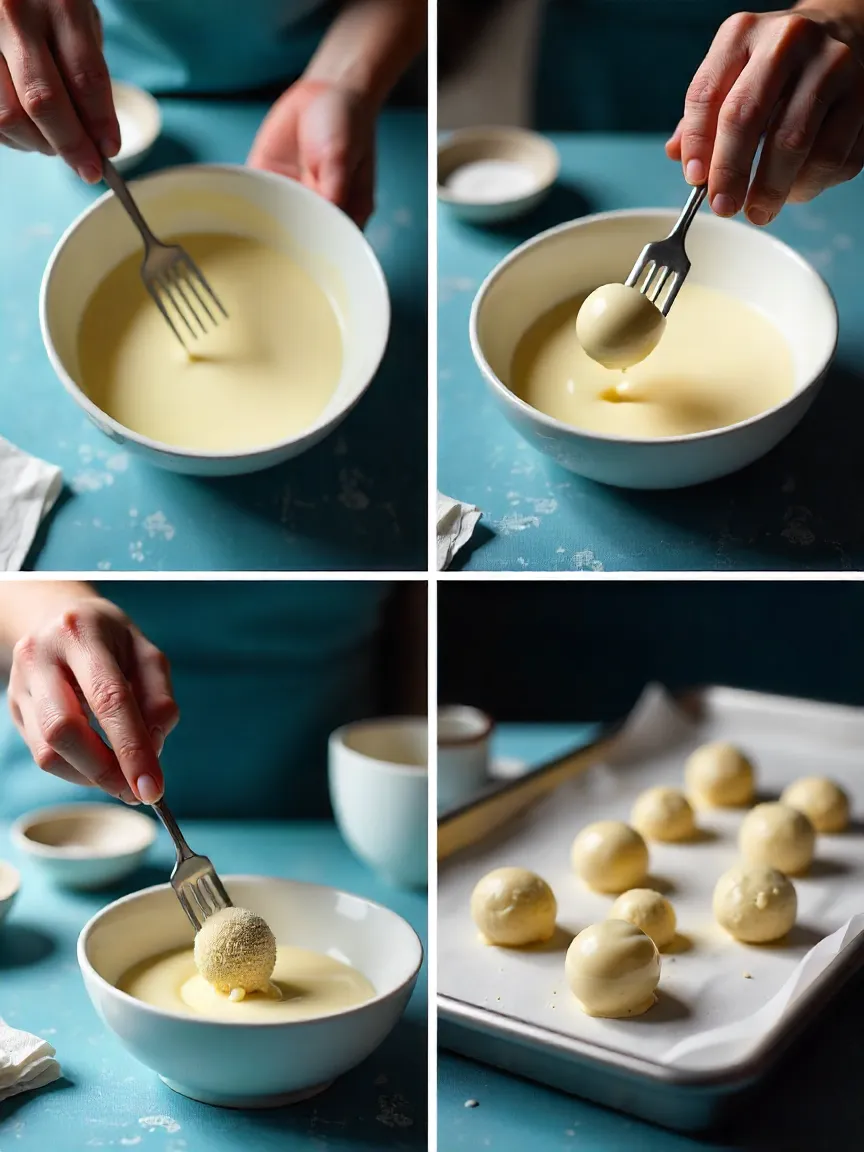
Melt the chocolate like a pro
- Chop your white chocolate into chunks.
- Melt it slowly in the microwave (20 sec intervals, stirring every time) or use a double boiler.
- Stir until smooth and glossy.
- If it gets too thick, stir in a tiny bit of coconut oil or neutral vegetable oil. It’ll thin it without ruining the texture.
⚠️ Warning: White chocolate burns FAST. Don’t walk away while it’s melting. Not even to check your phone. (I learned this the hard way.)
Dipping tips:
- Grab your chilled truffles from the fridge.
- Use a fork or skewer to gently dip each ball into the chocolate. Roll it around to coat.
- Tap off excess chocolate by gently tapping the fork on the side of the bowl.
- Place each dipped truffle back on the parchment-lined tray.
- Repeat until you’ve dipped them all. Don’t worry if a few look messy — they’ll still taste like a dream.
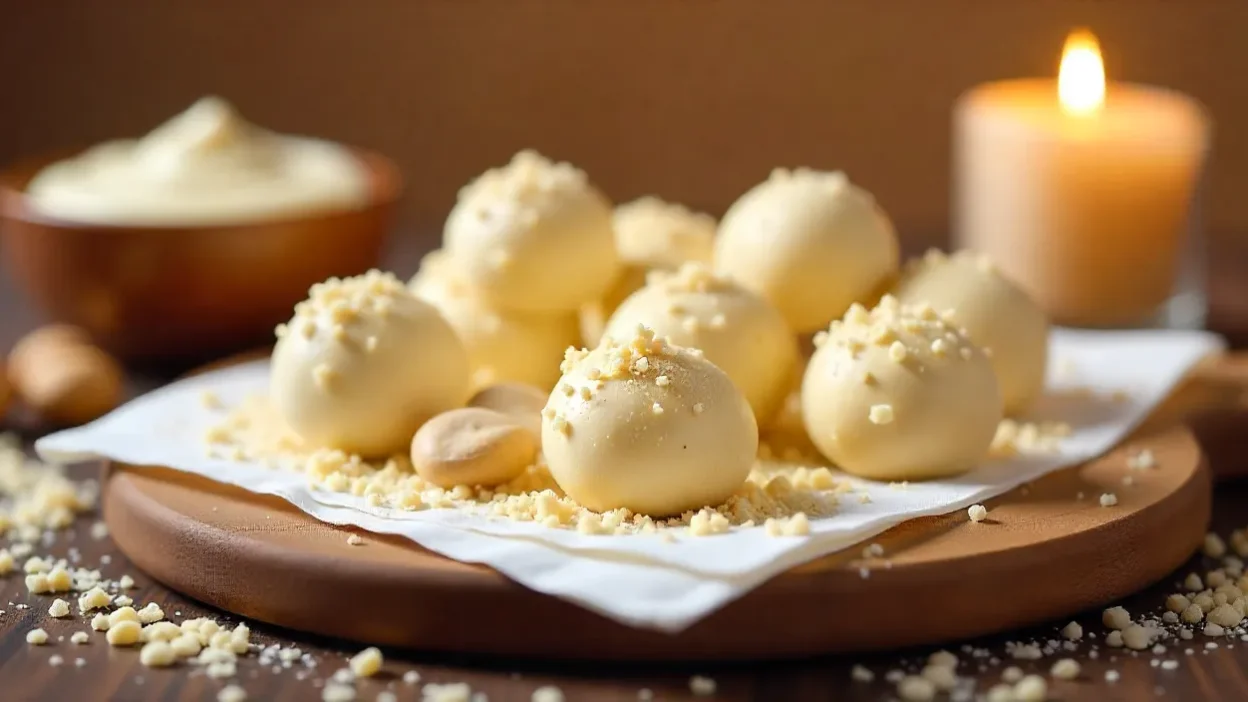
🎨 Time to decorate (because we eat with our eyes too)
After dipping those truffles in silky white chocolate, you get a tiny but magic moment before the coating hardens — and honestly, that’s when the real fun begins. Decorating these little treats is like giving them a personality. It’s the chance to make them look as amazing as they taste, and trust me, that makes eating them even more satisfying.
✨ Topping ideas:
- First up, crushed Biscoff cookie crumbs. They’re classic for a reason — they add this wonderful crunch and bring that signature caramel flavor right to the surface. Plus, sprinkling them on feels like a little nod to the whole Biscoff vibe.
- Feeling fancy? Chop up some hazelnuts or pistachios and sprinkle those over. The crunch is next-level, and the colors just pop against the white chocolate. Guests always notice that extra touch.
- For an artsy twist, melt a bit more white chocolate and drizzle it over in a zig-zag or swirl pattern. It’s an easy way to make your truffles look like they came from a bakery, no special skills needed.
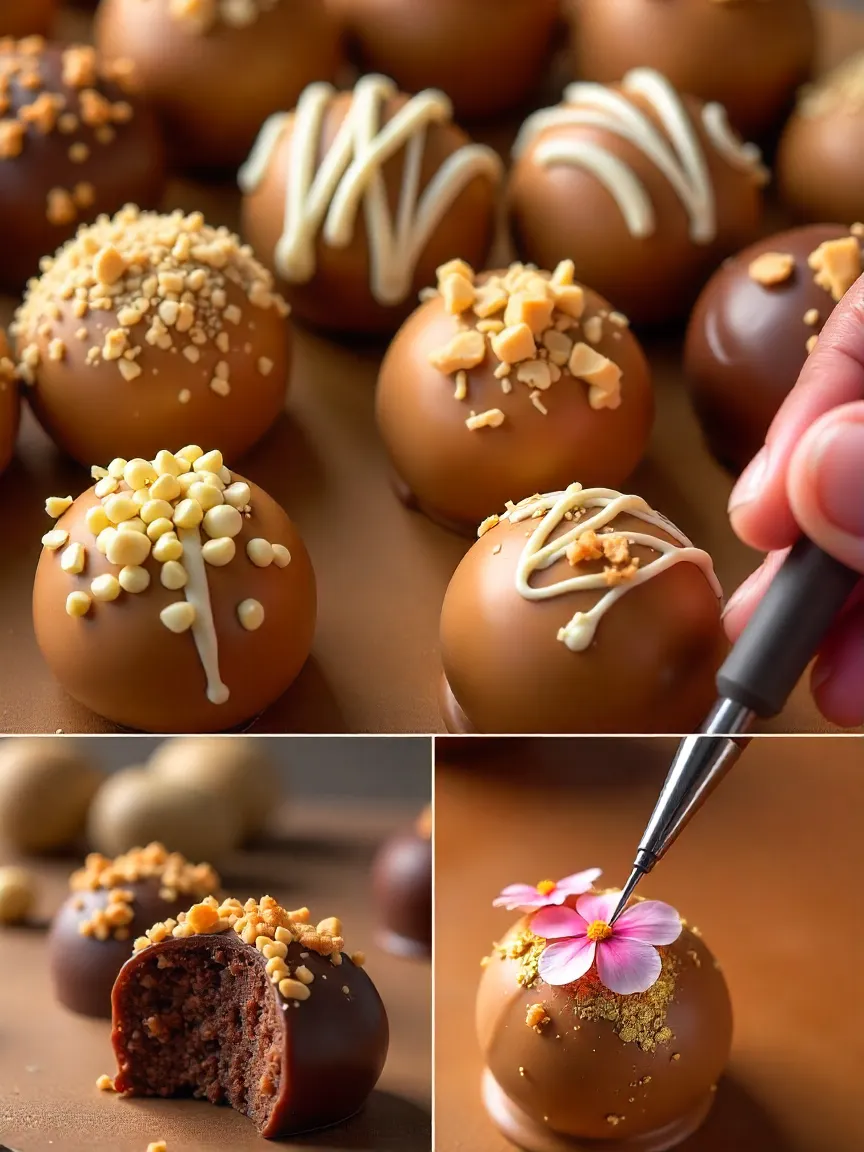
- Sea salt flakes might sound weird on sweets, but trust me, just a tiny pinch balances all that sweetness perfectly. It’s like a little flavor explosion in your mouth.
- No nuts? No problem! Dust them with cinnamon sugar instead. That warm, cozy flavor feels perfect for chilly evenings or festive gatherings — it’s like a little hug in every bite.
🌼 Pro trick:
Here’s a little secret from the pros — use tweezers to place tiny edible flowers or a sprinkle of edible gold leaf on your truffles. It sounds fancy (and it is!) but it’s actually super easy and totally worth it for that wow-factor. Perfect for gifts or when you want to impress without breaking a sweat.
Once your masterpieces are decorated, pop them back into the fridge for about 20 to 30 minutes. This gives the chocolate enough time to firm up so they hold their shape perfectly. And then… well, good luck resisting the urge to eat them all right away! I always tell myself I’ll wait, but let’s be honest — it’s a losing battle every time.
📦 How many does this make?
This recipe typically yields around 20 to 24 truffles, but the exact number can vary depending on how large you decide to roll each one. Honestly, sometimes it feels like the dough magically disappears — you know, those little bites that sneak away while you’re shaping the truffles. I’m pretty sure no one can resist tasting the mixture before it even gets coated in chocolate!
Whenever I’m preparing these for a party or a gathering, I almost always double the batch. Trust me, they vanish so fast that having extra on hand is a must. It’s funny how these little treats become the star of the dessert table — people always come back for seconds, thirds, and inevitably, someone asks me for the recipe. The best part is when people ask for the recipe — I just shrug and say, “Oh, it’s nothing fancy, just something I whipped up quickly,” even though I know it’s super easy and fast to make.
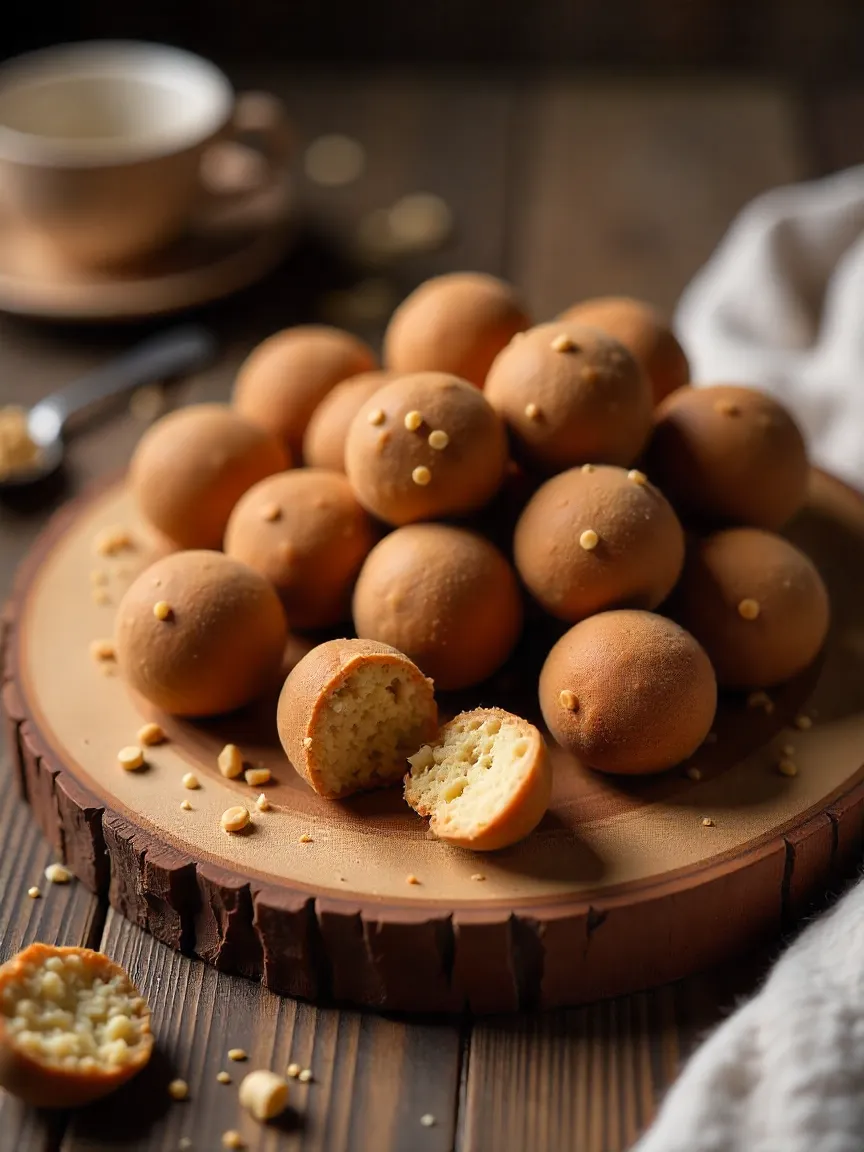
Despite the ease of the recipe, these truffles manage to feel special and indulgent — perfect for sharing or keeping all to yourself on a cozy night in. So if you’re thinking about making them for a crowd, definitely plan on making more than you think you’ll need. Because once people get a taste, they won’t want to stop!


Sounds amazing! Definitely making these this weekend. Thanks for sharing!