Contents
- Beyond the Basics: Electives, AP Projects, and Grill Master Gear 🍗🔥🥗
- Baking on the Grill: Charcoal vs. Gas Showdown 🔥🍞
- What to Bake on the Grill: Rustic Treats and Fire-Kissed Desserts 🍪🔥🍎
- Essential Techniques for Mastering Grill-Baked Goods 🔥🥖🍰
- Technique 1: Preheat the Grill and Build an Indirect Heat Zone 🔥🍞
- Technique 2: Use a Covered Grill and Cast Iron for Even Baking 🍳🔥
- Technique 3: Monitor and Adjust the Grill Temperature 🌡️🔥
- Technique 4: Infuse Smoky Flavor Into Grill-Baked Goods 🌽🔥🍑
Summer is the season of sizzling grills, smoky aromas, and long evenings spent outdoors with family and friends. But when it comes to mastering the art of barbecuing, many cooks still feel like they’re cramming for an exam they never studied for. That’s where Grilling Summer School comes in—a fun, flavorful guide that turns every backyard cookout into a delicious learning experience.
Here, there are no boring pop quizzes or strict homework assignments. Instead, the “syllabus” is filled with juicy burgers, flame-kissed steaks, perfectly charred vegetables, and yes—maybe the occasional dry-brining exercise that feels more like pleasure than work. It’s a hands-on crash course in building confidence over the coals and transforming every meal into a smoky, mouthwatering success.
Whether someone is just getting started with charcoal or already knows their way around the smoke like a seasoned pitmaster, this grilling school has something to teach. From busting myths (looking at you, “always marinate your meat” crew) to sharing pro-level techniques, the curriculum is designed to settle debates and sharpen skills.
The lessons are broken down into approachable “courses” that progress from foundational grilling skills to advanced, weekend-worthy projects. Think of it as a practical textbook—but instead of dull theory, it’s packed with recipes, science-backed insights, and clever tricks that make grilling smarter, easier, and way more fun.
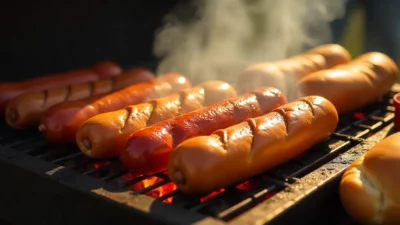
The journey begins with Grilling 101—a back-to-basics class that every outdoor cook should memorize. From lighting the perfect fire to searing steak with confidence, this essential guide provides the ABCs of mastering red-hot embers. Once the basics are down, cooks can move on to electives and advanced grilling challenges that will cement their reputation as the most reliable set of tongs at any cookout. 🌭🔥
Beyond the Basics: Electives, AP Projects, and Grill Master Gear 🍗🔥🥗
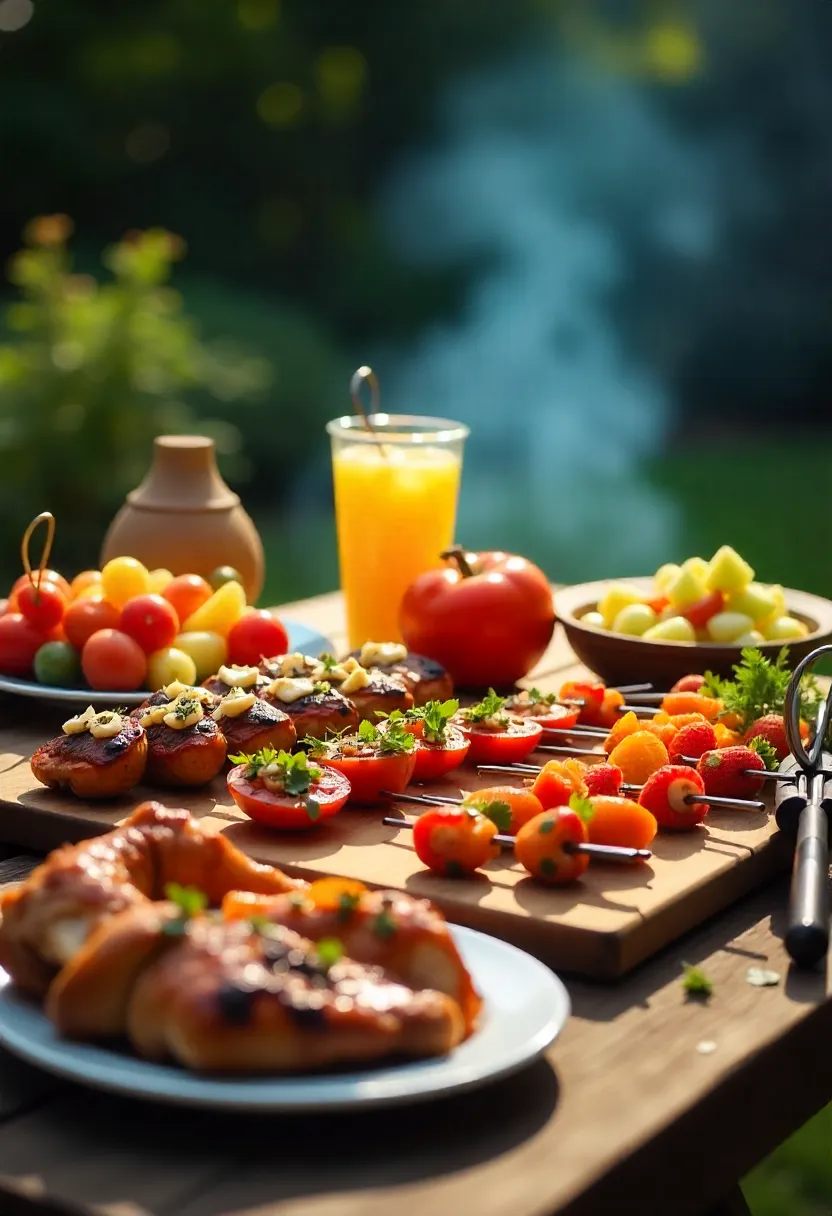
Once the fundamentals are locked in, it’s time to branch out into the “electives”—the fun side of grilling that goes far beyond steaks and burgers. This part of the curriculum celebrates versatility, showing how the grill can handle just about anything: smoky appetizers, vibrant grilled-fruit salads, and char-kissed vegetables that can turn even the simplest backyard gathering into a gourmet experience. One highlight? An epic vegetable board so stunning it could earn a place in the yearbook all on its own.
And the grill isn’t limited to savory dishes. Yes, it’s possible to bake on the grill, turning out golden breads, cobblers, and even pizzas that carry just a kiss of smoky flavor. With these techniques, an entire meal—from starter to dessert—can be cooked outside without ever touching the oven.
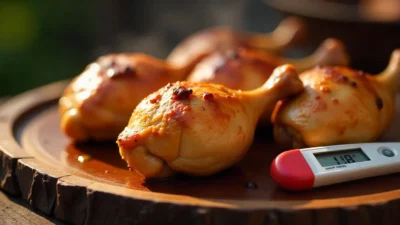
For ambitious students of the flame, the “AP courses” offer bigger, bolder projects. Think slow-smoked salmon, sticky barbecue chicken, fall-apart pork shoulder, and legendary Texas-style brisket. With the right guidance, even a basic grill setup can be transformed into a smoker capable of producing competition-worthy results.
Of course, every great scholar needs the right tools. Just as exams require pencils and calculators, grilling requires thermometers, tongs, and smart gear. That’s why this guide includes a must-have equipment list to make outdoor cooking smoother, safer, and more successful.
So apron or no apron, the invitation is simple: grab a drink, fire up the coals, and dive into the most delicious summer learning session ever. With this grilling school under their belt, every cook earns a diploma in backyard mastery. 🎓🍖
Baking on the Grill: Charcoal vs. Gas Showdown 🔥🍞
When it comes to grilling, the debate between charcoal and gas is as old as backyard cookouts themselves. But what about when the grill doubles as an oven? Just like with traditional grilling, both charcoal and gas bring unique advantages—and a few trade-offs—when it comes to baking outdoors.
Food expert Kenji López-Alt has long noted the differences between gas and charcoal grilling, and those insights hold true for grill-baking as well. Charcoal delivers an unbeatable smoky depth of flavor, perfect for rustic breads, pizzas, or even desserts that benefit from a touch of complexity. However, it’s not the easiest “oven” to manage. Heat control is tricky, and as the coals burn down, temperatures drop, making consistent baking a challenge.
Gas grills, on the other hand, offer simplicity and stability. With a twist of a knob, bakers can maintain a steady temperature—crucial for evenly risen loaves, golden crusts, and delicate pastries. The downside? Gas burns much cleaner than charcoal, which means the baked goods miss out on that signature smoky character. While gas delivers precision, it can’t replicate the bold, fire-kissed flavors that come naturally from charcoal.
The smoky advantage of charcoal really shines during longer bakes—typically 30 minutes or more—when the coals release aromatic smoke and flavorful gases that infuse breads and desserts with a subtle charred richness. From a hearty sourdough loaf to a peach cobbler kissed with campfire vibes, charcoal adds a distinct personality to baked foods that gas simply can’t match.
That said, the convenience of gas grilling shouldn’t be underestimated. For home bakers who value consistency and control above all, gas provides a stress-free way to grill-bake without constant monitoring. Charcoal requires more attention and adjustments, but for those who love flavor above ease, it’s often worth the extra effort.
In the end, choosing between charcoal and gas for baking depends on what matters most: smoky flavor or steady heat. With the right techniques (and a bit of patience), both methods can turn a grill into a surprisingly effective outdoor oven. 🍕🍰
What to Bake on the Grill: Rustic Treats and Fire-Kissed Desserts 🍪🔥🍎
Not every baked good is meant for the grill. While indoor ovens excel at creating precise environments for delicate pastries, layered cakes, or steam-injected baguettes, the grill shines in a different category: rustic, hearty, and forgiving recipes.
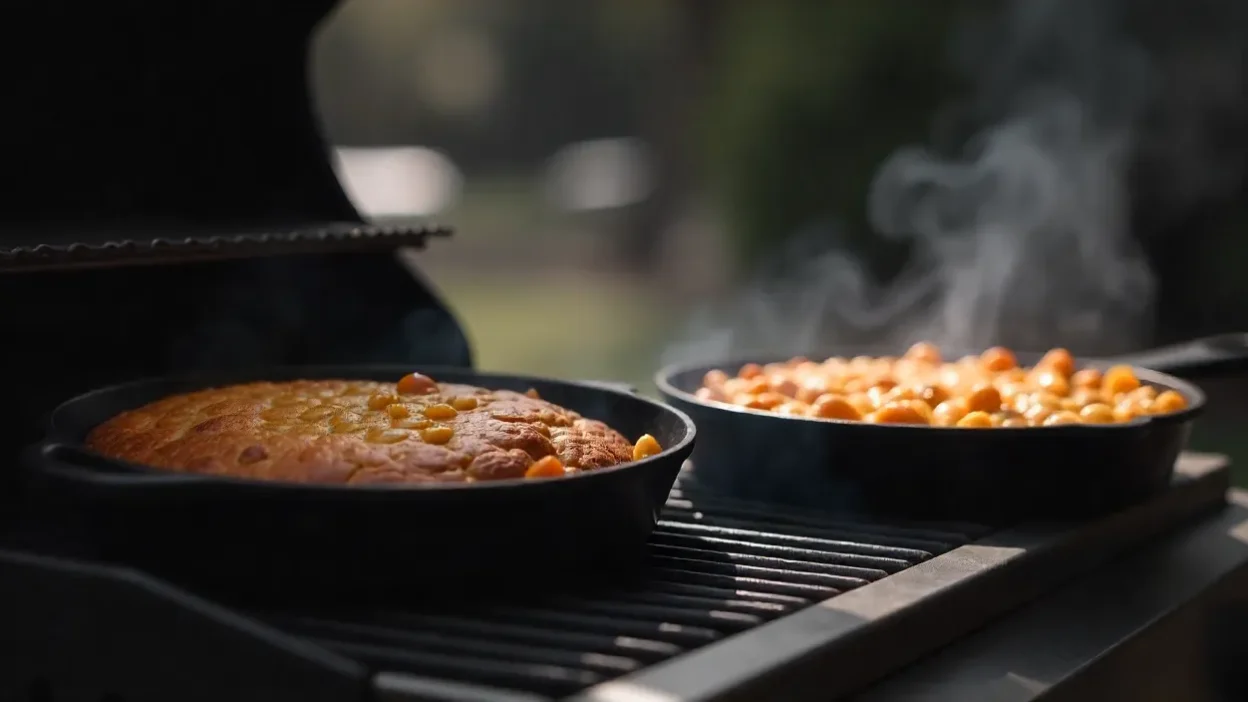
Think of the grill as a partner to cast-iron classics—the kinds of baked goods that thrive in a skillet and welcome a touch of smoke or char. These recipes don’t rely on perfectly even heat, making them well-suited to the variable temperatures of outdoor cooking.
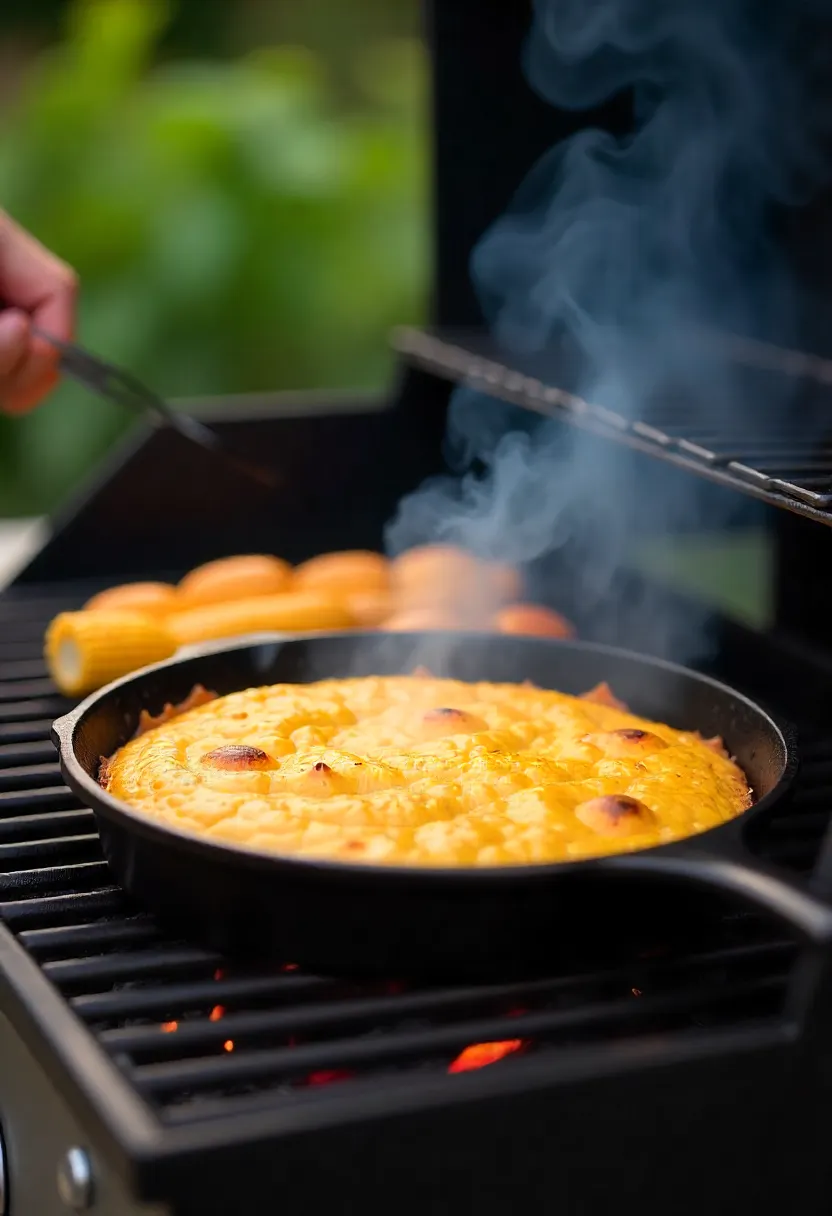
For instance, a skillet cookie or a smoked ancho chile brownie develops irresistibly crisp edges while keeping the center gooey and decadent. A cornbread baked with charred fresh corn and poblanos takes on an entirely new dimension, its earthy sweetness and peppery bite amplified by the smoky heat of the grill. Even fruit-forward desserts like rustic apple crisp benefit: the apples soften beautifully, caramelize in spots, and gain a subtle fire-tinged flavor that simply can’t be replicated indoors.
The rule of thumb is simple: choose baked goods that are sturdy, forgiving, and enhanced by a touch of smoke. Anything too delicate, fussy, or dependent on steady, controlled oven temperatures is best left to the kitchen. But for those who crave bold flavors and crave the romance of cooking outdoors, the grill is a playground for creativity—one that can turn simple desserts into unforgettable summer finales. 🍫🌽🍑
Essential Techniques for Mastering Grill-Baked Goods 🔥🥖🍰
Baking on a grill is not the same as baking in a standard oven—it’s a true technical challenge. Indoor ovens are insulated, designed to retain heat, and engineered to maintain precise, steady temperatures. Grills, whether charcoal or gas, were originally built for fast, direct-heat cooking like searing steaks or grilling burgers. While the lid of a grill does help regulate airflow and trap heat, it lacks the insulation and stability of an oven.
Still, with the right approach, a grill can double as a surprisingly effective outdoor oven. The key is learning how to build, control, and sustain heat. Successful grill-baking is less about fancy equipment and more about mastering technique. By carefully managing fuel, airflow, and cooking zones, bakers can produce everything from rustic breads to decadent desserts, all infused with a subtle smokiness that no oven can replicate.
Through years of experimenting and refining, expert grillers have developed a set of best practices that make grill-baking both achievable and reliable. These techniques cover how to establish an even heat base, when and how to rotate baked goods for consistent results, and the importance of monitoring temperatures closely. With these steps, even cooks who once reserved their grill strictly for burgers can graduate to baking pies, cobblers, and hearty loaves with confidence.
The bottom line: while a grill may not have been designed as an oven, with the right strategy, it can unlock a whole new world of outdoor cooking possibilities. 🔥🍪
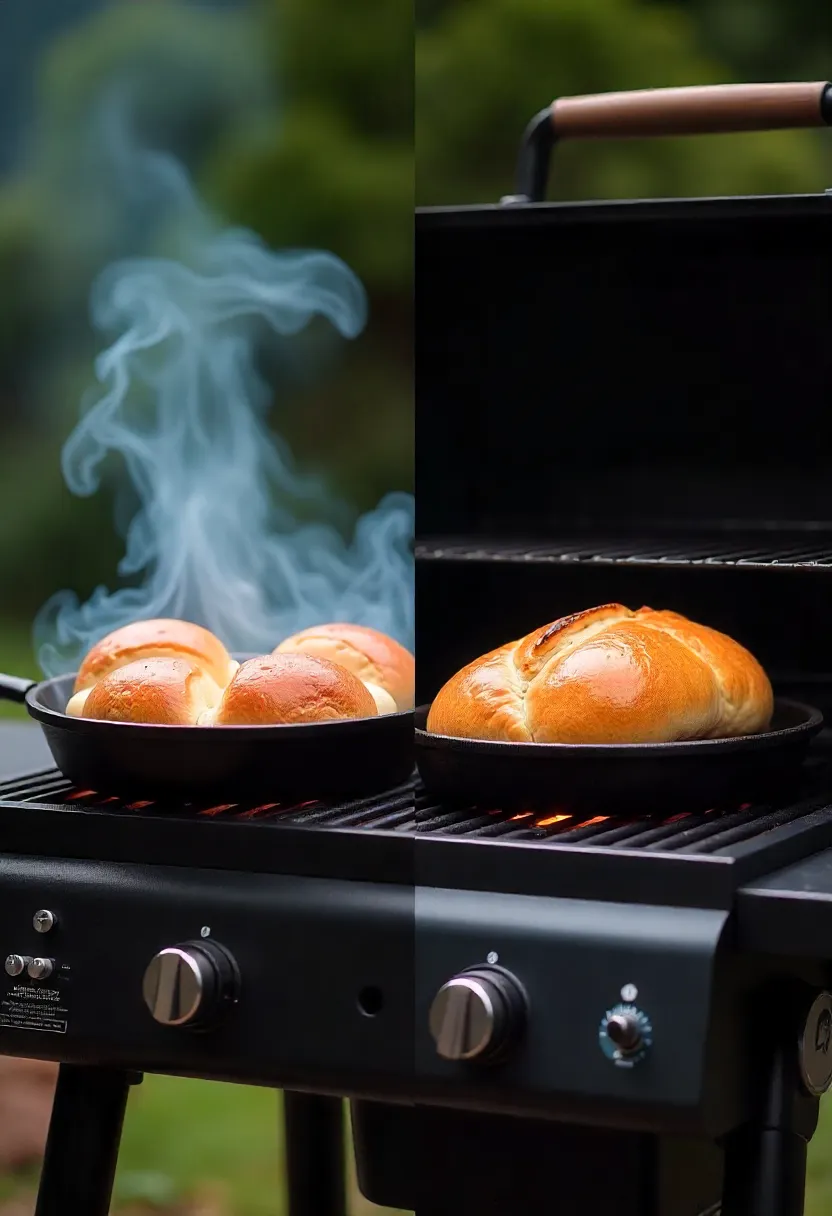
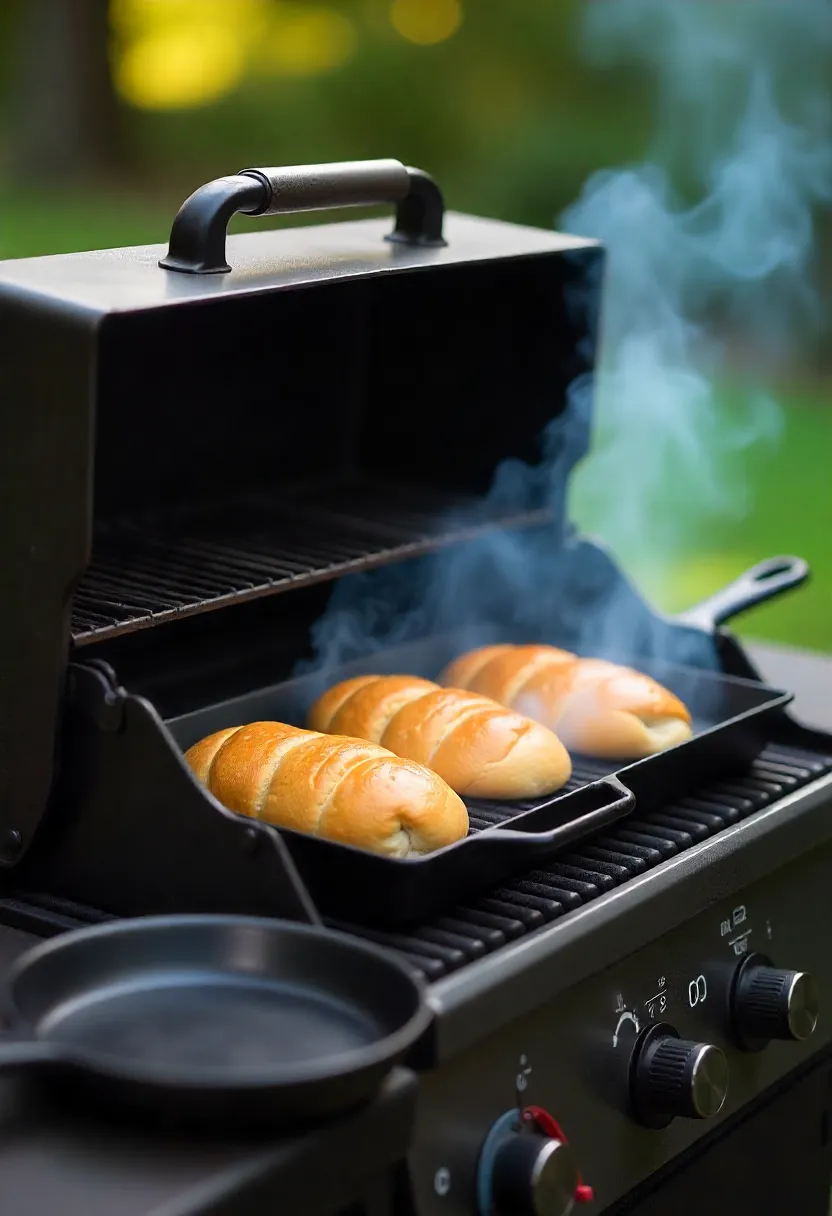
Technique 1: Preheat the Grill and Build an Indirect Heat Zone 🔥🍞
When baking indoors, most cooks simply preheat their ovens to the exact temperature they plan to use—usually 325–375°F for batters and 400–500°F for doughs. Modern ovens are insulated, designed to retain heat and maintain that steady temperature with ease.
A grill, however, is a very different beast. Because it lacks insulation, the moment the lid is lifted or a cold cast-iron skillet full of raw batter is placed inside, the heat drops rapidly. That’s why outdoor grill-baking requires a different strategy: preheating to a higher temperature (500–600°F) to anticipate and absorb that inevitable loss of heat.
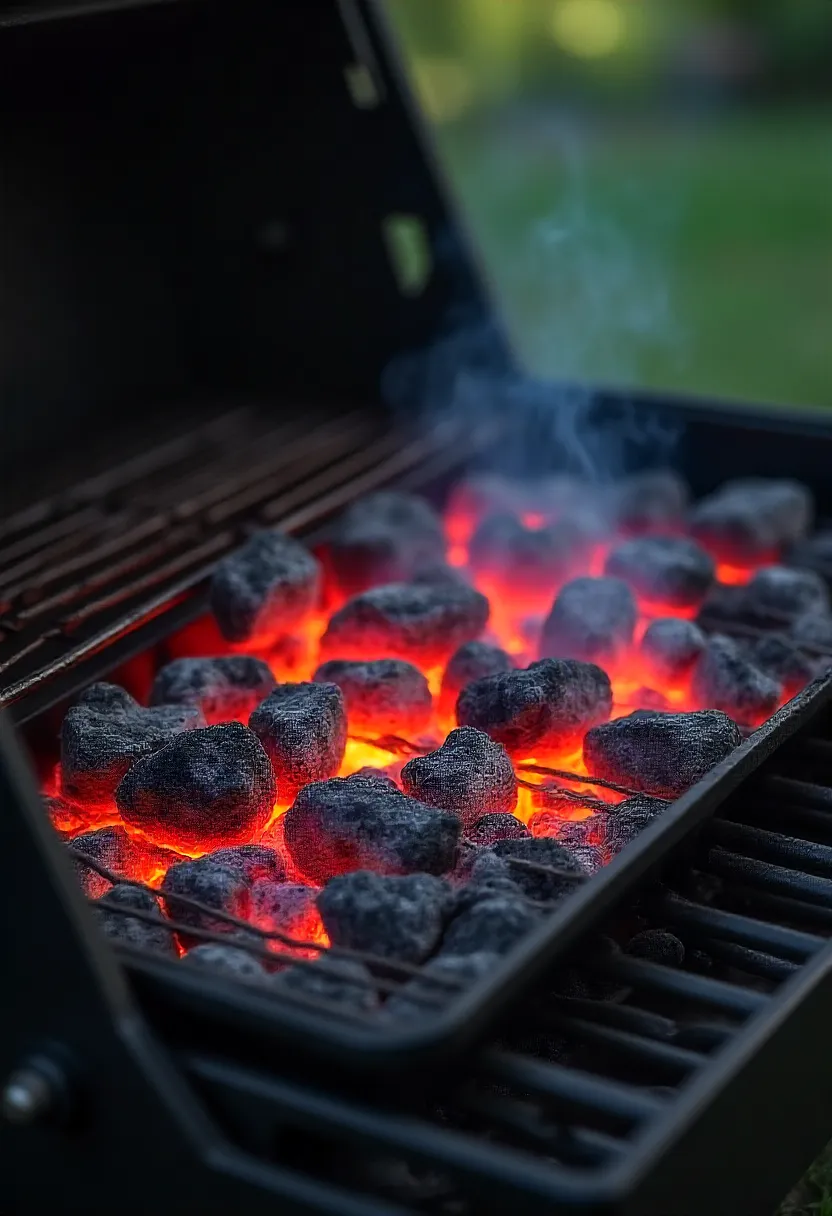
🔥 Preheating a Charcoal Grill
- Start with a full chimney of charcoal briquettes (around six quarts).
- Wait until the coals are properly lit and covered with a thin layer of gray ash along the edges.
- Pour the hot coals into a steeply banked pile along one side of the grill, pushing them up a couple of inches along the grill wall.
- Leave two-thirds of the coal grate empty—this becomes the indirect cooking zone, where baked goods can cook evenly without sitting directly over blazing embers.
- Remember: a full chimney takes 30–40 minutes to ignite, so plan ahead.
If the coals dwindle (especially after grilling dinner first), fresh fuel is essential. When the temperature dips below 300°F, carefully remove the cooking grate, add 2–4 quarts of unlit briquettes, and bank them against the existing hot coals. Return the grate, close the lid, and let the fire rebuild for 10–30 minutes until it hits the target preheat range again.
🔥 Preheating a Gas Grill
- Turn all burners on high and close the lid until the grill reaches about 500°F (260°C)—this usually takes around 15 minutes.
- Once hot, create an indirect cooking zone by turning off all burners except the primary burner.
- The primary burner is the one closest to the gas source—it’s always the first to ignite and powers the others. Without it, the rest of the burners won’t function properly.
This setup mimics an oven environment: direct heat on one side for power, and indirect heat on the other for gentle, consistent baking.
Why This Step Matters
Proper preheating and the creation of an indirect zone ensure that baked goods rise evenly, cook through, and don’t scorch. With this foundation in place, the grill transforms from a high-heat searing tool into a reliable outdoor oven capable of breads, desserts, and more.
Technique 2: Use a Covered Grill and Cast Iron for Even Baking 🍳🔥
Once the grill is preheated and the indirect heat zone is established, the next step is ensuring that baked goods cook evenly. On a grill, balance is everything: too much direct fire will scorch the bottom while leaving the top raw, but setting food in the indirect zone allows it to bake through from edge to center, just like in an oven.
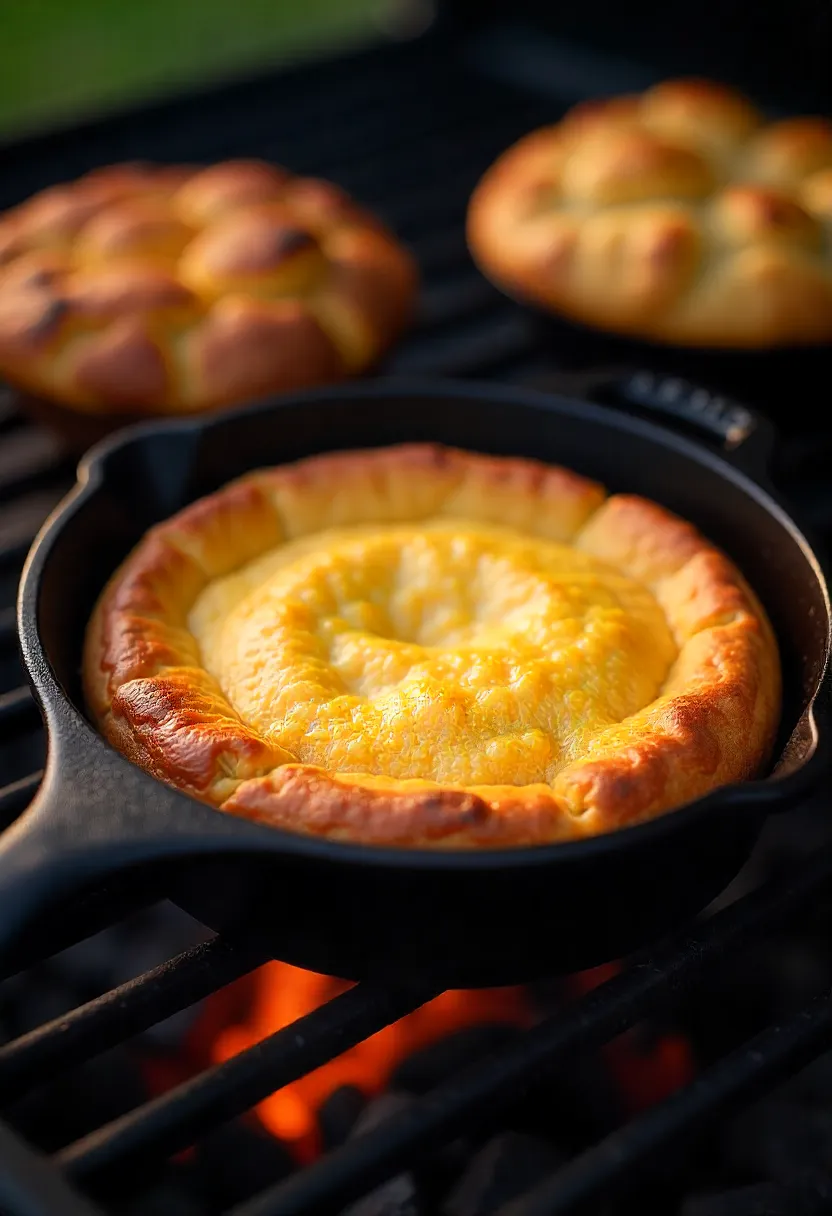
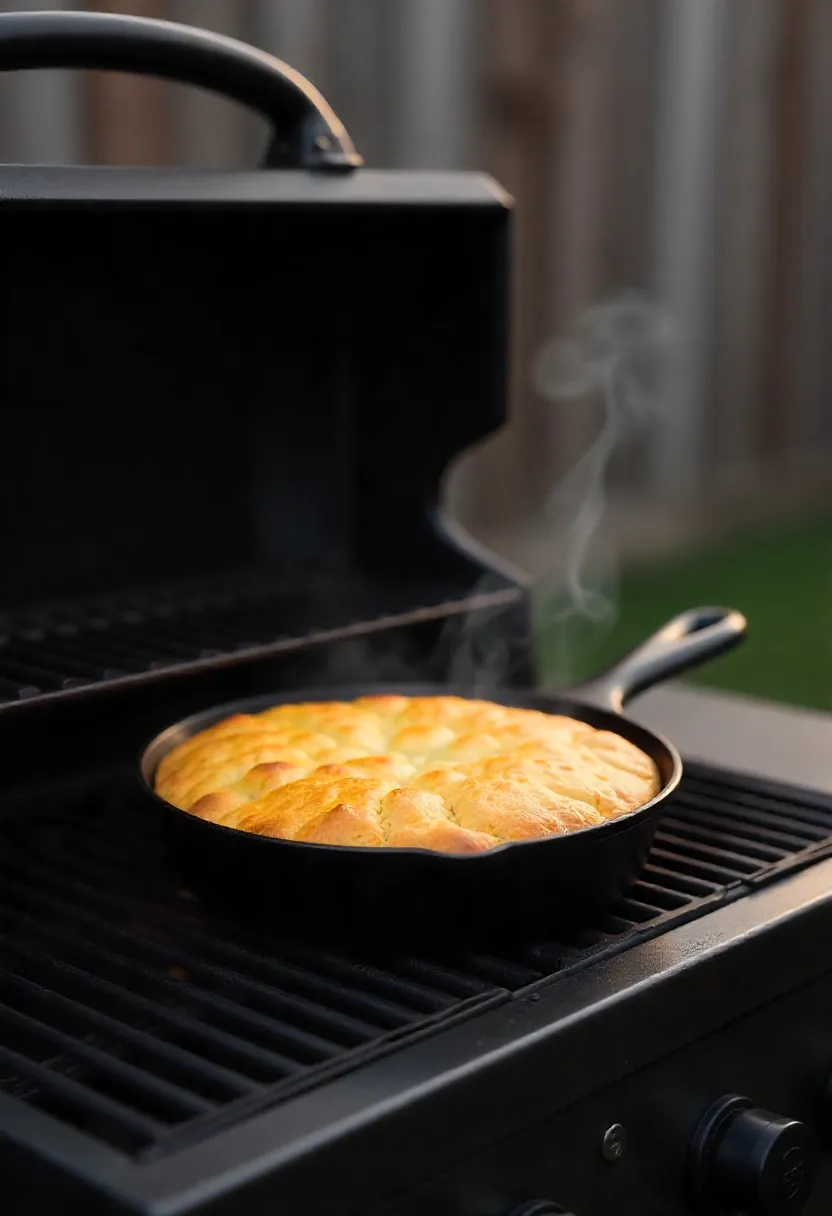
Why Cast Iron Is the Best Choice
For grill-baking, nothing beats a cast iron skillet. Its heavy construction retains heat beautifully, ensuring consistent cooking even as grill temperatures fluctuate. Cast iron also distributes heat evenly across the base and up the sides, preventing hot spots that might burn one part of a brownie or cornbread while leaving the other undercooked.
Unlike glass or thin metal bakeware, cast iron can handle the grill’s intense heat and rugged conditions without cracking, warping, or wearing down. It’s a tool designed to last—and once seasoned properly, it also adds flavor and natural nonstick performance to whatever’s being baked.
Why the Grill Lid Matters
The grill lid plays a role similar to an oven door—it keeps heat contained. But its function changes slightly depending on whether the grill is powered by gas or charcoal:
- Gas Grills → The stainless-steel lid and built-in heat deflectors trap heat efficiently. Closing the lid reduces the sharp temperature drop that happens when a heavy cast iron pan full of batter is introduced. This helps stabilize the heat, ensuring baked goods rise and set properly.
- Charcoal Grills → Here, the lid works differently. Closing it restricts airflow, which slows down the rate of burning. Instead of a fierce initial blast of heat, the fire burns lower and steadier, extending the lifespan of the coals and creating a more oven-like environment.
In short: on gas grills, the lid helps boost and maintain heat; on charcoal grills, it helps moderate and prolong heat. Either way, the lid is absolutely essential for controlling the environment inside the grill and achieving bakery-worthy results outdoors.
The Takeaway
To bake successfully on the grill:
- Always use the indirect heat zone to prevent scorching.
- Choose cast iron for durability, heat retention, and even cooking.
- Keep the lid closed to regulate temperature and mimic an oven environment.
With these tools and techniques, even rustic desserts and hearty breads can come out of the grill perfectly cooked—smoky, golden, and irresistible. 🍪🍞
Technique 3: Monitor and Adjust the Grill Temperature 🌡️🔥
Closing the grill lid is essential for trapping heat, but it doesn’t guarantee precise control. Unlike modern ovens with built-in insulation and calibrated sensors, grills are more unpredictable. Their built-in thermometers are often unreliable—they warp over time, are exposed to extreme weather, and are typically placed on the lid, far from where the food is actually cooking.
Why You Need an Ambient Probe Thermometer
To bake successfully on a grill, accuracy is non-negotiable. That’s why seasoned grillers rely on an ambient temperature probe thermometer (not the long-pointed meat probes used for roasts). Before preheating, the probe should be clipped directly to the cooking grate, right at food level. This ensures the temperature you’re tracking reflects the true environment where your baked goods are cooking.
With this setup, bakers can confidently adjust heat as needed, maintaining an oven-like consistency for breads, desserts, and other delicate grill-baked items.
Adjusting Heat on a Gas Grill
Gas makes temperature management straightforward:
- Keep the primary burner on, since it controls gas flow to the rest.
- Adjust the heat simply by turning the control knob to regulate propane flow.
- Close the lid to stabilize heat whenever possible.
This allows for fine-tuned, steady baking conditions with minimal effort.
Adjusting Heat on a Charcoal Grill
Charcoal, on the other hand, requires a bit more finesse. It burns hotter at first—often 500–600°F right after lighting—but begins to lose heat steadily over time. A full chimney (about six quarts of briquettes) will typically burn for an hour, with temperatures dropping around 50°F every 20 minutes.
To counteract this, bakers must manage airflow through the vents:
- Bottom vent open + top vent open → hotter burn (around 425–475°F).
- Bottom vent open + top vent partially closed → moderate heat (about 50°F cooler).
- Both vents closed → fire suffocates and eventually goes out.
Since charcoal depends on oxygen, adjusting the vents gives precise control over how hot the fire burns. This takes practice, but once mastered, it unlocks a whole new level of baking consistency.
Pro Tip for Charcoal Bakers
Experiment with vent adjustments while using an ambient probe thermometer to see how your specific grill responds. Each model behaves slightly differently, and becoming comfortable with these fine-tuned controls is the secret to intentional, confident grill-baking. Always wear heat-resistant gloves when handling vents or grates to stay safe.
Technique 4: Infuse Smoky Flavor Into Grill-Baked Goods 🌽🔥🍑
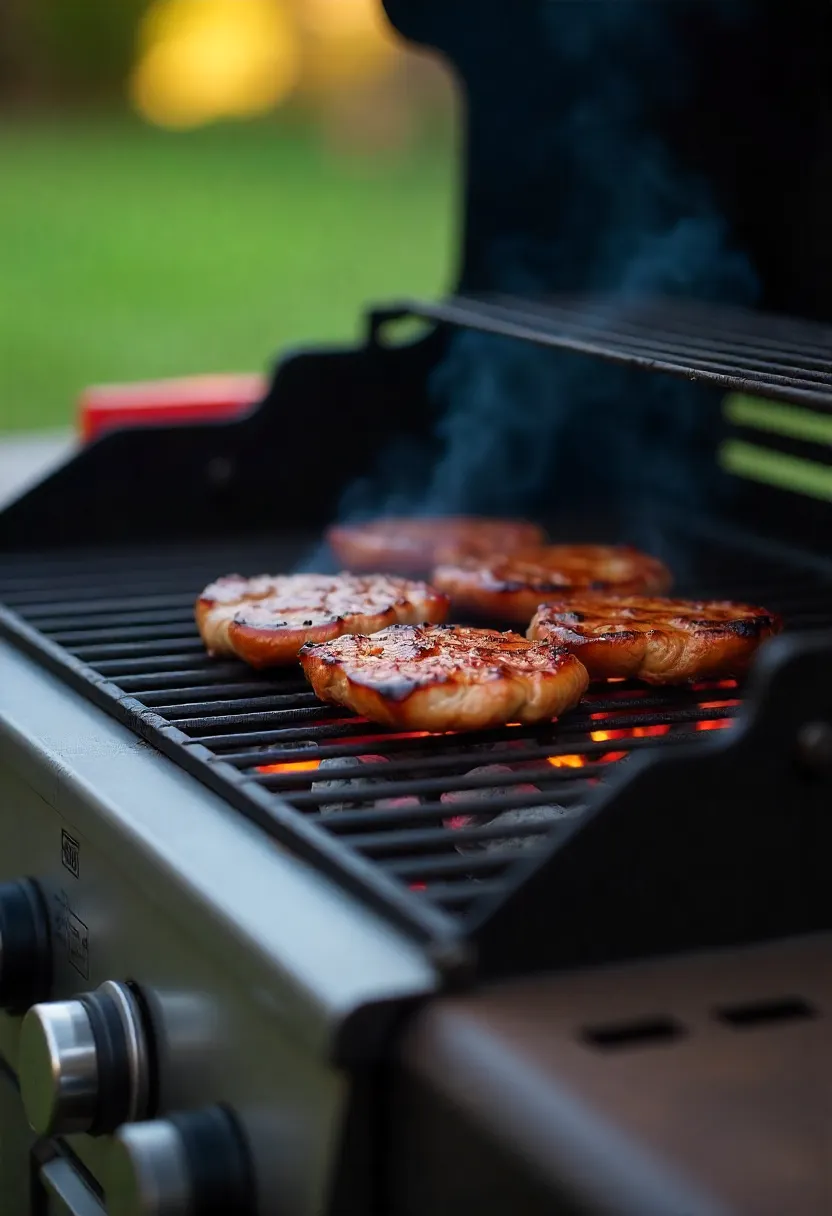
Indirect heat may be the foundation of grill-baking, but that doesn’t mean the hot side of the grill should go to waste. In fact, using the direct heat zone to add smoke and char is one of the most rewarding ways to elevate baked goods with flavors that an indoor oven simply can’t deliver.
Use Char to Intensify Ingredients
Before folding fruits, vegetables, or mix-ins into a batter, give them a quick char over the hot side of the grill. This not only softens the ingredients but also adds layers of smoky sweetness and caramelization. Examples include:
- Grilled peaches or apples → perfect for crisps, cobblers, or galettes. 🍑
- Charred corn → a game-changer for cornbread, giving it a savory-sweet edge. 🌽
- Smoky peppers → add complexity and depth to savory breads or casseroles. 🌶️
By starting with grilled components, the final baked dish gains a boldness and depth of flavor that feels authentically fire-kissed.
Think of Smoke as a Secret Ingredient
Beyond charring, smoke itself can act as a silent but powerful flavor enhancer. Even when using charcoal alone, a subtle smokiness will weave into baked goods. But if a stronger profile is desired, simply add a chunk of hardwood to the coals or place a foil packet of soaked wood chips on a gas grill. Both methods create fragrant smoke that permeates the dough or batter as it bakes.
The level of smokiness can be adjusted to taste:
- Charcoal only → light, gentle smokiness.
- Wood chunks or chips → richer, more pronounced smoky layers.
Think of it as adjusting seasoning—smoke is an “unwritten ingredient” that can transform a simple skillet cookie or cobbler into something extraordinary.
Why It’s Worth the Effort
Standing over a grill in the summer heat might not feel cooler than firing up the oven, but the payoff is undeniable. The unique flavor of smoke and char simply cannot be replicated indoors. For anyone already grilling dinner, keeping the fire going for a rustic dessert or loaf of bread is a no-brainer. It’s the ultimate way to make the most of the coals and reward yourself with a treat that carries the essence of outdoor cooking.
Hi, i think that i saw you visited my website thus i came to “return the favor”.I’m attempting to find things to improve my website!I suppose its ok to use a few of your ideas!!