Contents
- 🌿 Why Bake Cinnamon Rolls at Home?
- 🛒 Step 1: Preparing Ingredients Like a Pro
- 🌡️ Step 2: Activating the Yeast
- 🥣 Step 3: Mixing the Dough
- ⏳ Step 4: First Rise
- 🪄 Step 5: Rolling Out
- 🧈 Step 6: The Butter Layer
- 🍬 Step 7: The Cinnamon Sugar Filling
- 🎢 Step 8: Rolling and Cutting
- 🥘 Step 9: Second Rise
- 🔥 Step 10: Baking
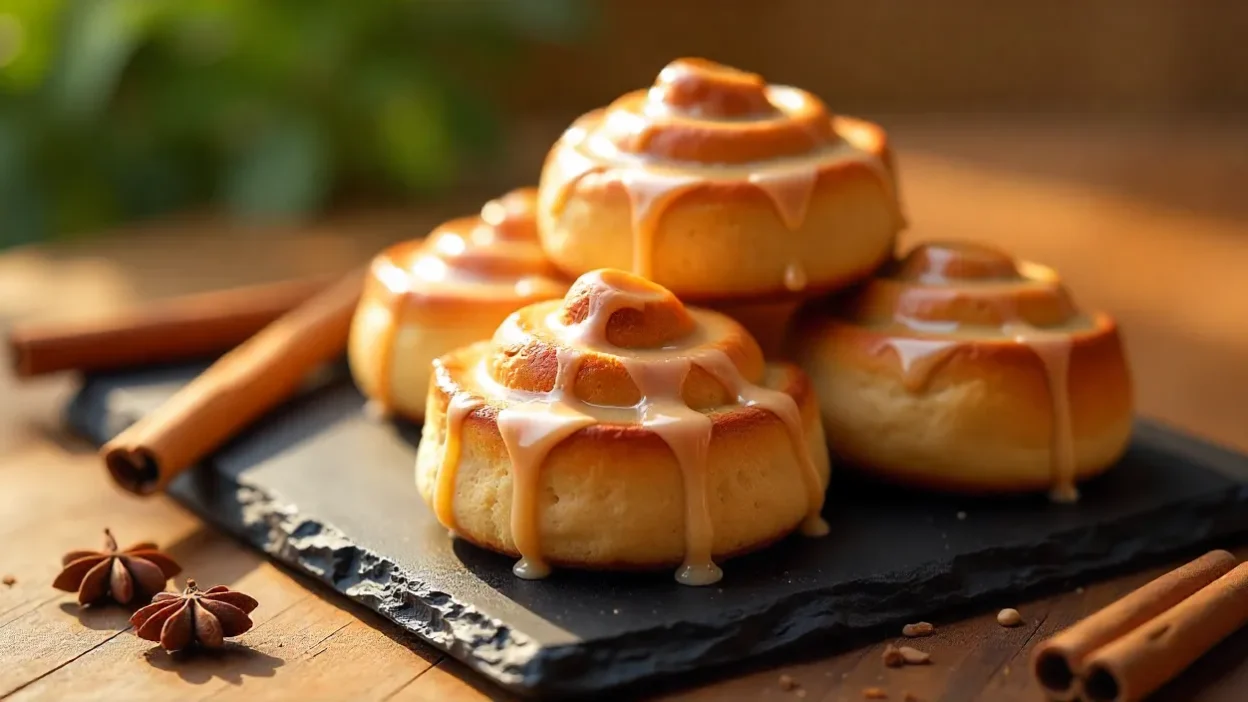
- 🍶 Step 11: Glazing
- 🌟 Variations & Creative Twists
- 💭 Final Thoughts
Have you ever caught yourself slowing down while walking past a bakery, almost against your will, because the smell of cinnamon just hit you? 🌬️ That warm, spicy sweetness doesn’t just float in the air—it hooks you, tugs at your sleeve, and suddenly you’re daydreaming about pastries you didn’t even plan to buy 🤤. For me, cinnamon rolls have always been that pastry. The one that feels like a hug in food form. They’re soft and pillowy, warm enough to fog up the plate, a little sticky in all the right ways, and crowned with a glossy glaze that practically drips happiness. 🍯
The truth is, you don’t actually need to chase that moment at the bakery—or settle for the sad, boxed versions that taste like they’ve been waiting for you all week. You can make them yourself at home. And once you do, it’s hard to go back. Why? Because homemade rolls have a kind of magic:
- they taste fresher and richer 🌿,
- you decide how sweet, gooey, or spiced they’ll be 🍫,
- and the act of baking them is strangely calming 🕯️.
Yes, it takes some time, but that’s part of the charm. While the dough rises, life slows down. You put on your favorite playlist 🎶, maybe make a cup of tea ☕, and just let the house fill with that faint yeasty smell that promises something good is coming.
I’ll take you through the whole journey—from the very first step of lining up your ingredients to that triumphant moment when you pull a tray of golden spirals from the oven. Along the way, I’ll slip in tricks I’ve learned, point out mistakes I’ve made (so you don’t have to), and share a few creative twists so you can make these rolls your own 🌟.
🌿 Why Bake Cinnamon Rolls at Home?
It’s a fair question. After all, you could just buy them. But here’s why homemade wins every single time:
- Flavor & Freshness 🥖 → Store-bought rolls lose their magic after sitting around. Fresh out of the oven at home? Soft, warm, unbeatable.
- Customization 🎨 → Double the filling if you’re feeling indulgent, cut back the sugar if you prefer subtle sweetness, or toss in extras like chocolate chips, nuts, or even orange zest. It’s your kitchen—you’re in charge.
- Satisfaction 😍 → Few things compare to the moment when you carry a tray of golden spirals to the table and hear that first “wow.”
- Economy 💵 → A single bakery run can cost as much as making a whole pan yourself—and you end up with more to share (or not share 😉).
So grab your apron, clear a little counter space, and let’s bake something that will make your kitchen smell like a dream 🥐✨.
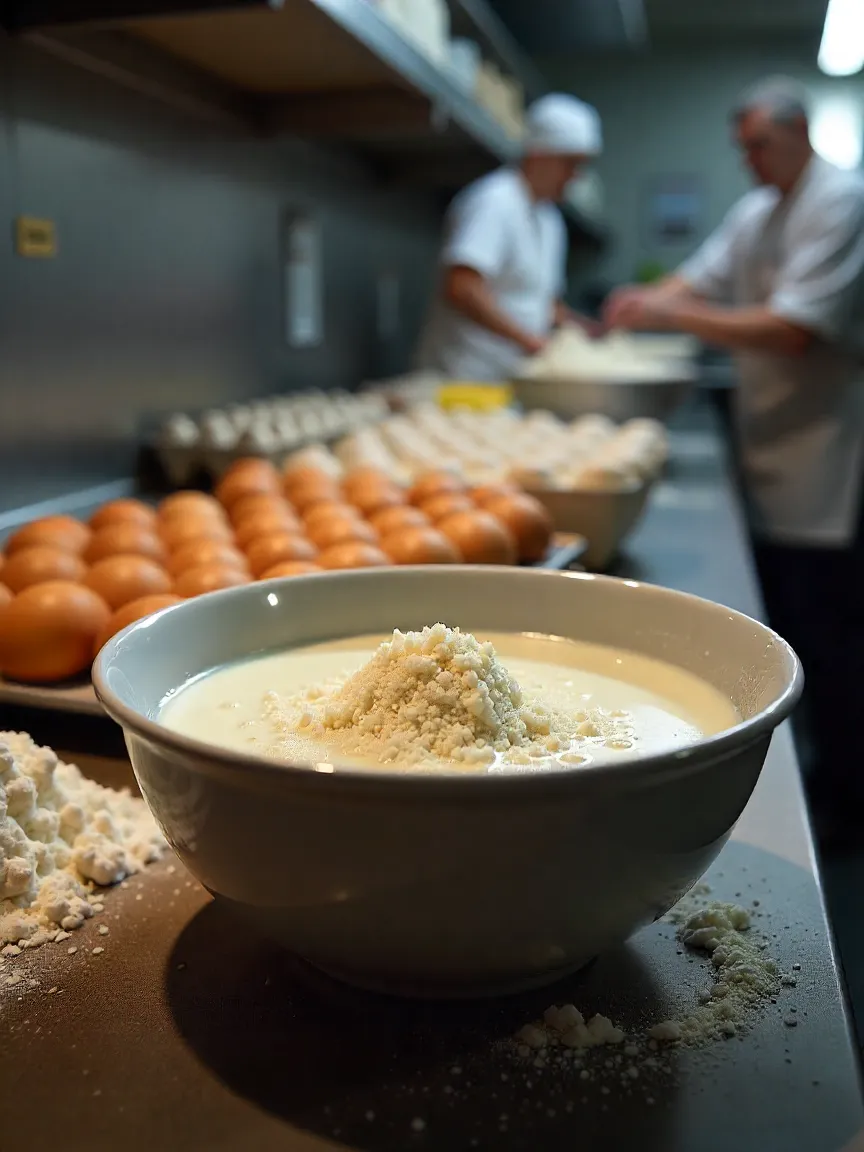
🛒 Step 1: Preparing Ingredients Like a Pro
If you want your cinnamon rolls to taste like a dream, the first step is simple: get organized. Seriously, it’s half the battle. I’ve learned this the hard way—once I started mixing without checking if I had all the ingredients, and halfway through I realized I was missing an egg. Disaster. 😅
Professional chefs call this mise en place, which basically means “everything in its place.” But really, it’s just setting up your workspace so you don’t panic later. Take a moment to gather all your ingredients, line them up, and even double-check measurements. This small step will save you so much stress later—and honestly, it feels really satisfying, like you’re a pastry magician about to work your spell. 🪄✨
Here’s what you’ll need:
For the dough:
- 4 cups all-purpose flour 🌾 – fluffy and soft, the backbone of your rolls.
- 1/3 cup white sugar – a little sweetness to feed the yeast.
- 1 teaspoon salt 🧂 – balances flavor and enhances the aroma.
- 2 ¼ teaspoons active dry yeast – the tiny heroes that make your dough rise.
- 1 cup warm milk 🥛 – think bathwater, warm but gentle.
- 2 large eggs 🥚 – richness and structure for soft, pillowy rolls.
- 1/3 cup melted butter 🧈 – adds tenderness and flavor.
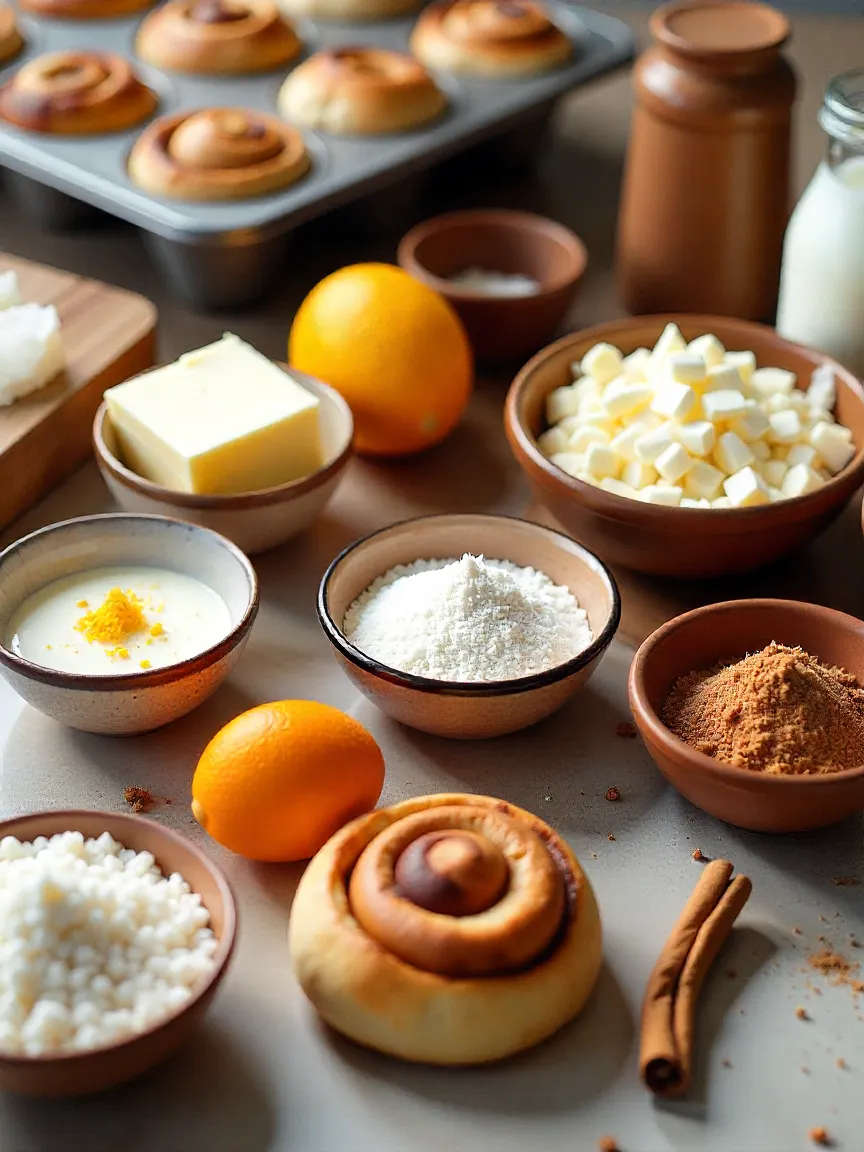
For the filling:
- 1 cup brown sugar – deep, caramel-like sweetness.
- 2 ½ tablespoons ground cinnamon 🌿 – the star of the show.
- 1/3 cup softened butter – the glue that holds the filling together.
For the glaze:
- 1 ½ cups powdered sugar – for that smooth, sweet finish.
- 2 tablespoons cream cheese (optional but highly recommended!) 🥰 – adds a creamy tang.
- A splash of milk or cream – for perfect consistency.
- A drop of vanilla extract 🌸 – aroma that makes everyone swoon.
Extra ideas: Add raisins, chopped pecans, shredded coconut, or a hint of orange zest 🍊. Every roll can become a tiny masterpiece of your own creation.
🌡️ Step 2: Activating the Yeast
Yeast might seem like just a little powder, but it’s alive. Tiny, invisible workers that puff up your dough and make it soft, airy, and utterly irresistible. Treat them right, and they’ll reward you. Treat them wrong, and… well, let’s just say I’ve had some very sad, flat rolls. 😬
Here’s the foolproof way I do it:
- Warm your milk until it’s cozy like a warm bath—around 110°F / 43°C. Too hot, and you’ll kill the yeast. Too cold, and nothing will happen. Just right is perfect. 🛁
- Stir in a teaspoon of sugar. Think of it as a little breakfast for your yeast, giving them energy to do their magic.
- Sprinkle the yeast on top. No stirring yet. Just let it sit and wake up.
After about 10 minutes, you should see foam bubbling up. That’s your yeast alive, happy, and ready to work 🎉. If it doesn’t foam, don’t despair—just start over. Trust me, it’s better than baking rolls that never rise.
Pro tips:
- Always use fresh yeast. Old yeast is lazy yeast. 😴
- If your kitchen is cold, try putting the yeast mixture somewhere warm, like on top of the fridge or near a slightly warm oven. Yeast loves cozy conditions.
- Patience is key. Don’t rush this step. Watch it bubble and grow, and let yourself enjoy the little moment of magic happening in your bowl. ✨
🥣 Step 3: Mixing the Dough
Alright, here’s the part where things start to actually feel real. Up until now it’s just been bowls of flour, sugar, and some eggs staring at you. But once you mix them—boom, it’s dough, and you’re on your way.
So, grab that foamy yeast mixture (it should smell a little like warm bread already—always a good sign). Crack in your eggs, whisk them around, and then pour in the melted butter. Don’t rush it; watch how everything sort of swirls together. That moment when butter hits yeast? It’s oddly satisfying, like the kitchen is telling you “yep, you’re doing this right.”
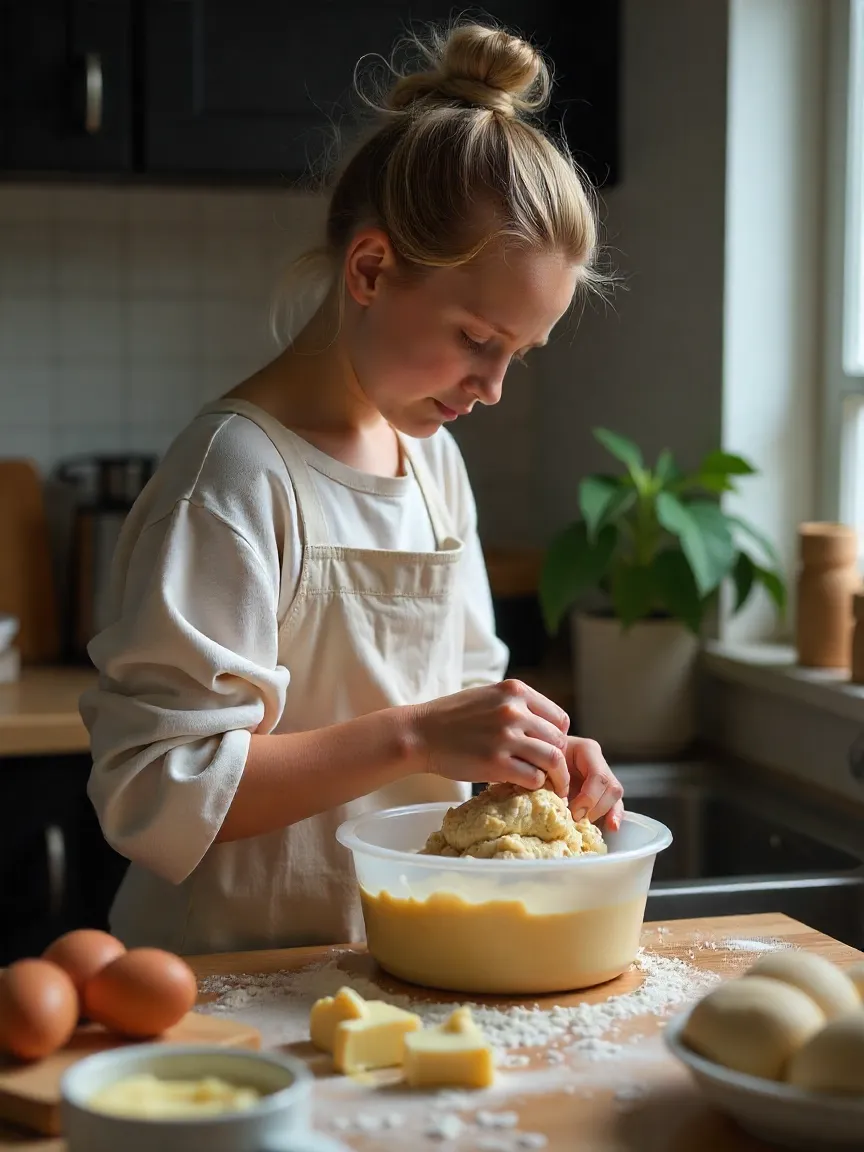
Now start adding your dry stuff: flour, sugar, and a pinch of salt. Slowly though. Dumping it all in at once feels tempting, but trust me, you’ll regret the sticky chaos later. Stir as you go until it starts pulling together into something that actually looks like food instead of sludge.
- Mixer method: slap on the dough hook, let it run for ~7 minutes. You’ll know it’s ready when it stops looking messy and starts looking shiny and smooth.
- Hand method: roll up your sleeves, toss some flour on the counter, and knead for a good 10 minutes. Folding, pressing, stretching—it’s kind of like stress relief therapy you didn’t ask for. You’ll feel your arms complain halfway through, but hey, that’s your workout of the day 💪.
The dough should feel soft and bouncy, almost like a squishy pillow. A little sticky is fine. A gluey nightmare? Not fine.
👉 Quick test: grab a tiny piece, stretch it carefully. If you can pull it thin enough that light shines through without ripping, congrats—it’s ready to move on.
⏳ Step 4: First Rise
Okay, now give that dough a break. Seriously. It’s been manhandled enough. Grease a bowl (butter, oil, whatever you’ve got), pop the dough inside, and cover it with a towel. Then walk away.
This is the weirdly calm stage: the dough just sits there… growing. Over the next hour or so, it’ll double in size. Sometimes you peek under the towel every 20 minutes like a kid checking if a present magically appeared under the tree 🎁. It feels silly, but watching it puff up never gets old.
- Usually it takes 1–1.5 hours.
- Warm room = faster rise.
- Cold room = dough sulking forever.
💡 Little trick: if your kitchen is freezing, cheat. Warm up your oven for a single minute, turn it off, stick the bowl inside with just the oven light on. Boom—instant cozy spa for your dough.
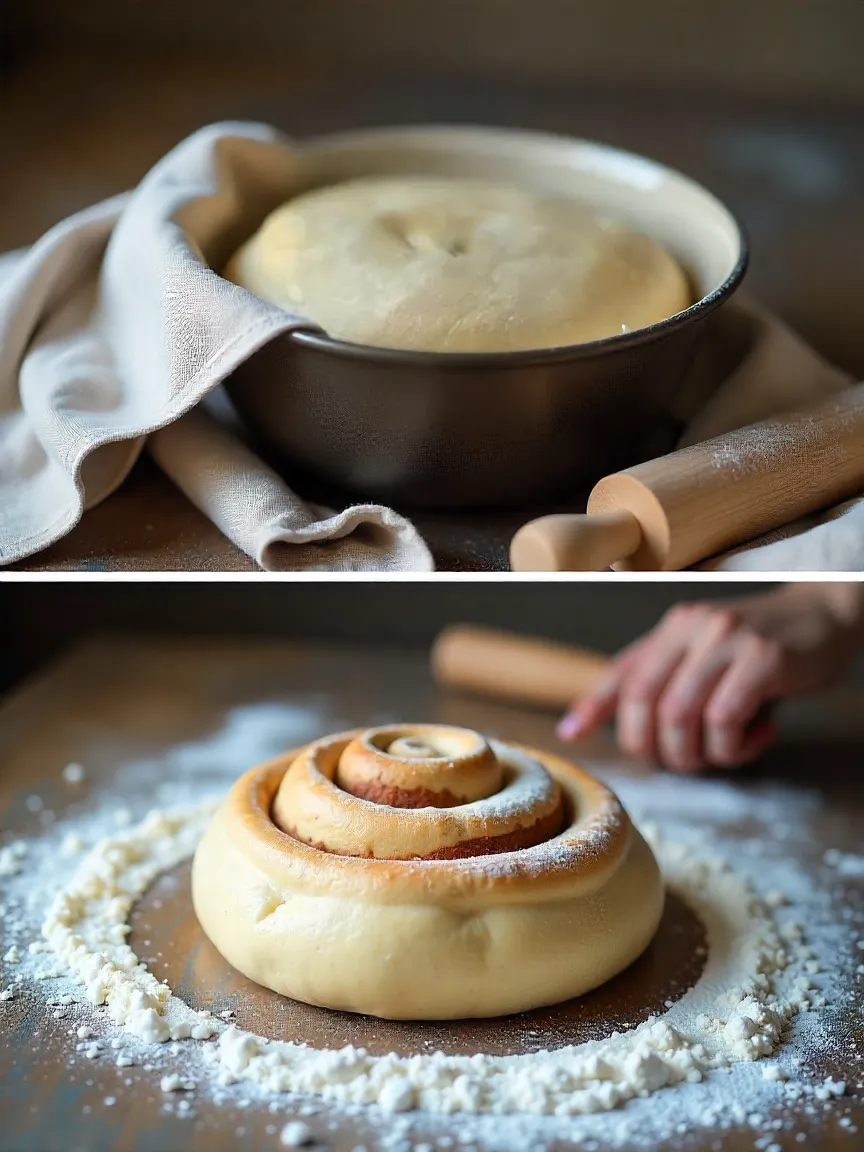
🪄 Step 5: Rolling Out
Here’s the fun part. Punch the dough down gently (yes, actually punch it—don’t worry, it can take it 👊). It’ll deflate a bit, which is weirdly satisfying. Then toss it onto a floured surface.
Grab your rolling pin and start stretching it out into a rectangle. Don’t obsess over perfect measurements—aim for something like 16×21 inches, but if it looks more like “kind of big and sort of rectangular,” you’re good. Remember, no one’s grading you here.
Now, sometimes the dough will fight back. You roll it, and it snaps right back like a stubborn rubber band. Don’t panic. Just step away for 5 minutes, maybe sip some tea, and let the gluten chill out. Come back after its little nap, and it’ll roll out easier.
It’s less about precision, more about getting a nice, even sheet. Think of it as preparing the canvas before painting. Only your “paint” is going to be butter, sugar, and cinnamon… which, honestly, sounds way better than actual paint. 🎨✨
🧈 Step 6: The Butter Layer
Time for one of the most underrated but crucial moves—spreading that butter. Take your softened butter (not straight-from-the-fridge hard, not melted soup, just soft enough to glide) and coat the whole rectangle of dough. Don’t skimp. Seriously.
Here’s why this step matters:
- It acts like glue, holding the cinnamon sugar in place so it doesn’t all fall out when you roll.
- It melts into the layers during baking, creating that gooey, caramel-like texture everyone secretly hopes for.
- And, let’s be real, butter just makes everything better 🧈💛.
Pro tip: use the back of a spoon or even your fingers to spread it evenly. It doesn’t have to look like artwork; no one’s judging your butter-spreading technique.
🍬 Step 7: The Cinnamon Sugar Filling
Now for the star of the show. Mix brown sugar with ground cinnamon, and as soon as you stir them together, the smell alone will make you want to skip ahead and eat it with a spoon. Resist. The magic happens on the dough.
Take a deep breath, then sprinkle the mixture generously across the buttered surface. Go edge to edge—like a snowfall covering everything. This is what gives you those hypnotic spirals when you slice later.
✨ Want to customize? Toss in some extras:
- Chopped nuts 🌰 for crunch,
- Chocolate chips 🍫 for melty pockets,
- Shredded coconut 🥥 if you’re feeling tropical,
- Or dried cranberries for a tart surprise.
Each roll can feel a little different depending on what you throw in.
🎢 Step 8: Rolling and Cutting
Now comes the slightly nerve-wracking but fun part—rolling. Start at the long side of your rectangle and carefully roll the dough into a log. Keep it snug but don’t squeeze the life out of it. Imagine you’re tucking the dough in for bed, not trying to strangle it 😅. Pinch the seam shut when you reach the end.
Here’s where most people panic: cutting. Forget knives—they squish everything. Instead, grab some unflavored dental floss (yes, the stuff from your bathroom cabinet). Slide it underneath the log, cross the ends over the top, and pull tight. Boom—perfect spirals every single time. It feels like a magic trick ✨.
Aim for about 12 pieces, but honestly, no one is going to complain if you end up with 11 chunky ones or 13 slightly smaller ones.
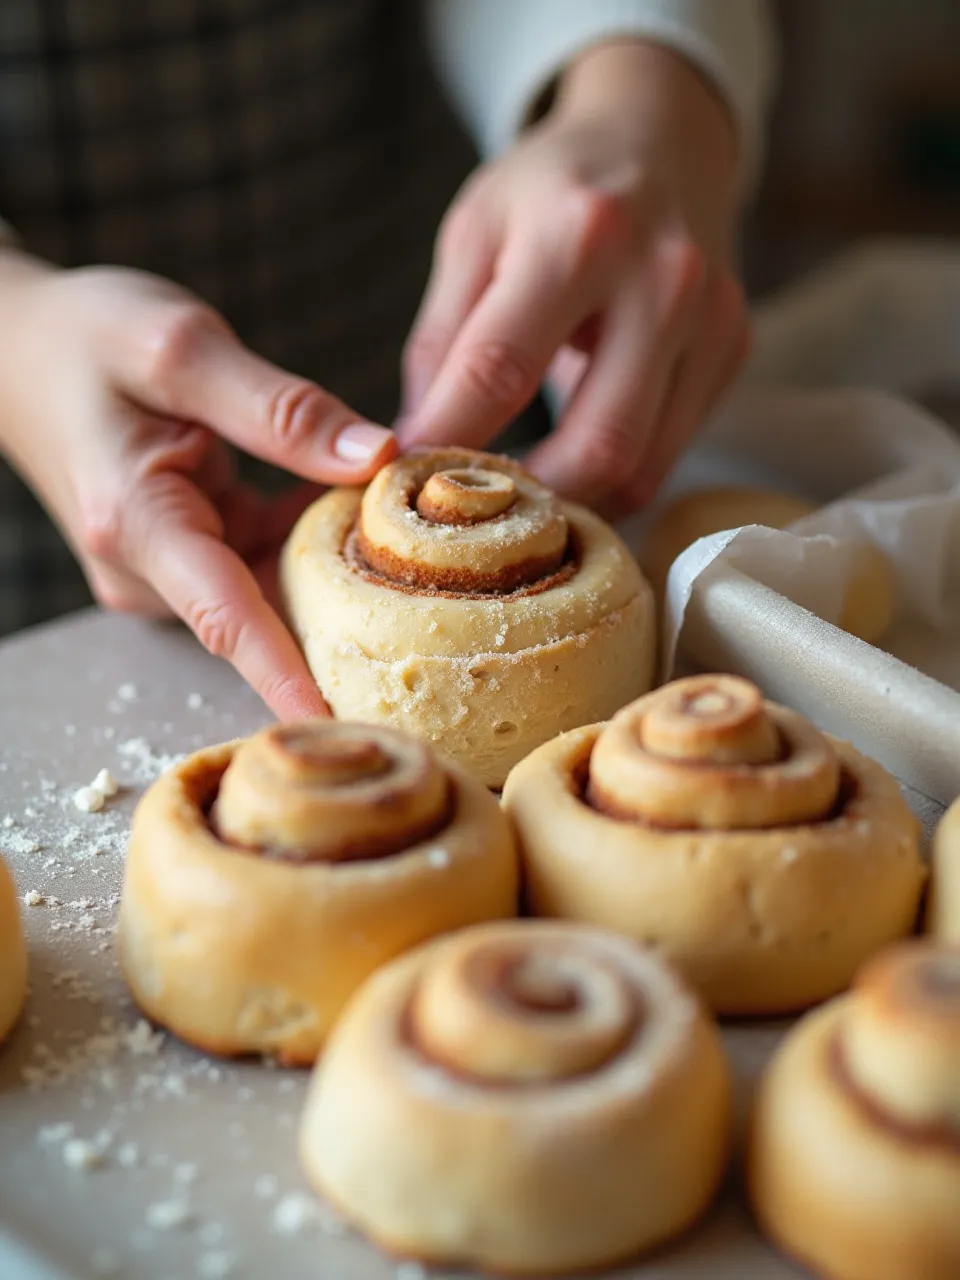
🥘 Step 9: Second Rise
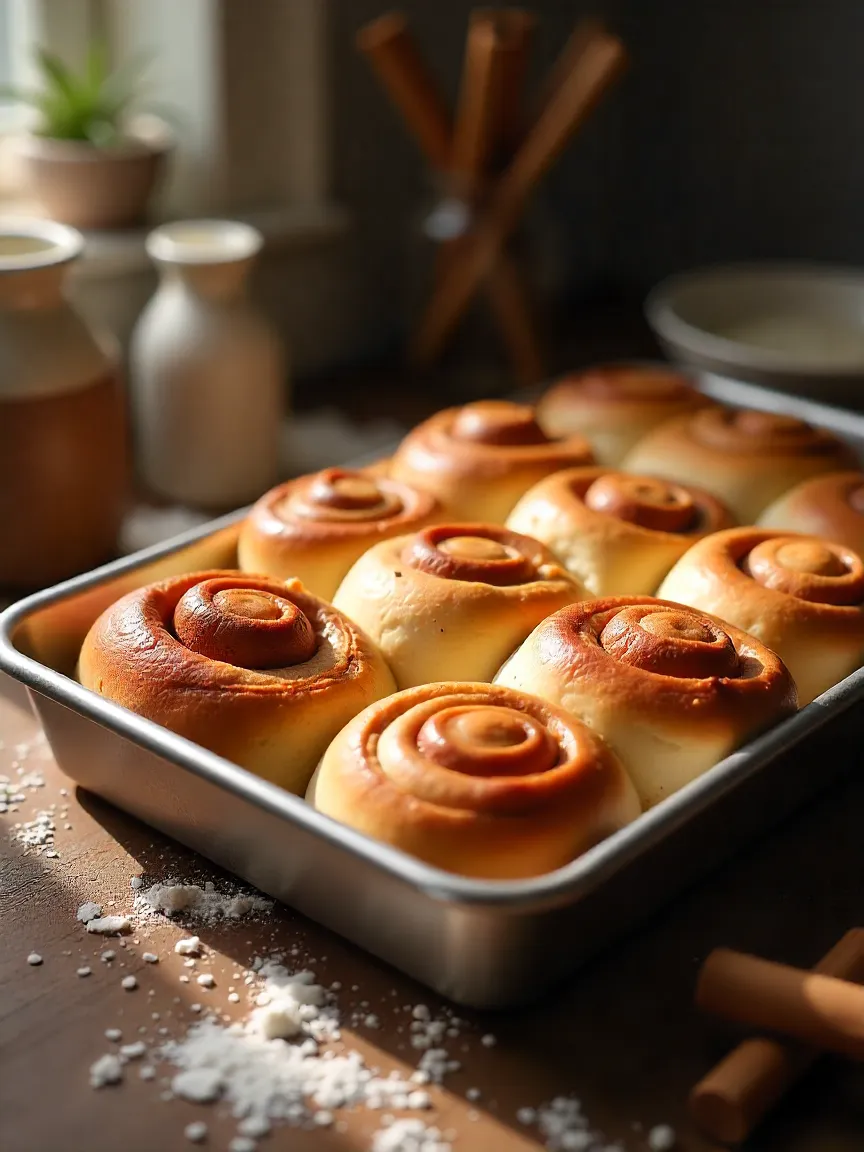
Place your cut rolls in a greased baking dish, leaving a little breathing room between them. Cover with a towel and let them rise again for 30–45 minutes. This is when they puff up and start looking like actual cinnamon rolls instead of awkward dough blobs.
If you’re planning ahead (say, for a lazy weekend breakfast), you can stop here. Just cover the dish with plastic wrap and slide it into the fridge overnight. In the morning, take them out, let them wake up to room temperature, and then bake. The anticipation makes that first bite even better 🤤.
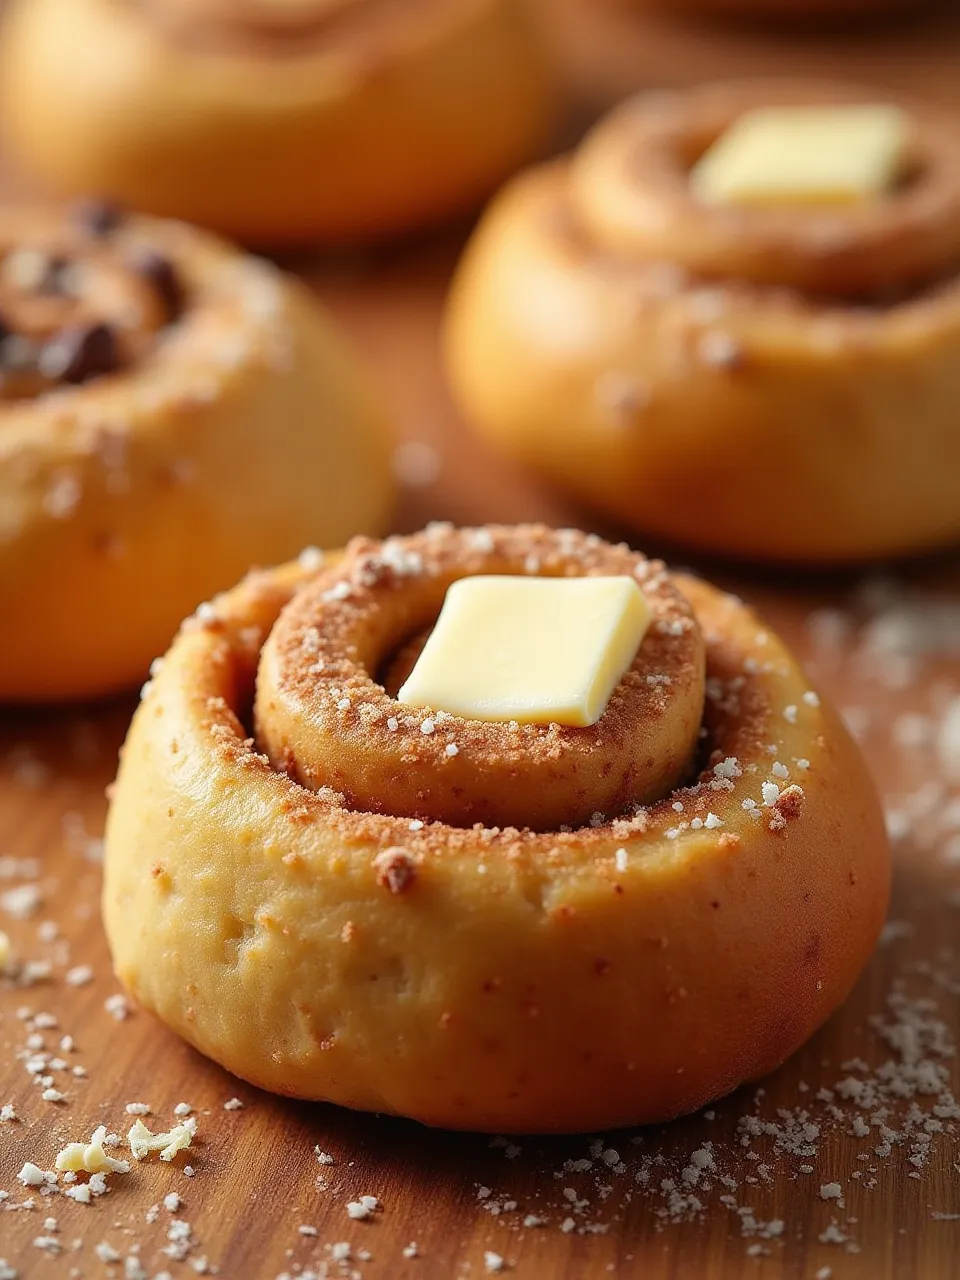
🔥 Step 10: Baking
Here’s the big moment—you’ve done the prep, the rolling, the waiting, and now it’s time to actually bake these beauties. Preheat your oven to 350°F (175°C), slide the tray inside, and set a timer for 25–30 minutes.
The hardest part? The waiting. About halfway through, your kitchen will start to smell like a full-blown bakery—warm cinnamon, sweet sugar, butter—it’s almost cruel how good it smells while you can’t touch them yet 😍.
Keep an eye on the tops: they should turn golden brown, with just a little deeper color on the edges. If you’re unsure, gently tap one; it should feel firm but springy. Don’t overbake—nothing sadder than a dry cinnamon roll.
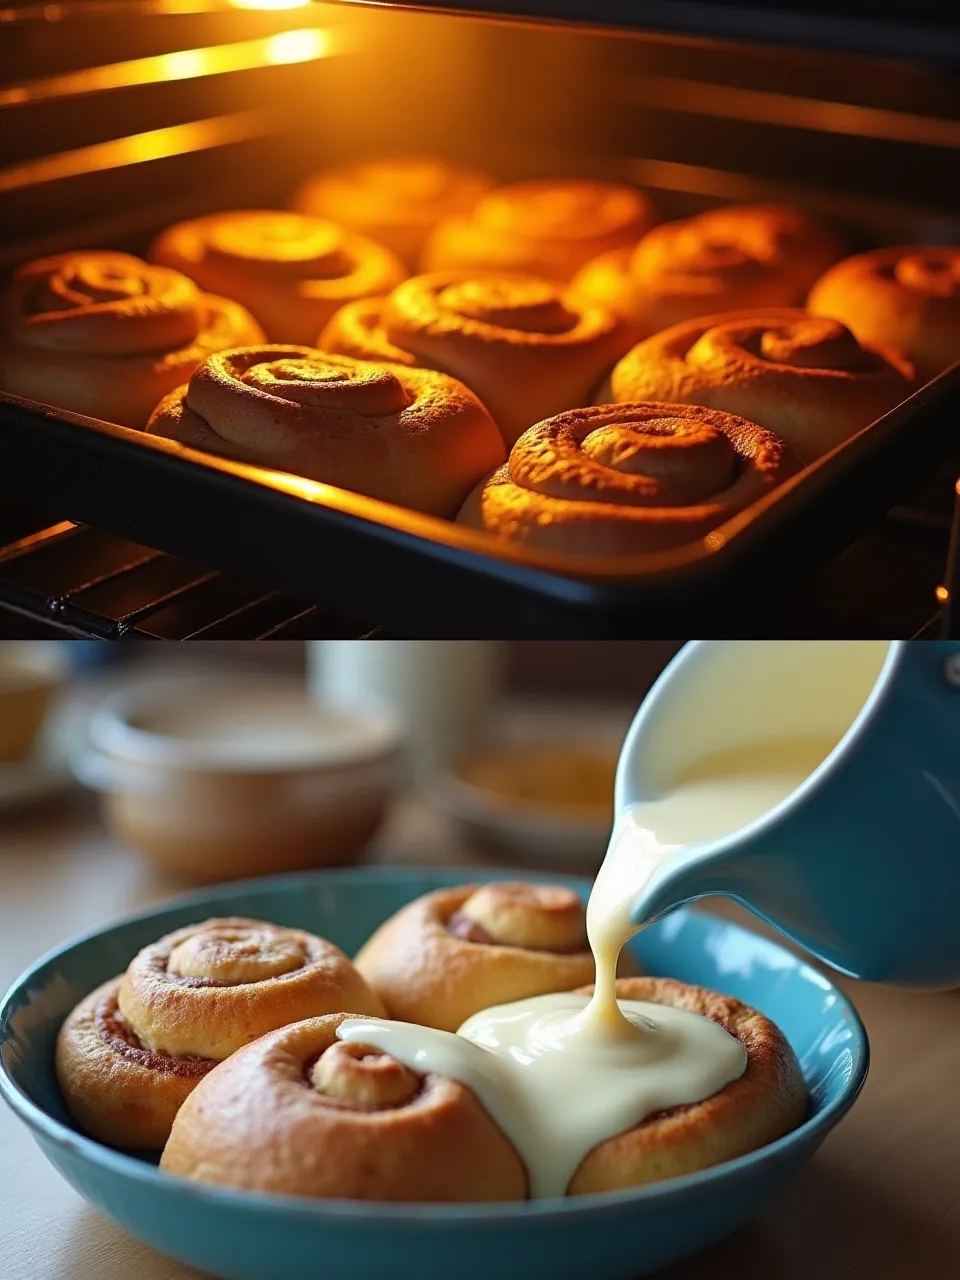
🍶 Step 11: Glazing
While the rolls are baking, whip up the glaze. It’s ridiculously simple:
- 1½ cups powdered sugar,
- a splash of milk (or cream for extra richness),
- a drop of vanilla for that swoon-worthy aroma 🌸.
Whisk until smooth. If you’re the kind of person who loves a creamier, slightly tangy frosting, add a couple tablespoons of cream cheese. It makes the glaze thicker and oh-so decadent 🥰.
Once the rolls come out of the oven, don’t wait too long—pour the glaze while they’re still warm so it seeps into the spirals. Watching the sugar melt into those layers? Pure happiness.
🌟 Variations & Creative Twists
Okay, so this is the playground part of the recipe. Once you’ve nailed the basic dough, you don’t have to stick to the classic version every time. Think of it like a blank canvas that you can dress up however you’re feeling that day:
- Apple Cinnamon Rolls 🍏 → Tuck thin apple slices into the filling before you roll it up. Suddenly you’ve got something halfway between a cinnamon roll and apple pie. Honestly, it’s dangerous how good these are.
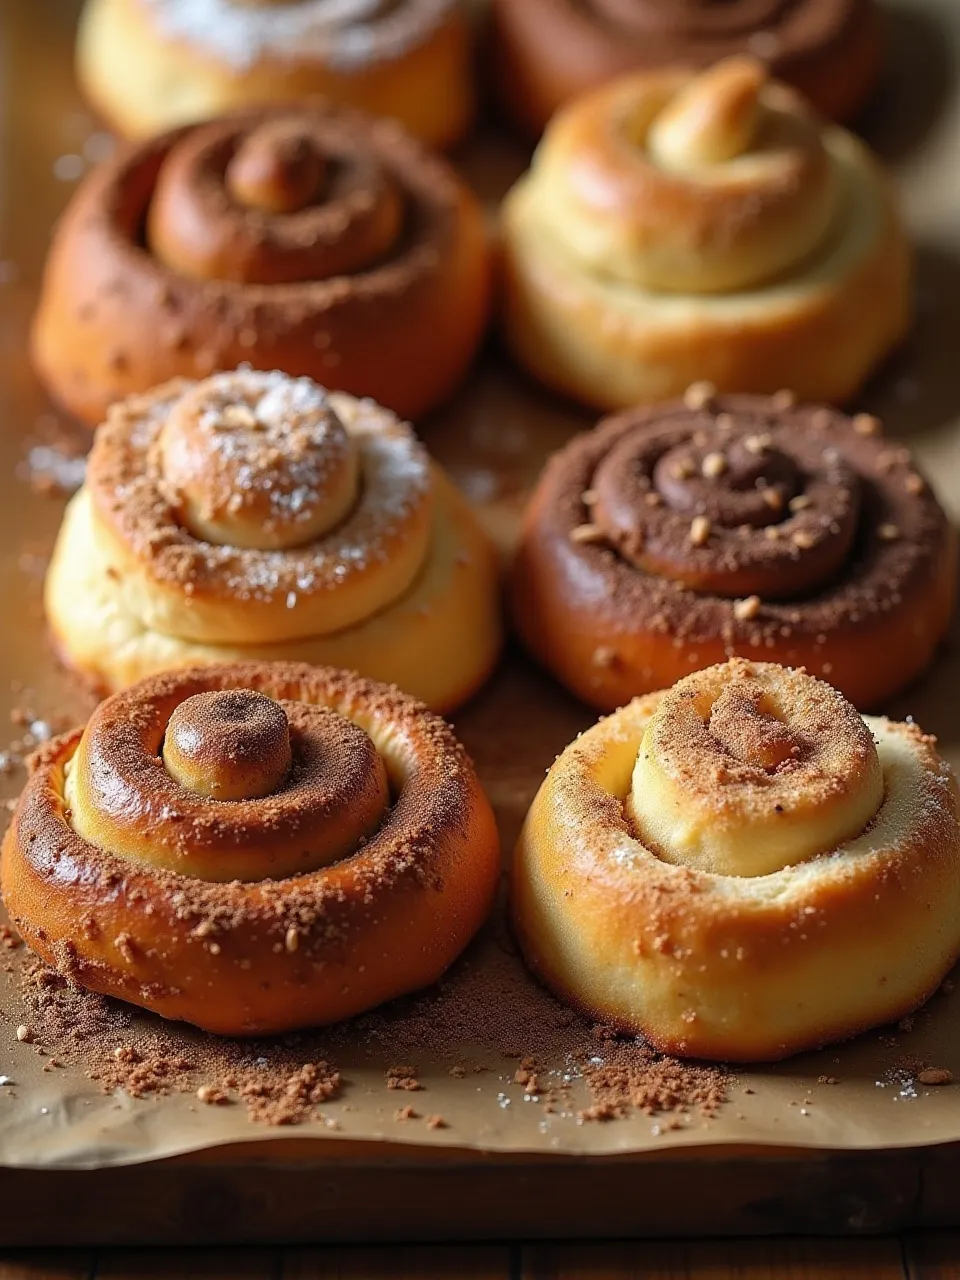
- Chocolate Swirl 🍫 → Swap out some of the cinnamon sugar for cocoa powder and scatter in chocolate chips. When it bakes, you get melty pockets of chocolate hiding in the spirals. Messy fingers? 100% worth it.
- Holiday Spice 🎄 → Sprinkle in nutmeg, ginger, and cloves along with the cinnamon. Your kitchen will smell like Christmas morning—even if it’s the middle of summer.
- Savory Version 🧄🧀 → Feeling bold? Forget the sugar entirely. Spread garlic butter, toss on fresh herbs and cheese, and roll it up. They come out like soft, pull-apart bread spirals that disappear in minutes at brunch.
And really—that’s just scratching the surface. Add orange zest, raisins, shredded coconut, cardamom, peanut butter… whatever you dream up. Each batch can feel like a little experiment, and sometimes the “what if I just throw this in?” versions are the best ones.
💭 Final Thoughts
Here’s the thing: making cinnamon rolls at home isn’t just about eating them (though, let’s be honest, that’s a huge part of it 🤤). It’s about the whole journey. Slowing down enough to watch yeast bubble, to knead dough until it finally feels right, to peek under the towel and see it double in size like some tiny miracle.

There’s magic in the process:
- punching down a fluffy ball of dough,
- rolling it into neat spirals,
- smelling cinnamon and sugar melt together in the oven,
- and finally pouring glaze over warm rolls while it drips into every little crevice.
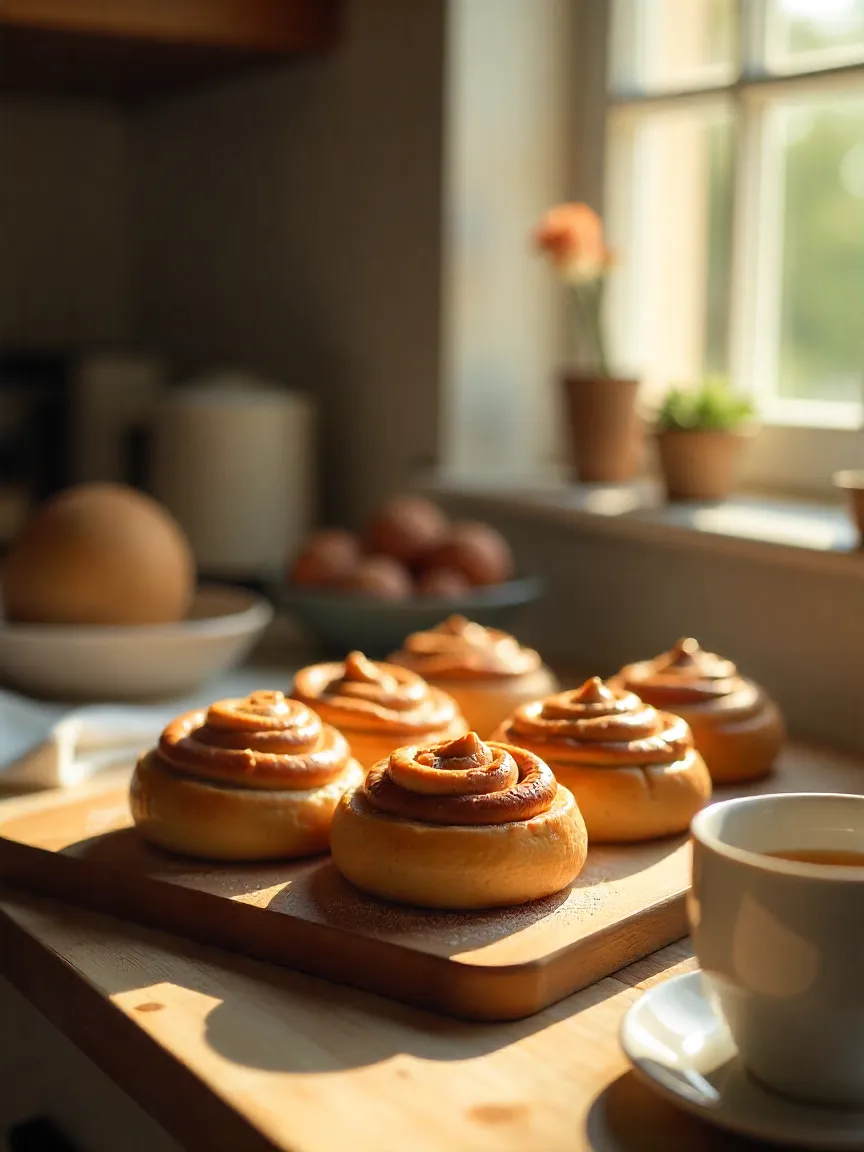
By the time you sit down to take that first bite, you’re not just tasting bread and sugar—you’re tasting the patience, the little pauses, the anticipation. And maybe a bit of butter too.
So next time a craving hits, don’t rush to the store. Try baking these at home. Share them with people you love, drop a plate off for your neighbors, or keep the whole pan for yourself (zero judgment here 😉). Either way, you’ll have something way better than store-bought: a batch of rolls that feels like comfort baked right into them.