
Contents
- 🍝 1. Reheat Pasta on the Stove with a Splash of Water
- 🥖 2. Revive Stale Bread by Misting with Water and Warming in a Cold Oven
- 🧀 3. Stir in a Splash of Milk to Bring Mac & Cheese Back to Life
- 🍲 4. Gently Reheat Soup on the Stove to Bring Back Depth and Warmth
- 🍕 5. Re-Crisp Leftover Pizza in a Skillet — No Lid, No Soggy Crust
- 🥘 6. Gently Reheat Casseroles in the Oven with Foil for Steam
- 🥗 7. Bring Wilted Salad Greens Back to Life with Ice Water
- 🛡️ Understanding Food Quality and Safety
- ✨ Creative Approaches to Bringing Back Flavor
Leftovers don’t have to feel like second-best. While yesterday’s food might seem dull or dry straight from the fridge, there are simple tricks to bring it back to life—and make it taste just as good, if not better, than the day before.
Whether it’s soggy fries, cold pasta, or a dried-out casserole, these seven easy methods help restore flavor, texture, and warmth with very little effort. No fancy tools required—just smart techniques anyone can use to cut waste and boost taste.
🍝 1. Reheat Pasta on the Stove with a Splash of Water

Leftover pasta often feels dry or rubbery after sitting in the fridge — but with just a few simple steps, you can bring it back to life and make it taste nearly as good as fresh.
Step 1: Transfer the pasta to a skillet or saucepan.
Use a nonstick pan if possible. If the pasta has sauce (like marinara or Alfredo), that’s great — the sauce will help rehydrate the noodles. If it’s plain, no problem — you’ll just need a bit more moisture.
Step 2: Add a splash of water.
Pour in 1–3 tablespoons of water, depending on how much pasta you’re reheating. The goal is to create steam that softens the pasta, not to drown it. If the pasta already has sauce, you can also add a spoonful of extra sauce or a drizzle of olive oil to refresh the texture and flavor.
Step 3: Reheat slowly over medium to low heat.
Set the stove to low or medium heat. Stir gently and often to prevent sticking and ensure even heating. Cover the pan with a lid to trap steam — this keeps the pasta moist and tender.
Step 4: Taste and refresh.
Once the pasta is hot all the way through, taste it. Want to make it even better? Add a pinch of salt or black pepper, a sprinkle of grated Parmesan, a dash of chili flakes, or some chopped fresh herbs like basil or parsley.
How do you know it’s ready?
The pasta should be fully warmed, slightly springy, and not mushy. This usually takes about 5–7 minutes.
👉 Extra Tips:
- For sauceless pasta, a small pat of butter added at the end can make a big difference in taste and texture.
- Avoid reheating pasta with seafood too long — it’s best warmed gently just until hot.
🥖 2. Revive Stale Bread by Misting with Water and Warming in a Cold Oven

That half-eaten baguette or crusty loaf sitting on your counter doesn’t have to go to waste. With just a little moisture and gentle heat, you can breathe new life into stale bread and enjoy it again like it’s fresh out of the oven.
Step 1: Add moisture to the crust.
Lightly mist the outside of the loaf with clean water. If you don’t have a spray bottle, just dampen your hands and pat the crust, or use a pastry brush to apply a thin layer of water. Focus on the crust — avoid soaking the bread, which can lead to sogginess.
Step 2: Place the bread in a cold oven.
Put the dampened bread directly on the rack or on a baking tray, then place it in a cold oven. Only after the bread is inside should you turn on the oven.
Step 3: Set the temperature to 300°F (150°C).
The slow rise in temperature helps rehydrate the bread evenly without drying it out further. Bake for 10 to 15 minutes, depending on the size and thickness of the loaf.
Step 4: Check for texture.
When done, the crust should be crisp again, while the inside should feel soft and springy. Let it cool slightly before slicing.
🔁 Best for:
This method works especially well for:
- Baguettes
- Sourdough loaves
- Rustic Italian or French bread
It’s less effective for soft sandwich bread or anything pre-sliced, which tends to dry out quickly when reheated.
👉 Bonus Tip:
Wrap partially revived bread in a clean kitchen towel to keep it warm and fresh longer at the table — perfect for dinner or a quick snack.
🧀 3. Stir in a Splash of Milk to Bring Mac & Cheese Back to Life

Few leftovers lose their charm faster than macaroni and cheese. By the next day, the once-creamy comfort food can turn into a dry, clumpy block. Luckily, a tablespoon of milk is all it takes to restore its gooey glory.
Step 1: Measure the milk.
Add about 1 tablespoon of milk for every 1 cup of leftover mac and cheese. You can use regular milk, plant-based milk, or even a splash of cream for extra richness.
Step 2: Stir gently to combine.
Mix the milk into the pasta thoroughly. This will help loosen up the cheese sauce and evenly distribute the moisture.
Step 3: Reheat slowly.
- Microwave: Place the mac and cheese in a microwave-safe bowl, cover with a microwave-safe lid or damp paper towel, and heat in 30-second bursts, stirring in between until creamy and warm.
- Stovetop: Warm it in a saucepan over low heat, stirring constantly. Add more milk if it still seems dry.
Step 4: Cover while heating.
Covering the dish helps trap steam, which softens the pasta and keeps the sauce from drying out.
🥄 Optional Upgrades:
- Add a pat of butter for extra silkiness.
- Stir in a little grated cheese for a freshly melted feel.
- Sprinkle with pepper, paprika, or hot sauce to wake up the flavor.
👉 Works for:
- Homemade mac and cheese
- Boxed versions like Kraft or Annie’s
- Baked mac and cheese casseroles
A little milk goes a long way toward turning dry leftovers back into a bowl of creamy comfort.
🍲 4. Gently Reheat Soup on the Stove to Bring Back Depth and Warmth

Soup might seem easy to reheat—but doing it the wrong way can dull the flavor, ruin the texture, or even burn the bottom. The secret to reviving any leftover soup is low, slow heat and a good stir.
Step 1: Choose the right pot.
Use a small- to medium-sized saucepan that distributes heat evenly. Avoid thin-bottomed pans, which can scorch the soup.
Step 2: Reheat on low to medium heat.
Pour the soup into the pot and warm it slowly over low or medium heat. Don’t rush it—gentle warming allows flavors to reawaken without overcooking delicate ingredients.
Step 3: Stir often.
Soups tend to separate when stored. Stirring brings the broth, herbs, and solids back together, rebuilding the flavor and helping everything heat evenly. Stir every few minutes, scraping the bottom of the pot to avoid sticking.
Step 4: Adjust texture if needed.
If the soup has thickened in the fridge, add a splash of water, broth, or milk depending on the soup type. This refreshes the original texture without diluting flavor.
Bonus Tips:
- Add a fresh garnish: A handful of chopped herbs or a drizzle of olive oil adds brightness and makes it feel freshly made.
- Taste and adjust: A little salt, pepper, or squeeze of lemon can boost the flavor after sitting overnight.
🥄 Works especially well for:
- Vegetable soups
- Chicken noodle
- Creamy bisques or chowders (with extra care not to boil)
Taking the time to gently reheat soup gives you a bowl that tastes like it was just cooked—not just “warmed up.”
🍕 5. Re-Crisp Leftover Pizza in a Skillet — No Lid, No Soggy Crust

Microwaved pizza often ends up limp and soggy. But with one skillet and no lid, you can bring back that crispy-bottom, gooey-top goodness in just minutes.
Step 1: Preheat a dry skillet.
Use a nonstick or cast iron skillet and heat it over medium. No oil or butter—just the pan. This method mimics a pizza stone, crisping the base without overcooking the top.
Step 2: Add the pizza slice(s) directly to the pan.
Lay down one or two slices flat in the hot skillet. Don’t overcrowd. Let them heat for 2 to 4 minutes, undisturbed.
Step 3: No lid allowed.
This is key. Keeping the pan uncovered allows steam to escape, which is what keeps the crust from turning soggy and helps it re-crisp beautifully.
Step 4: Optional press for full contact.
Lightly press the slices with a spatula so the crust makes full contact with the pan. This helps the bottom heat evenly and get that pan-fried crunch.
Step 5: Peek and serve.
Once the crust is golden and the cheese is slightly melty, it’s ready. No flipping, no fuss.
🧀 Bonus Tip:
If you want meltier cheese without ruining the crust, spritz a tiny bit of water in the skillet (away from the pizza), then cover for just 15–20 seconds at the end. It’ll steam the top without softening the bottom too much.
This trick gives day-old pizza a fresh-out-of-the-oven texture—crisp, cheesy, and satisfying in under 5 minutes.
🥘 6. Gently Reheat Casseroles in the Oven with Foil for Steam

Leftover casseroles are delicious—but only if reheated with care. A microwave can dry them out or heat them unevenly. For the best results, revive your casserole using low oven heat and gentle steam.
Step 1: Preheat your oven to 325°F (160°C).
Low and slow is the goal here. This temperature warms the dish through without scorching the edges or drying out creamy sauces.
Step 2: Cover the dish loosely with foil.
The foil acts like a lid but leaves room for a bit of airflow. It keeps in just enough steam to maintain moisture while allowing the top layer to stay tender—not soggy.
Step 3: Bake for 20–30 minutes.
Reheat time depends on the size of the portion. For individual servings, start checking around the 15-minute mark. For a larger casserole, give it closer to 30 minutes.
Step 4: Finish uncovered (if needed).
If your casserole looks overly moist after heating, remove the foil for the last 5 minutes. This step helps crisp the top slightly and balance the texture.
Bonus Tip: Add a splash of milk or broth before reheating if the casserole seems dry going in. This refreshes sauces without making things watery.
🧀 Best For:
Creamy pastas, layered casseroles, cheesy bakes, lasagna, enchiladas—any dish where structure and moisture matter.
Using this method gives leftovers a freshly baked texture, turning yesterday’s comfort food into today’s satisfying second helping.
🥗 7. Bring Wilted Salad Greens Back to Life with Ice Water
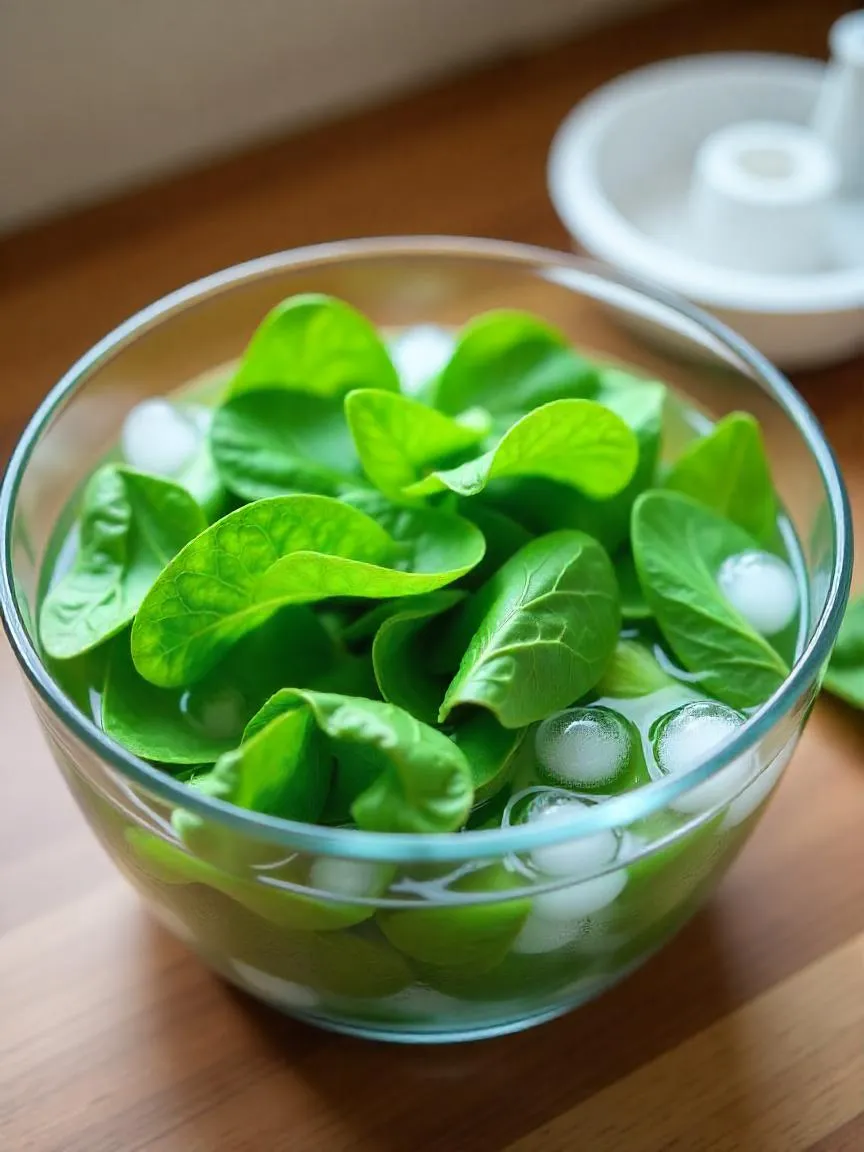
Limp lettuce? Tired arugula? Don’t toss them yet! With just a bowl of ice water, your greens can bounce back to life—crispy, cool, and ready to serve.
Step 1: Fill a large bowl with cold water and a handful of ice cubes.
The colder, the better. Ice water shocks the greens, encouraging them to rehydrate and regain structure.
Step 2: Submerge the wilted greens.
Let them soak for 15–30 minutes, depending on how droopy they are. The water works its way into the cell walls of the leaves, plumping them back up.
Step 3: Dry thoroughly.
Once revived, drain the greens well. Use a salad spinner or pat dry gently with a clean kitchen towel or paper towels. Any leftover moisture can water down your dressing.
Step 4: Use immediately.
Freshened greens are best served right away for peak crunch and color.
🥬 Works Best For:
Lettuce, spinach, kale, arugula, herbs, and other leafy greens that haven’t gone slimy—just a little weary.
This trick doesn’t fix spoilage, but it does turn wilted-but-edible leaves into a bowl of crisp, refreshing salad again. It’s a great way to cut waste and keep your meals vibrant.
🛡️ Understanding Food Quality and Safety
Reviving leftovers is only worth it if the food is safe to eat. Even the most delicious dish isn’t worth the risk if it’s gone bad. Knowing how to spot signs of spoilage and how to store cooked food properly can keep meals tasty and safe.
👃 How to Tell If Leftovers Are Still Good
Trust your senses—but know what to look (and smell) for:
- Smell: If the food has a sour, musty, or “off” odor, it’s likely gone bad—even if it looks okay.
- Appearance: Mold (fuzzy spots of green, white, or black) or odd discoloration is a clear sign to toss it.
- Texture: Slimy or unusually mushy textures, especially on meats or vegetables, often indicate spoilage.
⚠️ The 2-Hour Rule
Leftovers that have sat at room temperature for more than 2 hours should be thrown out. Bacteria can multiply quickly in that time.
♨️ A Note on Reheating
Reheating leftovers to 165°F (74°C) can kill most bacteria—but not the toxins they may have produced. So reheating alone is not a fix for spoiled food.
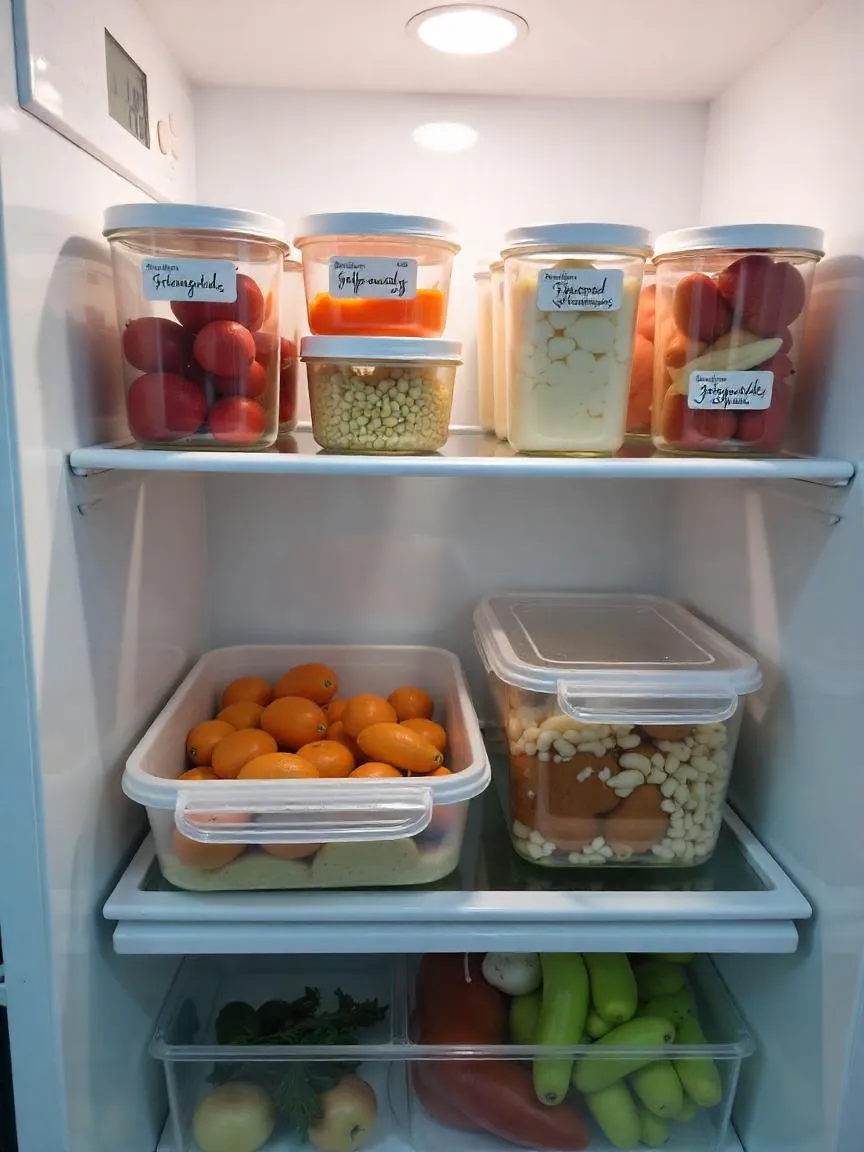
🧊 Storing Cooked Dishes for Freshness
Keep leftovers safe and appetizing with proper storage:
- Cool Quickly: Let food cool slightly, then refrigerate within 2 hours. Don’t leave hot dishes out on the counter too long.
- Use Airtight Containers: They prevent moisture loss, reduce odor mixing, and extend shelf life.
- Label with Dates: Add a sticker or marker note with the prep date. This makes it easy to use older items first and avoid waste.
- Use or Freeze: Most leftovers last 3–4 days in the fridge. For longer storage, freeze them in well-sealed containers or freezer bags.
❄️ Avoid Freezer Burn
Wrap food tightly in plastic wrap, foil, or freezer-safe bags to avoid that frosty layer that ruins texture and flavor.
🧼 Bonus Tip:
Keep your fridge clean and organized. It’s easier to track what you have and reduces the chance of missing items until they’re too far gone.
✨ Creative Approaches to Bringing Back Flavor

Sometimes leftovers fall flat—not just in texture, but in taste. The trick isn’t starting from scratch—it’s knowing how to wake up flavor and moisture without overdoing it. A few clever touches can turn yesterday’s meal into today’s favorite.
🧂 Balancing Spices and Seasonings
Leftovers often lose their kick. Luckily, it only takes a few pantry staples to bring them back to life:
- Salt: A small pinch can brighten hidden flavors.
- Acid: A squeeze of lemon, a splash of vinegar, or a spoonful of pickle brine can refresh heavier dishes instantly.
- Fresh Herbs: Sprinkle on chopped parsley, cilantro, or chives to add color and a lively finish.
- Spices: A dash of black pepper, red pepper flakes, smoked paprika, or curry powder adds depth and energy.
💡 Tip: Taste as you go. Adding seasoning in small amounts prevents overpowering the dish—and helps you rediscover its best version.
Example Pairings:
- Roasted vegetables → balsamic drizzle + thyme
- Rice or grains → lime juice + chopped scallions
- Meat dishes → mustard, soy sauce, or chili oil (just a touch!)
💧 Using Moisture Wisely to Avoid Dryness
Dry food is a common leftover problem—but soggy food isn’t any better. The key is gentle moisture, added with purpose:
- Broths & Stocks: Add a spoonful when reheating casseroles, grains, or roasted meats to restore softness.
- Oils & Butters: A drizzle of olive oil or melted butter can revive dry pasta, stir-fries, or potatoes.
- Steam it: Use a skillet with a lid to reheat food with a splash of water or broth. The steam rehydrates gently.
- Dress It Up: A spoonful of dressing, yogurt sauce, or light gravy can bring both flavor and softness to grain bowls, roasted veggies, or sandwiches.
🍽️ Less is more: The goal is to coat—not drown—the food. A little moisture goes a long way in bringing back a fresh-cooked feel.


Ooh, this looks amazing! I’m always looking for ways to upgrade my leftovers and avoid food waste. The pasta tip especially caught my eye – I’m guilty of reheating pasta wrong so often! Can’t wait to try these seven methods, thanks for sharing!