Contents
- 1. Freeze Fresh Herbs in Olive Oil for Instant Flavor Boosts
- 2. Peel Garlic Effortlessly Using a Jar or Shaker
- 3. Peel Ginger the Easy Way — With a Spoon, Not a Knife
- 4. Bake Your Bacon for Perfect Results and No Greasy Mess
- 5. Roll Citrus Before Cutting for More Juice with Less Effort
- 6. Soften Butter Quickly with a Warm Glass — No Melting Needed
- 7. Use Unflavored Dental Floss for Perfectly Clean Cuts
- 8. Slice a Bunch of Cherry Tomatoes at Once with This Plate Trick
- Bonus Tip: Time-Saving Kitchen Tools That Do the Work for You
- Organizational Tips for a Streamlined, Stress-Free Kitchen
- Maintenance and Cleaning Hacks for a Greener, Healthier Kitchen
Let’s face it — no matter how much we love food, cooking on a daily basis can feel overwhelming. Between juggling work, errands, and family time, even the simplest meal prep can eat up more hours than expected.
That’s why mastering a few clever kitchen hacks can be a game-changer. With just a little planning and a touch of creativity, you can cut your prep time in half, reduce clean-up stress, and enjoy the process a whole lot more.
Whether you’re a beginner cook or a seasoned home chef, these 8 time-saving kitchen tricks will make your everyday routine more efficient — and maybe even a little fun.
From smarter ingredient prep to organizing your workspace like a pro, these tips aren’t complicated — but they’ll have a big impact. Ready to cook smarter, not harder? Let’s dive in.
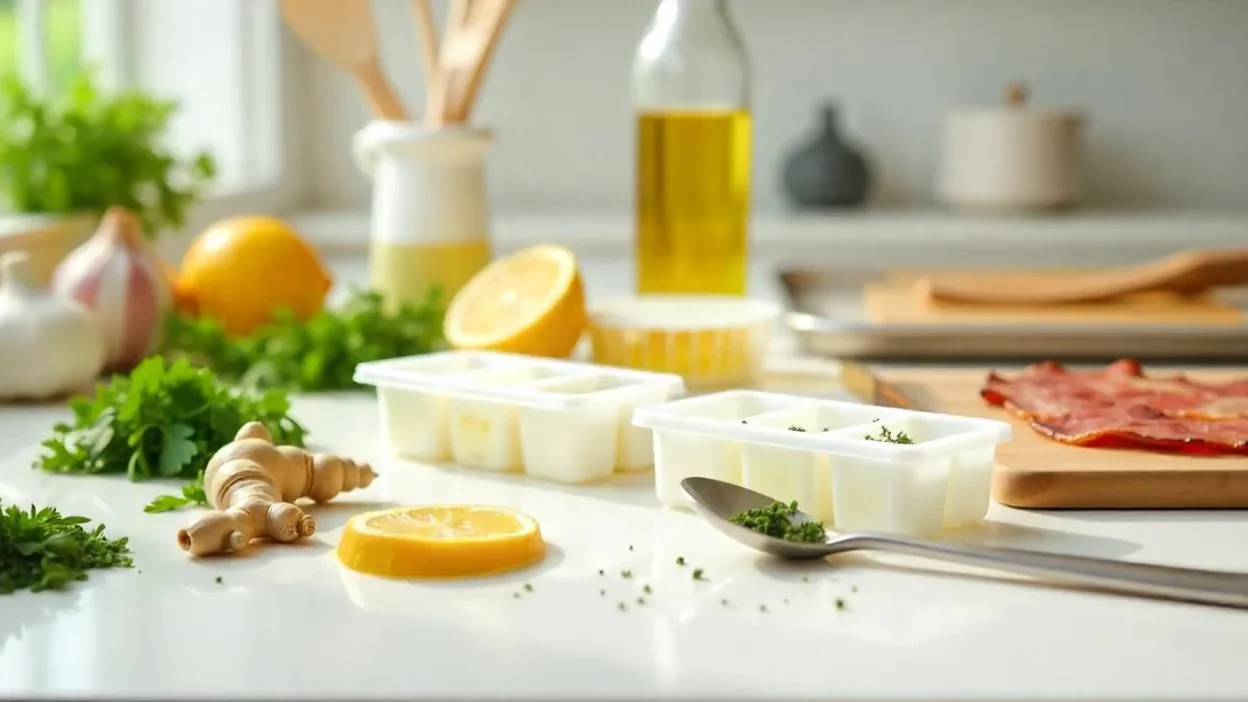
1. Freeze Fresh Herbs in Olive Oil for Instant Flavor Boosts

Tired of buying fresh herbs only to watch them wilt in your fridge after two days? This brilliant hack not only preserves their flavor but also saves you precious prep time — and reduces food waste.
How it works:
Chop up your favorite fresh herbs like basil, parsley, thyme, rosemary, dill, or cilantro, then mix them with a good-quality olive oil (or another neutral oil you use for cooking). Spoon the herb-oil mixture into an ice cube tray and freeze.
Once solid, transfer the cubes into a labeled freezer-safe bag or container. You now have ready-to-use flavor bombs at your fingertips.
How to use them:
These herb-infused oil cubes can be added directly to hot pans, soups, sauces, stews, or roasts. Drop one into a skillet to start a stir-fry or pasta base, or melt into scrambled eggs or roasted vegetables for an instant infusion of flavor.
🕒 Why it saves time:
No more chopping herbs every time you cook. No more wilted bunches going to waste. And no extra dishes to clean — just grab and go.
2. Peel Garlic Effortlessly Using a Jar or Shaker
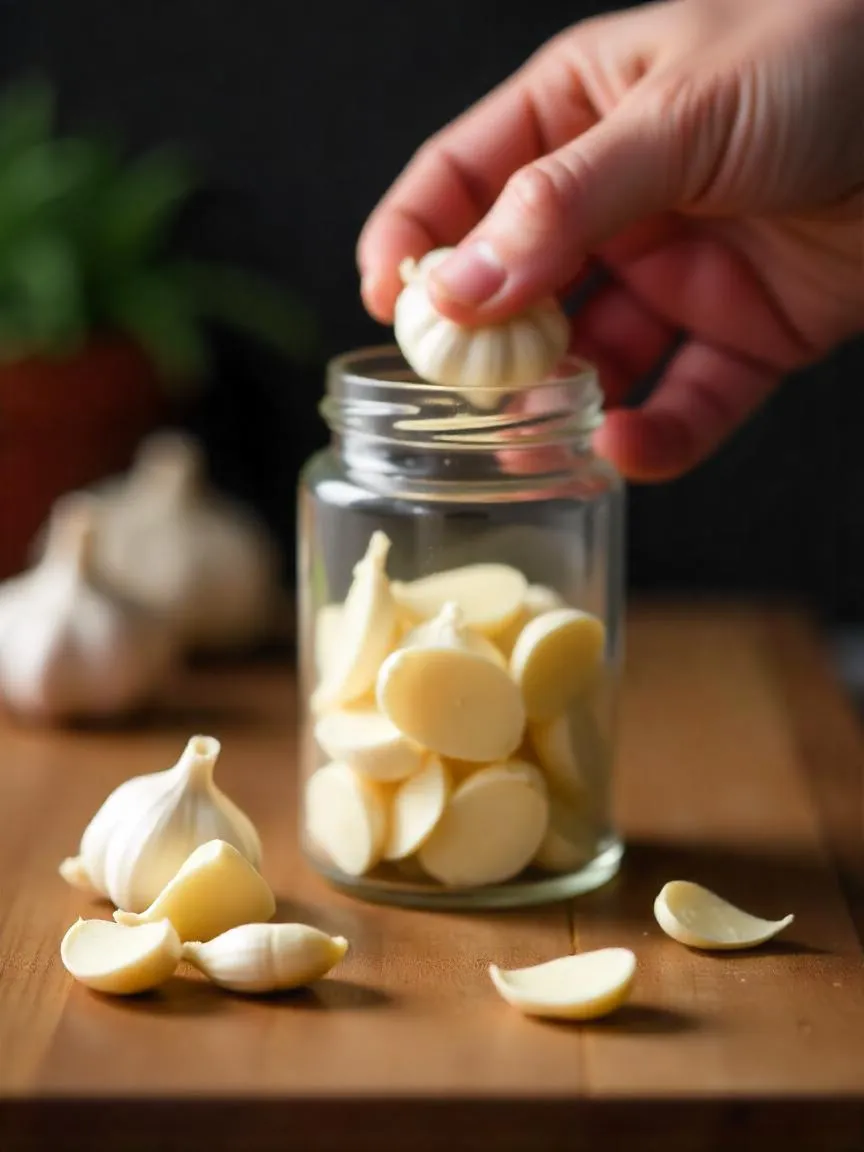
If you love cooking but dread peeling garlic, you’re not alone. Garlic adds incredible depth to any dish, but removing those stubborn papery skins can be a real time-sink — not to mention the lingering smell on your hands.
Here’s a genius kitchen hack that solves both problems: peel garlic using a jar or shaker.
How it works:
Pop a handful of garlic cloves into a clean glass jar, cocktail shaker, or any container with a tight-fitting lid. Seal it and shake vigorously for 15–20 seconds. The cloves will smash against the walls and each other, loosening the skins completely.
Open the lid and voilà — the garlic cloves are clean, and the skins have separated. No knives. No sticky fingers. No lingering garlic smell.
Why it’s awesome:
- 🧄 Peels multiple cloves at once — perfect for batch cooking or prepping for a party
- 👃 Keeps your hands odor-free
- ⏱️ Saves loads of time compared to peeling by hand
Pro tip: This hack works even better if you gently crush the cloves with the side of a knife first — but even without that, a good shake does the trick.
3. Peel Ginger the Easy Way — With a Spoon, Not a Knife
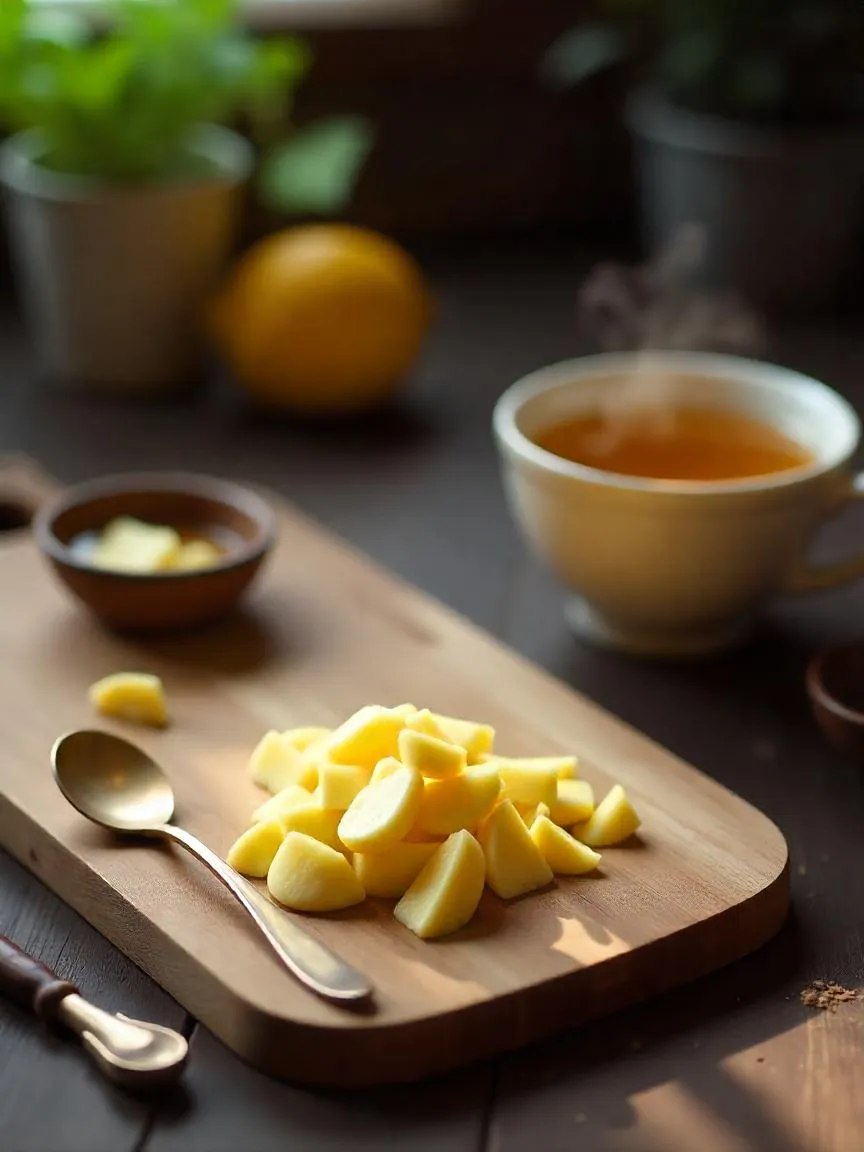
Fresh ginger adds a warm, spicy kick to both sweet and savory dishes — but peeling it with a knife can be wasteful, slippery, and even dangerous. Thankfully, there’s a simple, clever trick that chefs swear by: use a spoon.
How it works:
Hold a piece of ginger root in one hand and a metal spoon in the other. Use the edge of the spoon to scrape the skin away. The thin peel comes off easily, even around the ginger’s knobby curves, without taking too much of the good stuff with it.
Why it’s better than using a knife:
- 🥄 No waste — you keep more of the actual ginger
- 💡 Safe and beginner-friendly — far less risk of cuts
- 🔍 Reaches into tight spots — perfect for those odd ginger shapes
- ⏱️ Much faster cleanup with less mess
Whether you’re grating ginger for stir-fry, blending it into a smoothie, or adding it to baked goods, this spoon method will save you time and frustration.
4. Bake Your Bacon for Perfect Results and No Greasy Mess

Skip the skillet and ditch the grease splatter — baking bacon in the oven is one of the easiest ways to make perfect, crispy strips without standing over a hot pan. It’s a cleaner, faster, and more hands-off method that delivers consistent results every time.
How to do it:
- Preheat your oven to 400°F (200°C).
- Line a baking sheet with parchment paper or aluminum foil for easy cleanup.
- Arrange the bacon slices in a single layer, making sure they don’t overlap.
- Bake for 15–20 minutes, depending on thickness and desired crispness.
- Transfer to a paper towel-lined plate to absorb excess fat.
Why it works:
- 🔥 The oven cooks bacon evenly on both sides — no flipping required
- 💦 No messy grease splatter all over your stove
- 🧽 Cleanup is a breeze — just toss the foil or parchment
- 🍳 Frees up stove space for eggs, pancakes, or other breakfast essentials
Bonus Tip: For extra-crispy bacon, place a wire rack over the baking sheet and lay the slices on top. This allows the fat to drip below, making the bacon even crunchier.
5. Roll Citrus Before Cutting for More Juice with Less Effort
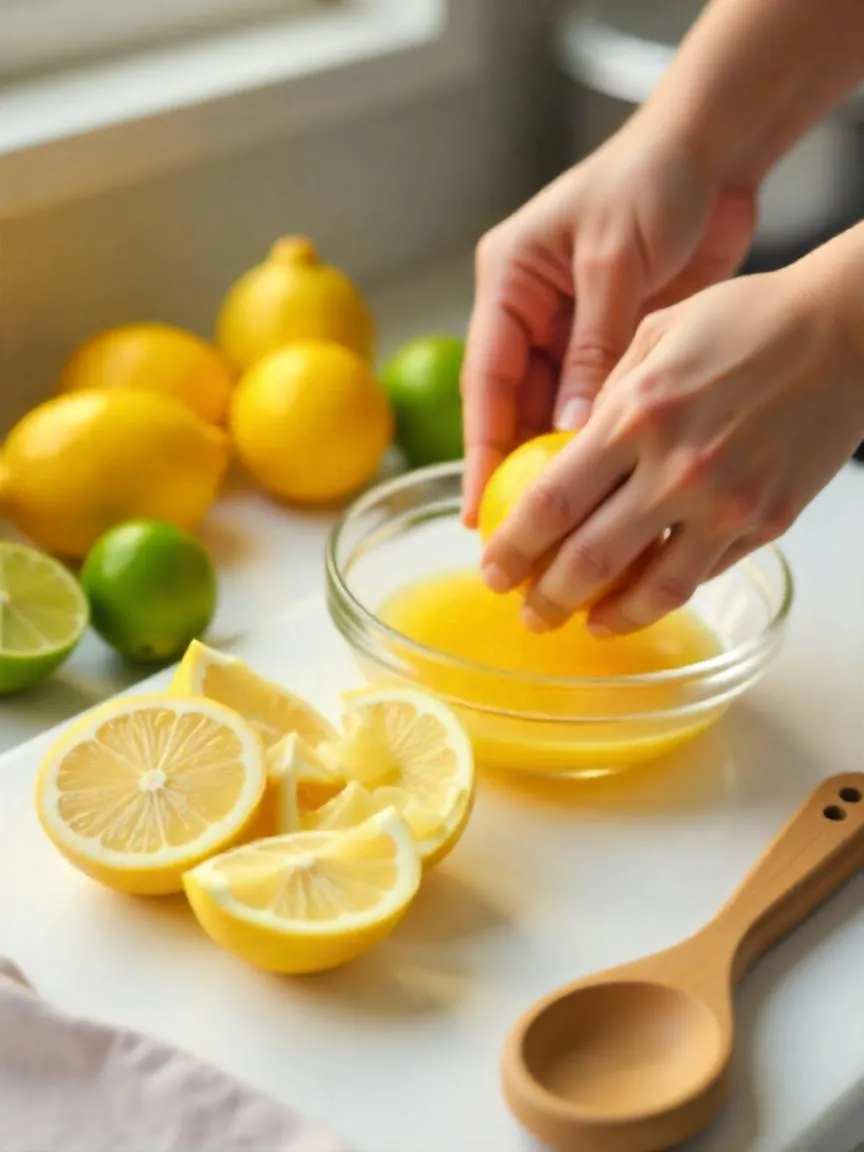
Squeezing lemons and limes only to get a few sad drops? Here’s a quick kitchen trick that takes just seconds but can double your juice yield — and it requires no gadgets or fancy tools.
The trick? Just roll your citrus fruit on the counter before slicing.
How to do it:
Place the lemon, lime, or orange on a hard surface. Using the palm of your hand, apply gentle but firm pressure while rolling it back and forth for 10–15 seconds. This motion breaks down the inner cell walls, releasing the juice and making the fruit easier to squeeze.
Why it works:
- 🍋 Maximizes juice output — especially helpful when you only have one lemon
- 💪 Takes less strength to squeeze
- ⏱️ Saves time and fruit — no need to cut extra just to get enough liquid
- 💧 Perfect for salad dressings, marinades, cocktails, or baking
Bonus Tip: For even more juice, pop the citrus into the microwave for 10 seconds before rolling — especially helpful if it was in the fridge.
6. Soften Butter Quickly with a Warm Glass — No Melting Needed

Forgot to take the butter out of the fridge? We’ve all been there — especially when baking. Instead of waiting 30+ minutes or risking a melted mess in the microwave, try this clever hack using a warm glass to bring your butter to perfect spreading or mixing consistency in just a minute.
Here’s how it works:
- Cut a slice or small block of cold butter and place it upright on a plate or countertop.
- Take a sturdy glass goblet or drinking glass and warm it by either:
- Running it under hot tap water for 20–30 seconds
- Placing it in the microwave with water inside, heating for 30 seconds, then emptying it
- Quickly dry the glass, then invert it over the butter to trap the heat inside.
- Let it sit for 1–2 minutes, and voilà — your butter will soften without melting.
Why it’s great:
- 🧈 Even, controlled softening — perfect texture for baking or spreading
- ⏱️ Faster than waiting at room temp
- 🔥 No risk of melting like with a microwave
- 💡 No extra dishes or mess
This trick is ideal when you’re about to cream butter with sugar, make toast, or need soft butter for pastries on short notice.
7. Use Unflavored Dental Floss for Perfectly Clean Cuts

Want bakery-level cake slices or cheese boards that look like they came from a Michelin kitchen? Here’s a surprisingly genius tool hiding in your bathroom cabinet: unflavored dental floss.
Yes — really.
Why it works:
Dental floss is thin, sharp, and flexible, making it ideal for slicing through soft or delicate foods without sticking, crumbling, or smearing.
What you can slice with floss:
- 🎂 Layered cakes — get clean, even slices without ruining the frosting
- 🧀 Soft cheeses like brie, goat cheese, or mozzarella
- 🍫 Brownies and bars — avoid dragging crumbs with a knife
- 🍞 Cinnamon rolls or dough — before baking, for even portions
How to use it:
- Use unflavored, unwaxed floss to avoid any taste or residue.
- Cut a long piece, hold it tight between both hands.
- Press down gently and evenly through the food item.
- Pull out sideways instead of lifting, for the cleanest finish.
Pro Tip: You can even use this method to level cakes before stacking layers.
8. Slice a Bunch of Cherry Tomatoes at Once with This Plate Trick
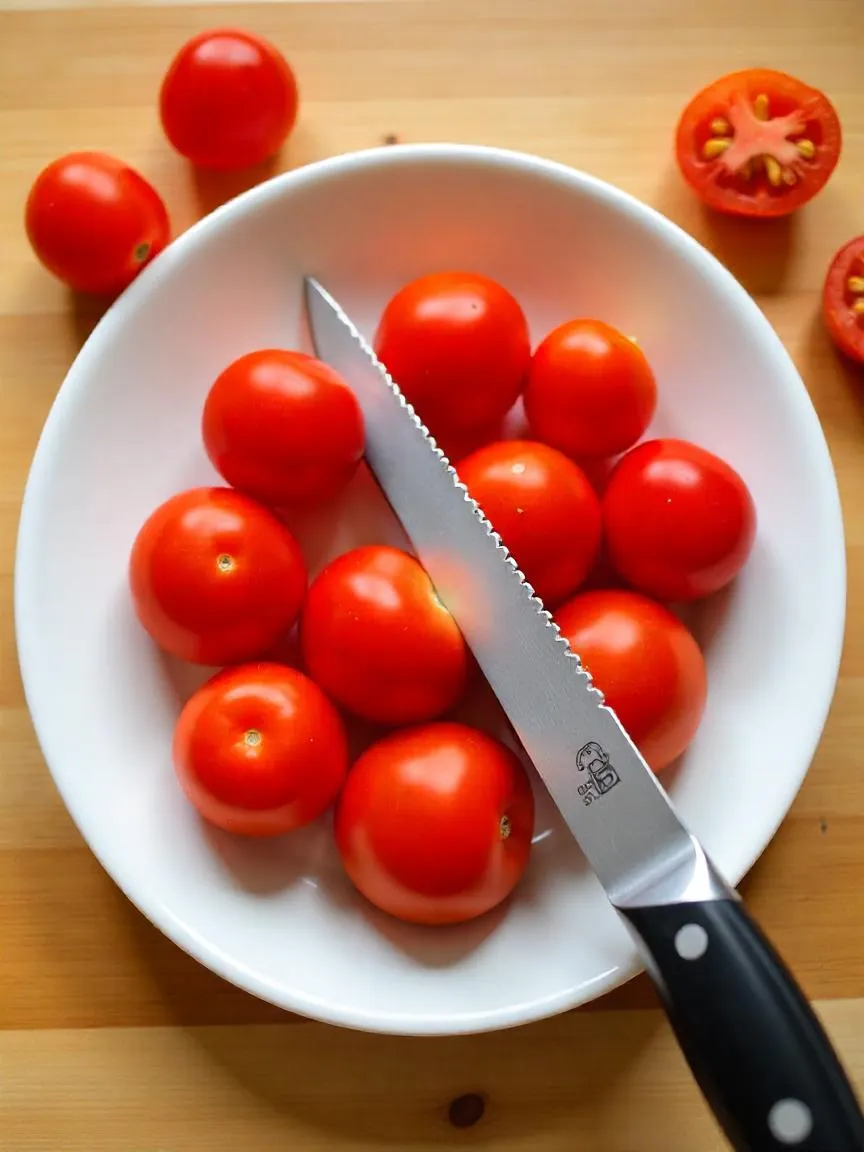
Tired of cutting cherry tomatoes one by one? When you’re prepping salads, pastas, or lunchboxes, those little red gems can really slow you down. But with this simple hack using two plates or lids, you can slice a whole batch in seconds — with zero mess and perfectly even results.
How it works:
- Grab two small plates or plastic container lids that are the same size.
- Place a single layer of cherry or grape tomatoes on the bottom plate.
- Gently press the second plate or lid on top to hold the tomatoes in place — but don’t squish them.
- Slide a sharp serrated knife horizontally between the plates, slicing through all the tomatoes at once.
Why it’s genius:
- 🍅 Saves tons of time — cut 10–15 tomatoes in one smooth motion
- 🔪 Even slices every time, great for presentation
- 🧼 Less mess and fewer knife slips
- 🥗 Perfect for salads, sandwiches, pasta, and meal prep
Bonus Tip: This method also works for other small, round ingredients like grapes or olives!
Bonus Tip: Time-Saving Kitchen Tools That Do the Work for You
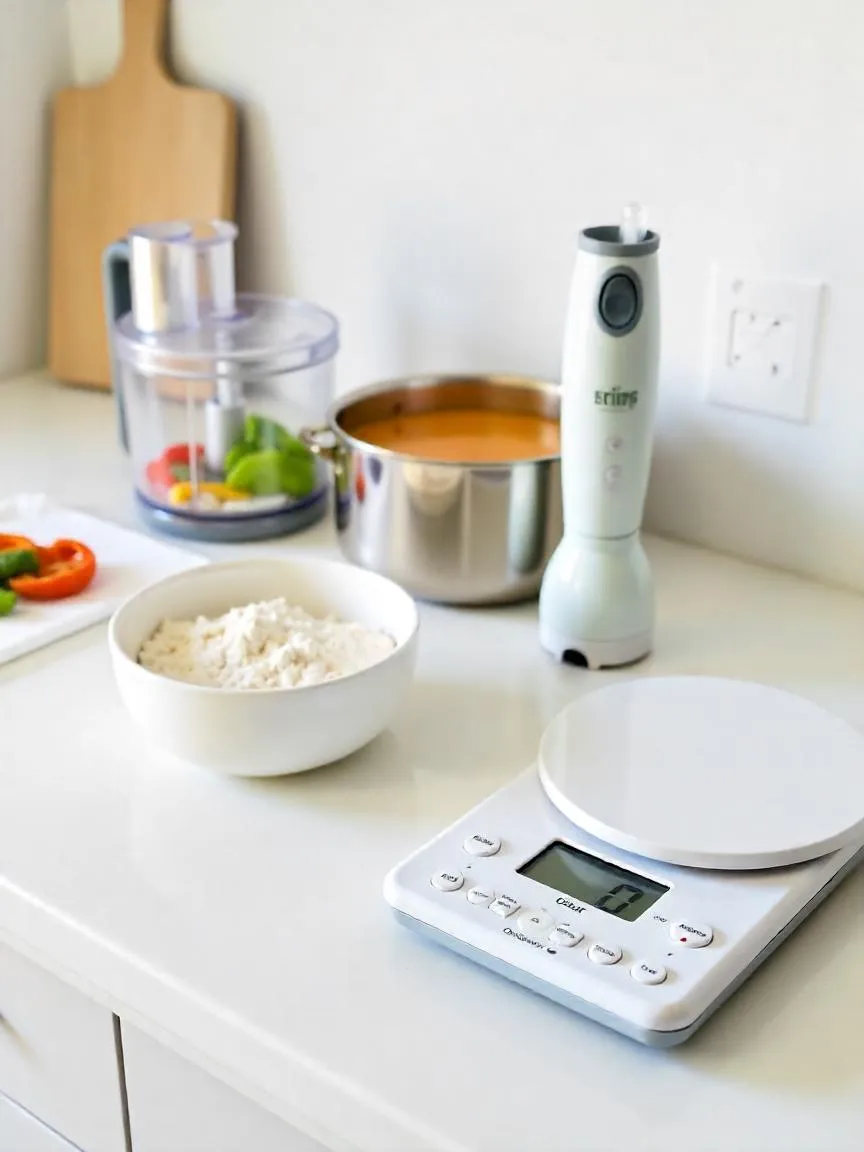
Sometimes, the secret to cooking faster isn’t just about technique — it’s about having the right tools. A few smart gadgets can completely transform how you move in the kitchen, saving you time, effort, and counter space.
🔧 Multifunctional Tools = Fewer Steps, Fewer Dishes
Why chop, mix, and puree by hand when one tool can do it all? Here are a few must-have kitchen tools that pull double (or triple) duty:
- 🌀 Food Processor – The ultimate time-saver. It slices, dices, grates, and purees in seconds. Great for meal prep, sauces, doughs, and even shredding cheese.
- 🍲 Immersion Blender – Blend soups, smoothies, or sauces right in the pot without transferring hot liquids to a blender (and avoiding extra clean-up).
- ⚖️ Measuring Cups with Built-In Scales – These hybrid tools measure by volume and weight in one container, making baking and portioning super efficient.
- 🔢 Digital Kitchen Scale with Unit Conversion – Speeds up recipes, especially international ones. Automatically switches between grams, ounces, and milliliters.
🛠️ Why these tools matter:
- Cut prep time in half
- Reduce dirty dishes
- Improve accuracy in cooking and baking
- Make complicated tasks (like emulsifying or slicing large batches) effortless
Investing in time-saving kitchen equipment doesn’t mean buying every gadget — just the right ones that truly match your cooking style.
Organizational Tips for a Streamlined, Stress-Free Kitchen
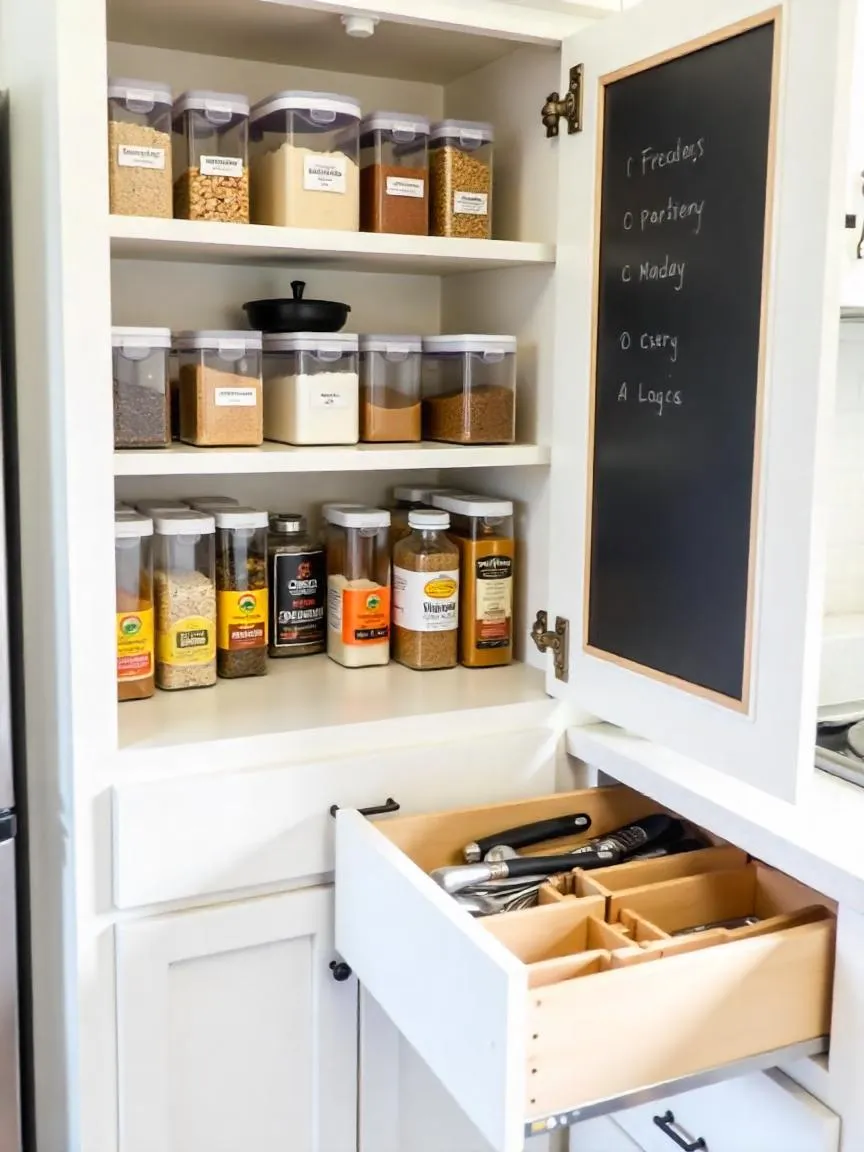
A cluttered kitchen slows you down. A smartly organized one makes cooking faster, easier, and even more fun. With a few simple changes, your kitchen can go from chaotic to calm — no renovation required.
🧂 Pantry Organization Tips That Actually Work
Your pantry is the control center of your kitchen — when it’s organized, meal prep becomes a breeze.
- 🏷️ Group similar items: Keep grains, canned goods, baking supplies, and snacks in clearly defined zones.
- 🔍 Use clear containers: They let you see exactly what you have, and labels keep everything in its place.
- 📏 Go vertical: Stackable bins, tiered spice racks, and hanging shelves maximize small spaces.
- 🔄 Use turntables (lazy Susans): Great for accessing oils, sauces, or jars in deep shelves.
- 🗓️ Track expiration dates: Stick an inventory list on the inside of the pantry door so you waste less and shop smarter.
🗂️ Smart Storage Solutions for Every Corner
Think beyond the drawer. These clever storage upgrades will optimize your workflow and cut down on daily kitchen stress:
- 🍴 Drawer dividers: Separate utensils, measuring tools, and gadgets so you can grab what you need instantly.
- 🔪 Magnetic knife strips: Free up drawer space and keep knives safely within reach.
- 🧺 Bins and baskets: Great for grouping small or oddly shaped items like seasoning packets, tea bags, or food wraps.
- ☕ Create task zones: A baking station, smoothie corner, or coffee bar helps streamline your routine.
- 🔧 Adjustable cabinet shelves: Fit tall pans or stackable containers more efficiently.
Pro Tip: Declutter first, organize second. Let go of duplicate tools and expired ingredients — your kitchen will instantly feel bigger and more manageable.
Maintenance and Cleaning Hacks for a Greener, Healthier Kitchen
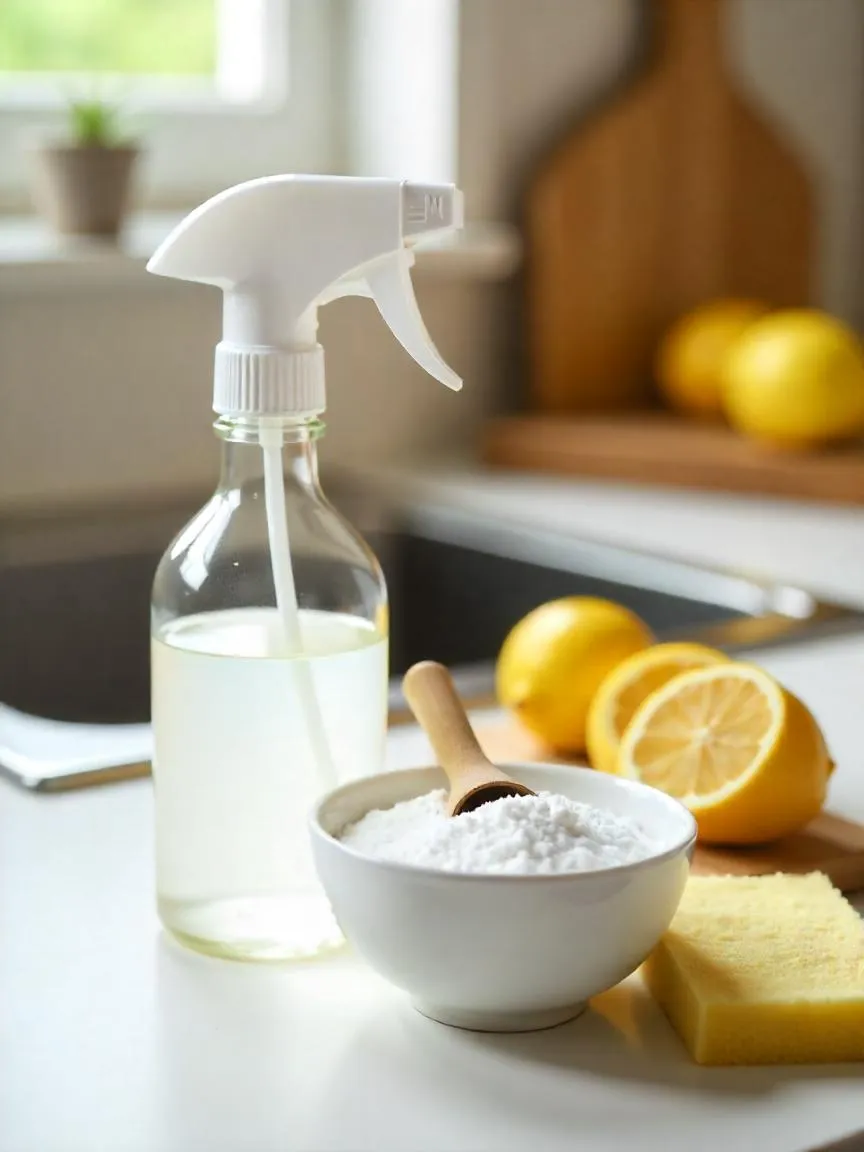
A clean kitchen isn’t just about looks — it’s about health, safety, and peace of mind. The best part? You don’t need harsh chemicals to keep your cooking space sparkling. With just a few everyday ingredients, you can tackle messes in a way that’s eco-friendly, affordable, and safe for your family.
🌿 Eco-Friendly Cleaning Staples That Really Work
Skip the toxic sprays and overpriced cleaners. These natural ingredients are surprisingly powerful — and far gentler on your skin, lungs, and the planet.
- 🍋 Lemon Juice
Naturally acidic, lemon juice cuts through grease, kills germs, and deodorizes. Mix with warm water to clean cutting boards, countertops, and sinks, or rub a halved lemon directly on stains. - 🧼 Baking Soda
This gentle abrasive lifts grime, burnt-on food, and stains. Make a paste with water to scrub stovetops, inside ovens, or stainless steel. It’s also great for neutralizing odors in the fridge. - 🧴 White Vinegar
A powerhouse all-purpose cleaner. Mix equal parts vinegar and water in a spray bottle to clean glass, tile, appliances, and floors. It also removes limescale and soap scum with ease.
💡 Quick Tips for Kitchen Maintenance:
- Keep a spray bottle of vinegar solution on hand for daily wipe-downs
- Sprinkle baking soda in your sink or garbage disposal, then follow with lemon juice for a fizzy fresh clean
- Clean cutting boards weekly with lemon and salt to sanitize and remove stains
- Use reusable cloths instead of paper towels to reduce waste
These natural solutions not only clean effectively but also reduce exposure to harsh fumes and cut down on plastic waste. Small changes like these create a big impact — in your kitchen and beyond.


So true! Between work and kids, I’m always looking for ways to streamline meal prep. Looking forward to seeing those 8 tricks!