
Contents
Ever craved a dish that’s quick to make yet feels like something special? The frittata is here to save your day — whether it’s breakfast, brunch, lunch, or dinner. This egg-based wonder is a perfect go-to when you’re short on time but still want something satisfying and flavorful.
The first time I attempted to make one, I’ll admit I was skeptical. I worried it would turn out rubbery, too eggy, or bland. But once I nailed the balance, frittatas became a regular part of my rotation. They’re wonderfully forgiving and endlessly adaptable — and best of all, they require very little effort.

Let’s walk through each step to crafting the perfect frittata — from choosing ingredients to mastering the stovetop or oven finish. You’ll be amazed at how something this simple can taste so good. Ready? Let’s get cracking! 😄
Ingredients that set the tone 🥚🍅🧀
Every great dish begins with excellent ingredients. And with frittatas, each element contributes to the overall taste, texture, and appearance — so choosing wisely really pays off.
Eggs: the foundation
Eggs are the core of the frittata. Use the freshest you can find — ideally organic or pasture-raised, as they typically have richer yolks and better flavor. The difference might seem small, but once you taste it, you’ll understand why it matters.
If you can, peek inside the carton and check the yolk color. Deep golden or even orange yolks signal a nutrient-rich diet for the hens, which translates to a richer-tasting egg. Always check expiration or sell-by dates — fresh eggs whip better, cook lighter, and taste cleaner.
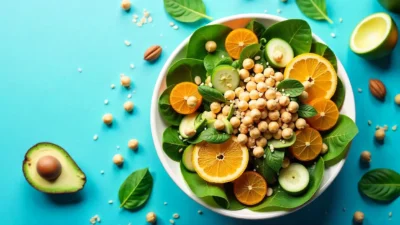
Veggies: flavor and color in every bite 🌈
Frittatas are the perfect way to use up vegetables before they go bad. You can toss in just about anything — bell peppers, spinach, mushrooms, zucchini, leeks, scallions, cherry tomatoes, or even leftover roasted vegetables.
Using what’s in season is always smart — not only are seasonal veggies more affordable and accessible, but they also have better flavor and nutritional value. Plus, a rainbow of veggies makes your frittata look gorgeous and appetizing.
Before adding them to your eggs, give your vegetables a quick sauté. Use olive oil or butter and cook until they’re softened and just beginning to caramelize. This enhances sweetness and prevents sogginess. Don’t skip this step — raw vegetables can release water into the eggs and make your frittata watery.
Finish with a handful of chopped fresh herbs like parsley, dill, basil, or chives. These little touches brighten everything up and add layers of aroma and taste.
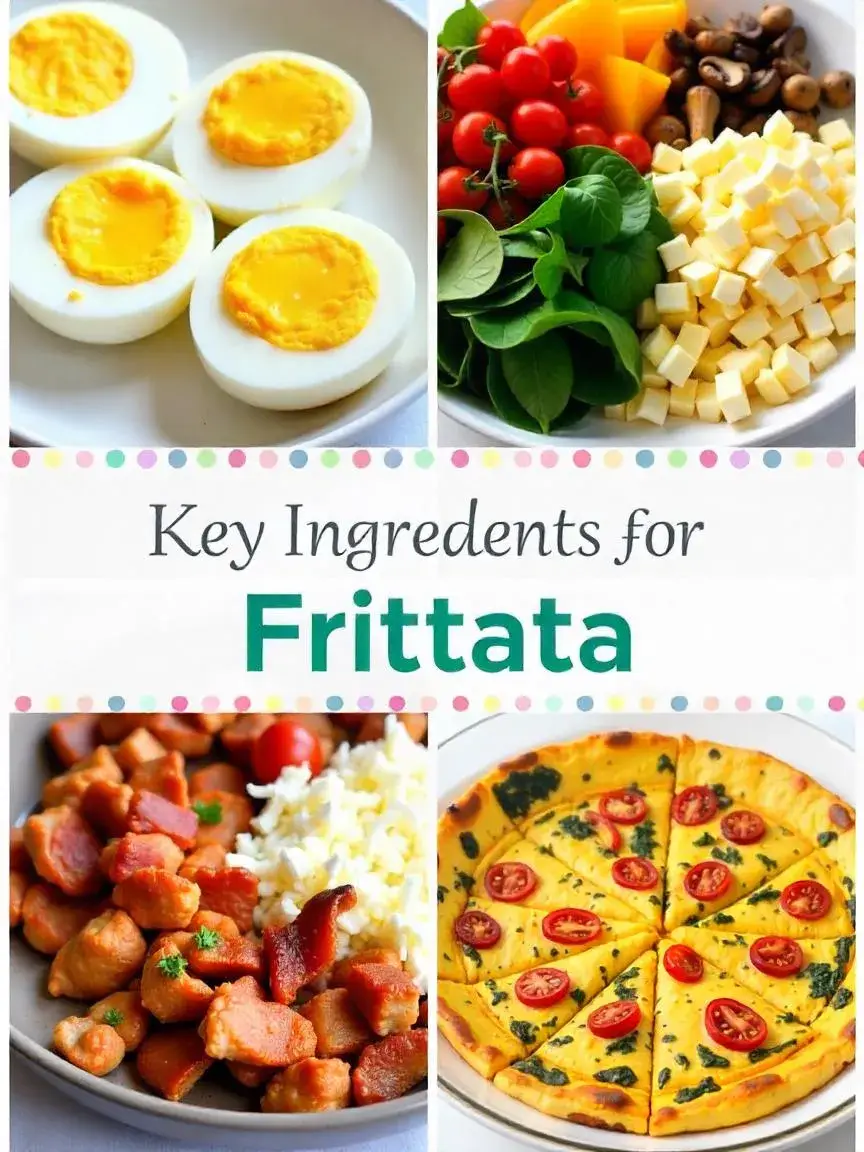
Cheese: that creamy goodness 🧀
Cheese gives frittatas their indulgent, comforting depth. From sharp cheddar to goat cheese, mozzarella, Gruyère, or feta — each brings a unique flavor and texture.
If you’re unsure what to pick, try a mix: a creamy cheese like brie with something sharp like parmesan. Crumble soft cheeses or grate hard ones so they melt evenly into the eggs.
Cheese can go inside the frittata or sprinkled on top before baking for a bubbly, golden finish.
Protein: make it more filling 🥓🍗🌱
Want to turn your frittata into a full-on meal? Add protein. Leftover chicken, cooked sausage, crispy bacon, ham, or smoked salmon are all fantastic options. For vegetarians, marinated tofu, seared tempeh, or hearty beans work too.
Important: whatever protein you choose, make sure it’s pre-cooked and well-drained before mixing in. Extra moisture or fat can throw off the texture.
The gear that makes it easier 🔪🍳
You don’t need a professional setup to make a great frittata, but having the right tools makes cooking more efficient and cleanup easier.
Pick the right pan
Use a 10- to 12-inch non-stick skillet for easy release and even cooking. It should ideally be oven-safe — that way you can start on the stove and finish in the oven for perfect texture.
If you have a well-seasoned cast iron skillet, that’s a great option too. It holds heat superbly and gives your frittata a beautifully crisp edge.
Kitchen tools you’ll use often
A strong, heatproof spatula
- A whisk or fork for beating eggs thoroughly
- A good chef’s knife and cutting board for prep
- Measuring spoons or a digital scale for seasoning and balance
A little prep goes a long way — having everything at hand keeps you relaxed and organized.
Prepping the smart way 🥒🧅
Taking time to prep everything ahead of cooking makes a big difference. Not only does it keep your cooking area clean, but it helps you build flavor in each bite.
Start by rinsing and drying all produce. Chop your veggies uniformly to ensure even cooking. For example: thinly slice mushrooms, dice peppers small, and tear spinach into bite-sized pieces.
Crack your eggs into a mixing bowl — use 6 to 8 for a standard skillet. Whisk them until fully combined and season with salt and pepper. For added creaminess, mix in a splash of milk, half-and-half, or even unsweetened yogurt.
Sauté any vegetables or meats that need pre-cooking and let them cool slightly before adding to the egg mixture. This prevents overcooking the eggs when everything is combined.
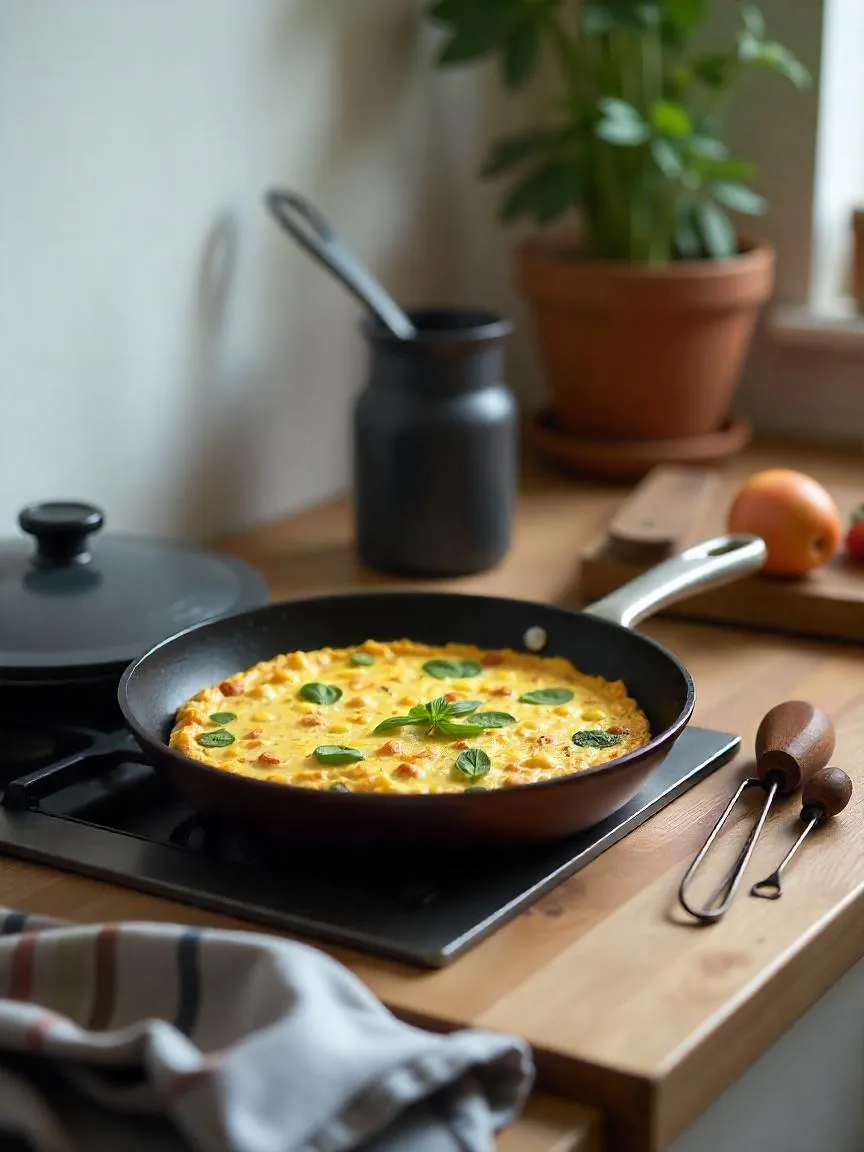
Two ways to cook — both foolproof 🔥
Stovetop style
Preheat your skillet over medium heat. Grease it lightly with butter or olive oil. Pour in your egg mixture and let it sit untouched for 5 to 7 minutes.
When the edges begin to set, use your spatula to gently lift them, letting uncooked egg slide underneath. This trick helps the center cook evenly.
If the top still looks a bit wet but the bottom is nicely set, cover the pan with a lid to finish. Alternatively, you can pop the whole pan under a broiler for a couple of minutes for a lightly browned top.
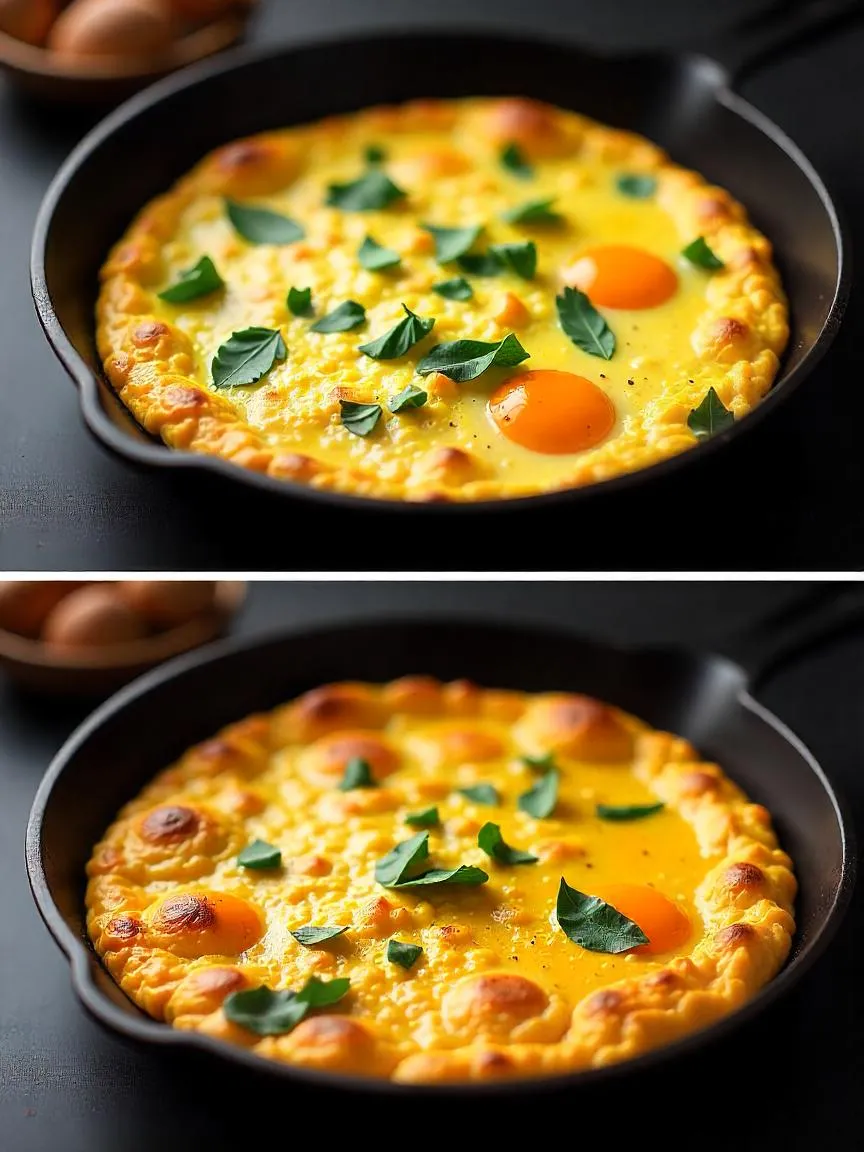
In the oven
Preheat the oven to 375°F (190°C). Grease your oven-safe skillet or baking dish and pour in your egg mixture. Bake for 15–20 minutes or until the center is just set.
For a golden, slightly crisp top, switch on the broiler for the last 2–3 minutes. Watch closely to avoid burning!
How to tell it’s done
Give the pan a gentle jiggle — the center should move slightly but not appear liquidy. You can also test with a knife or toothpick. If it comes out clean, it’s ready.
Let it sit for a few minutes before slicing — this helps it firm up for cleaner wedges.
Serve it up with style 🥗🍞
How you present your frittata can really elevate the whole meal experience, even if you’re just sitting down for a casual bite. Start by slicing your frittata into generous wedges — thick enough to hold their shape but still easy to eat. Arrange the slices thoughtfully on a large platter for sharing, or place individual wedges neatly on each plate for a more refined touch. A light sprinkle of fresh herbs like parsley, basil, or chives adds a burst of color and freshness, making the dish visually appealing. For an extra touch of flavor and shine, drizzle a little high-quality olive oil or a balsamic glaze over the top — it’s a small detail that makes a big difference.🥗

To complement the richness of the frittata, serve it alongside a crisp, refreshing salad. Arugula with its peppery bite, tender baby greens, or even shaved fennel tossed with a simple lemon vinaigrette bring a bright contrast and balance the flavors beautifully. Adding crusty bread or a freshly baked baguette is a fantastic way to round out the meal — not only does it provide satisfying texture and substance, but it’s perfect for mopping up any remaining deliciousness on your plate.🍆🌽
If you’re looking to make the meal a bit heartier or want to add some variety, roasted potatoes seasoned with herbs and garlic, sautéed greens like spinach or kale, or grilled seasonal vegetables are excellent choices. They add both color and nutrition, making your plate a feast for the eyes and the palate. When it comes to beverages, sparkling water with a twist of lemon or lime is wonderfully refreshing, especially on warmer days. For a more celebratory vibe, a glass of chilled, light white wine pairs beautifully with the savory, cheesy notes of the frittata.🍷
Saving what’s left — yes, it reheats well
If you happen to have leftovers — which is a great problem to have — it’s important to store your frittata properly to keep all that flavor and texture intact. First, allow the frittata to cool completely at room temperature; this helps prevent condensation which can make it soggy when stored. Once cooled, wrap it tightly in plastic wrap or transfer it into an airtight container to preserve freshness.😄❄️
Stored in the refrigerator, your frittata will stay good for about 3 to 4 days, making it an ideal make-ahead meal for busy days. For longer storage, freezing is a fantastic option. Slice the frittata into portions before freezing so you can easily thaw and reheat just what you need without waste. Frozen frittata can last up to two months without losing quality.
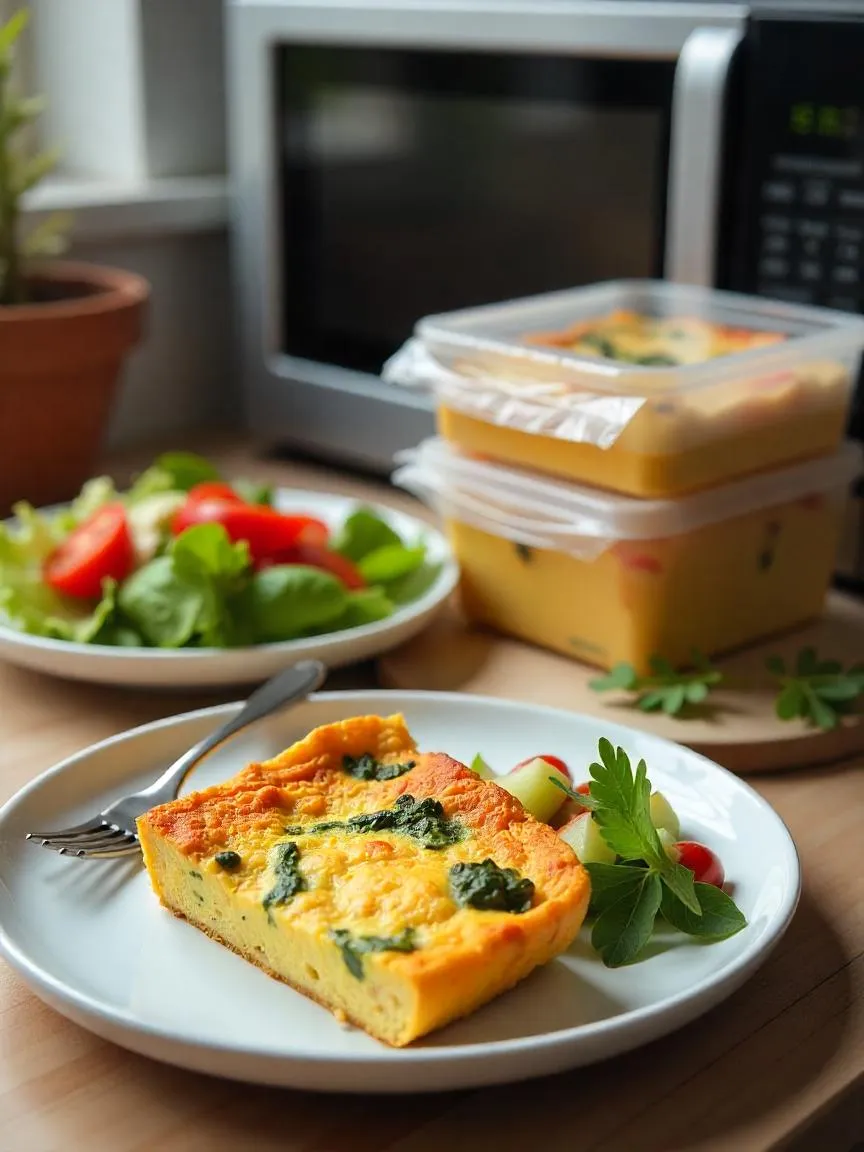
When you’re ready to enjoy the leftovers, reheat gently to avoid drying out. The oven is often best — preheat to a low temperature (around 300°F or 150°C) and warm the slices covered with foil until heated through. If you’re in a hurry, the microwave works too; cover the frittata lightly to retain moisture, and heat in short bursts, checking often to prevent overcooking.🔥
Leftover frittata is perfect for quick lunches, snacks, or even a light dinner when paired with a simple salad or soup. Its flavors often deepen overnight, so you might find it tastes even better the next day!


OMG, yes! Frittatas are my absolute LIFE SAVER. I used to think they were some fancy-pants dish, but this article totally nailed it – so easy and adaptable! My go-to is roasted veggie and feta, but I’m totally trying some new combos now. Thanks for the reminder!