Contents
- 🧂 Fundamentals of Salting Salmon – What You Really Need to Know
- 🐟 Choosing the Right Type of Salmon for Salting
- 🧪 How Salt Affects Salmon – The Science Behind the Cure
- 🧂 Step-by-Step Salting Methods for Salmon
- 💧 Wet Brining Method for Salmon – Juicy, Flavorful Results
- 🧂 Tips for Even Salt Distribution – Balanced Flavor Every Time
- ⏱️ How Long to Salt Salmon – Timing for Perfect Texture
- 🍽️ Using Salted Salmon in Recipes – Flavor, Versatility & Storage Tips
- 🔪 Preparing Salted Salmon for Cooking – Rinse, Rest & Cook with Confidence
- 🍴 Popular Dishes with Salted Salmon – Global Favorites & Modern Uses
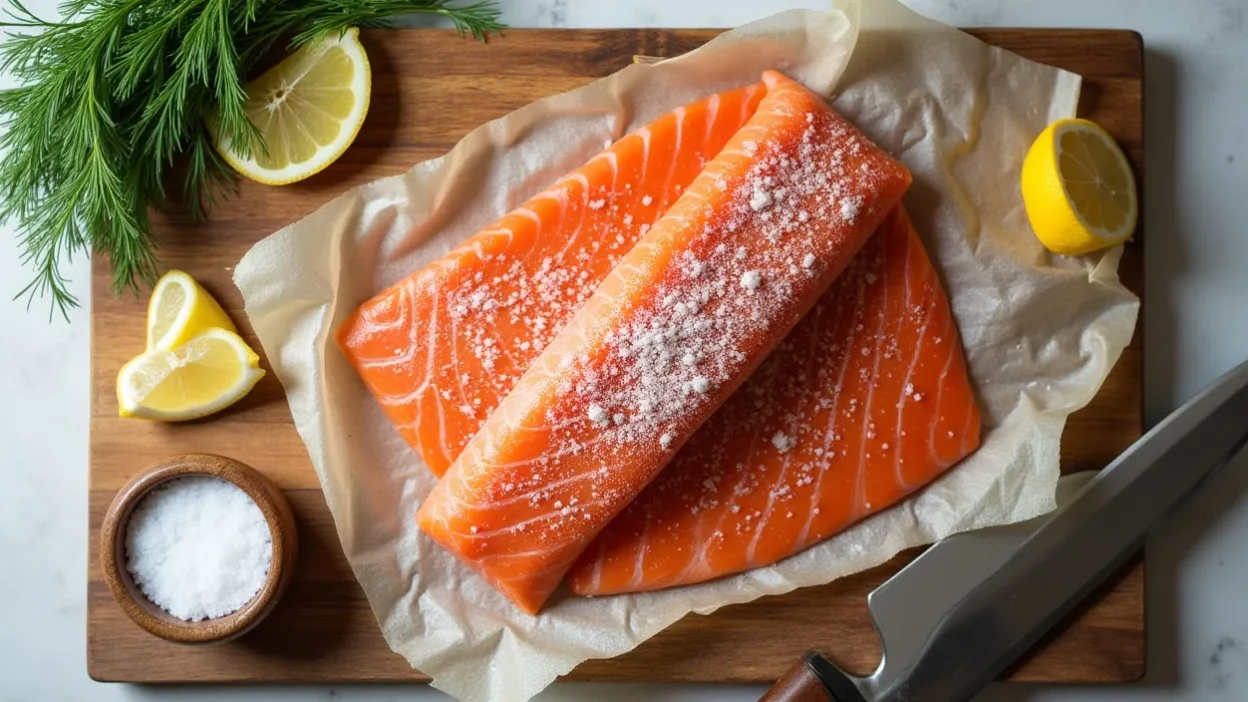
Salting salmon is one of the oldest and most effective techniques for preserving fish and enhancing its natural flavor. Whether you’re preparing gravlax, smoked salmon, or just want to infuse a fillet with rich, savory depth, a simple salt cure can do wonders. 🐟✨
This method uses a blend of coarse salt and sugar to draw out moisture, firm the flesh, and develop a more concentrated taste. It’s easy to do at home with minimal equipment — and the results are deliciously rewarding.
🧂 Fundamentals of Salting Salmon – What You Really Need to Know
Salting salmon is more than just sprinkling on salt — it’s a process that transforms both the texture and flavor of the fish. By drawing out moisture, salt firms up the flesh, reduces strong odors, and naturally preserves the salmon. Whether you’re curing for gravlax, smoking, or flavor-boosting before cooking, understanding the basics makes all the difference. 🐟✨
🔧 What You Need to Salt Salmon at Home
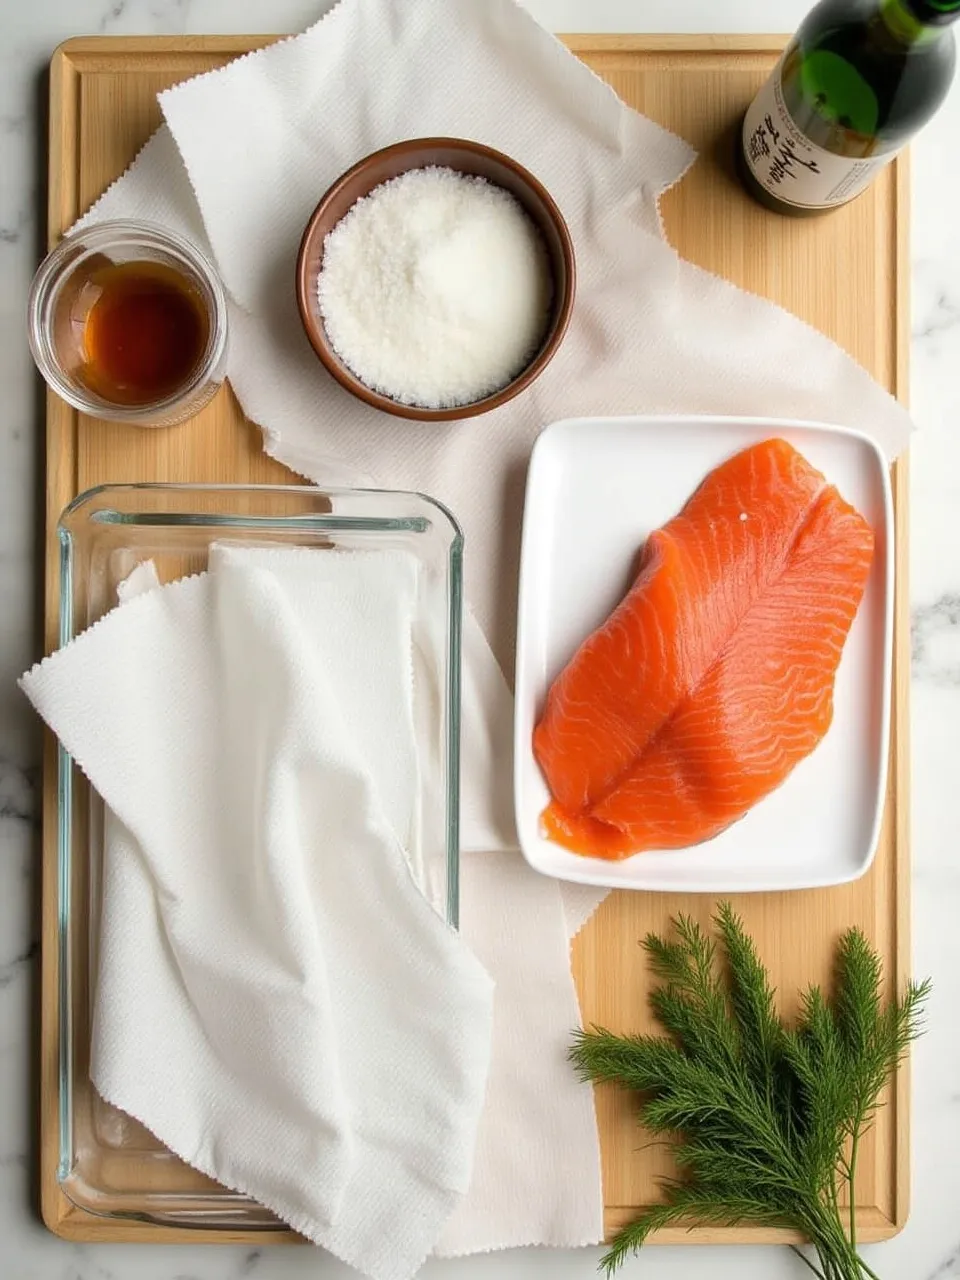
You don’t need fancy gear — just a few essential tools and the right ingredients:
🧂 1. Coarse Salt
- Use coarse sea salt or kosher salt.
- These types are ideal because they coat evenly, stick well, and dissolve at the right rate.
- Avoid fine table salt, which can make the fish overly salty.
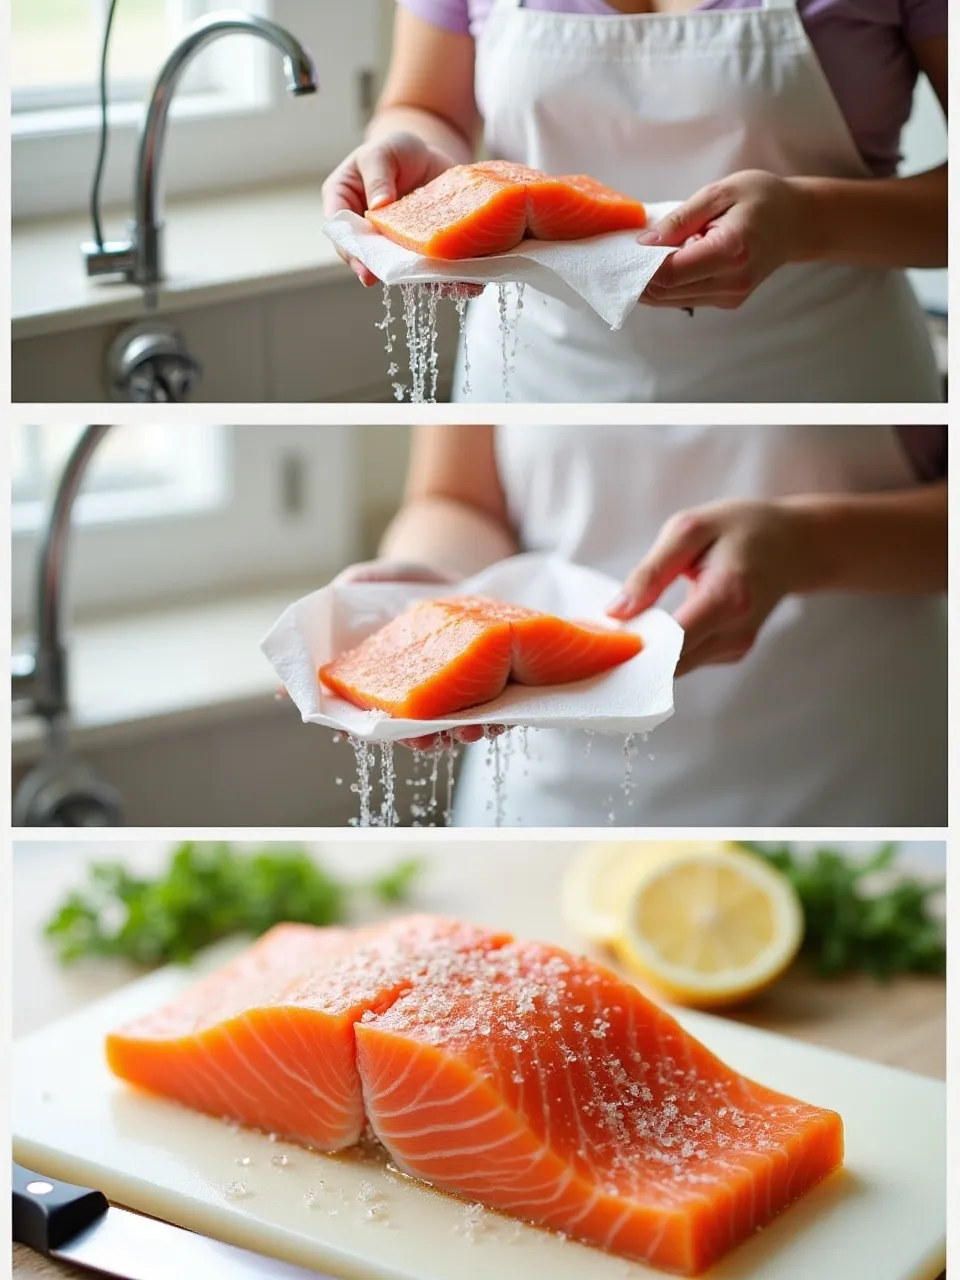
🧻 2. Paper Towels
- Pat the salmon dry before salting to help the cure stick.
- Use extra paper towels to wrap the fish during and after curing, or to blot excess moisture.
🍽️ 3. Tray or Shallow Dish
- This holds the salmon while curing.
- Choose a non-metallic container (glass, plastic, or ceramic) to avoid flavor changes.
- Line with a rack or extra paper towels to let moisture drain off if needed.
❄️ 4. Refrigerator Space
- Always cure salmon in the fridge to keep it at a safe temperature during the process.
- Make sure the curing container is covered to prevent contamination and odor transfer.
🍶 Optional: Flavor Enhancers
To take your salt cure to the next level, you can add a touch of sake or mirin (sweet rice wine) to the mix:
- Sake helps soften fishy notes and enhances aroma.
- Mirin balances saltiness with a gentle sweetness.
These are optional but can give your salmon a refined, delicate character often found in Japanese-style cures.
📝 Pro Tip: Always start with fresh, high-quality salmon — ideally sushi-grade or sustainably sourced. The better the fish, the better the cure.
🐟 Choosing the Right Type of Salmon for Salting
The first step to great salt-cured salmon is choosing the right cut of fish. Freshness and quality have a bigger impact than any spice or technique. Whether you’re making gravlax, prepping for smoking, or enhancing flavor before cooking, the salmon you select sets the tone for the entire process. 🎯
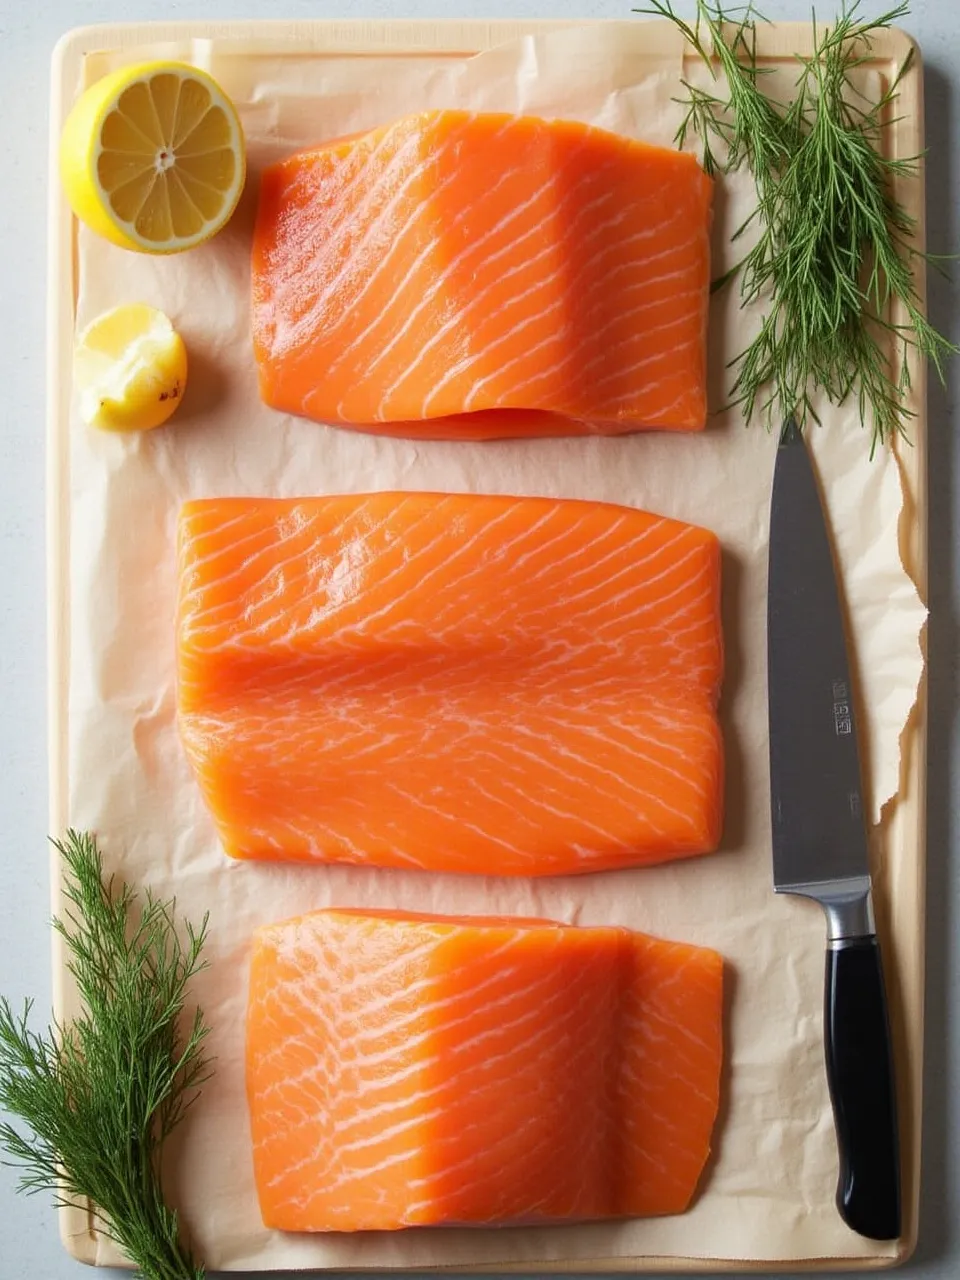
✅ Best Cuts for Salting
- Thick, skin-on fillets or steaks are ideal.
- The skin acts as a barrier, helping to keep the flesh intact during curing.
- Thicker cuts cure more evenly and allow better control over flavor and texture.
Avoid thin tail ends or unevenly sliced portions — these can over-cure and dry out.
🌊 Wild-Caught vs. Farmed Salmon
Both can be used, but each offers distinct qualities:
- Wild-caught salmon – Leaner with a stronger, richer flavor. Great for bold-tasting gravlax or smoked preparations.
- Farmed salmon – Milder, higher in fat, and more buttery in texture. Easier for first-timers and works well with citrus or herb-based cures.
There’s no “wrong” choice — it depends on your flavor goals and availability.
🚫 What to Avoid
- Previously frozen salmon – Freezing changes the cell structure, which can affect how the fish absorbs salt. Use fresh if possible.
- Pre-salted or pre-seasoned salmon – These are already processed and will over-cure or taste off when salted again.
🛒 What Matters Most: Freshness
No matter the variety, the freshness of the salmon is more important than the brand, label, or price tag.
Look for:
- Firm, moist flesh
- No strong fishy odor
- Bright, vibrant color
- Clear packaging with no excess liquid
💡 Tip: If you’re unsure, ask your fishmonger for sushi-grade or sashimi-grade salmon — it’s usually the freshest and safest for curing.
🧪 How Salt Affects Salmon – The Science Behind the Cure
Salting salmon isn’t just about adding flavor — it’s a process rooted in chemistry and preservation. When done right, salt transforms raw salmon into a firmer, tastier, and longer-lasting ingredient. Understanding how salt works helps you avoid common mistakes and get consistently great results. 🧂🐟
💧 Salt Draws Out Moisture (Osmosis in Action)
Salt works by pulling water out of the fish through a process called osmosis. As the moisture leaves the flesh, the salmon becomes:
- Firmer in texture
- Less prone to spoilage
- Easier to slice cleanly after curing
This denser texture is ideal for dishes like gravlax or thin-sliced cured salmon served raw.
🛡️ Salt Preserves the Fish
By removing excess moisture, salt also slows down bacterial growth, helping to keep the salmon safe to eat for longer than fresh, uncured fish.
🧊 This makes curing a practical method for storing salmon — especially before smoking or traveling.
🍥 Flavor Boost & Odor Control
Salt naturally enhances the salmon’s flavor, bringing out its rich, buttery notes while reducing the “fishy” smell that can come with raw seafood.
- Adding sake or mirin to the curing mix can amplify this effect:
- Sake helps neutralize odor
- Mirin adds subtle sweetness and depth
⚠️ Don’t Overdo It: Balance Is Key
While salt improves flavor and preservation, too much salt or leaving the salmon in the cure too long can have the opposite effect:
- Over-cured salmon becomes tough, dry, and overly salty
- Undercured salmon stays mushy and may not be safe to store
⏱️ Timing and salt-to-fish ratio are crucial for achieving the perfect texture and flavor.
📝 Pro Tip: Always weigh your salmon and calculate your salt/sugar mix accordingly. This helps ensure precision, especially for longer cures.
🧂 Step-by-Step Salting Methods for Salmon
Salting salmon is both an art and a science. The method you choose — and how well you apply it — has a major impact on the final flavor, texture, and safety of your cured fish. With the right technique, anyone can achieve professional-level results at home. 🎯
✋ Dry Salting Technique (Classic & Simple)
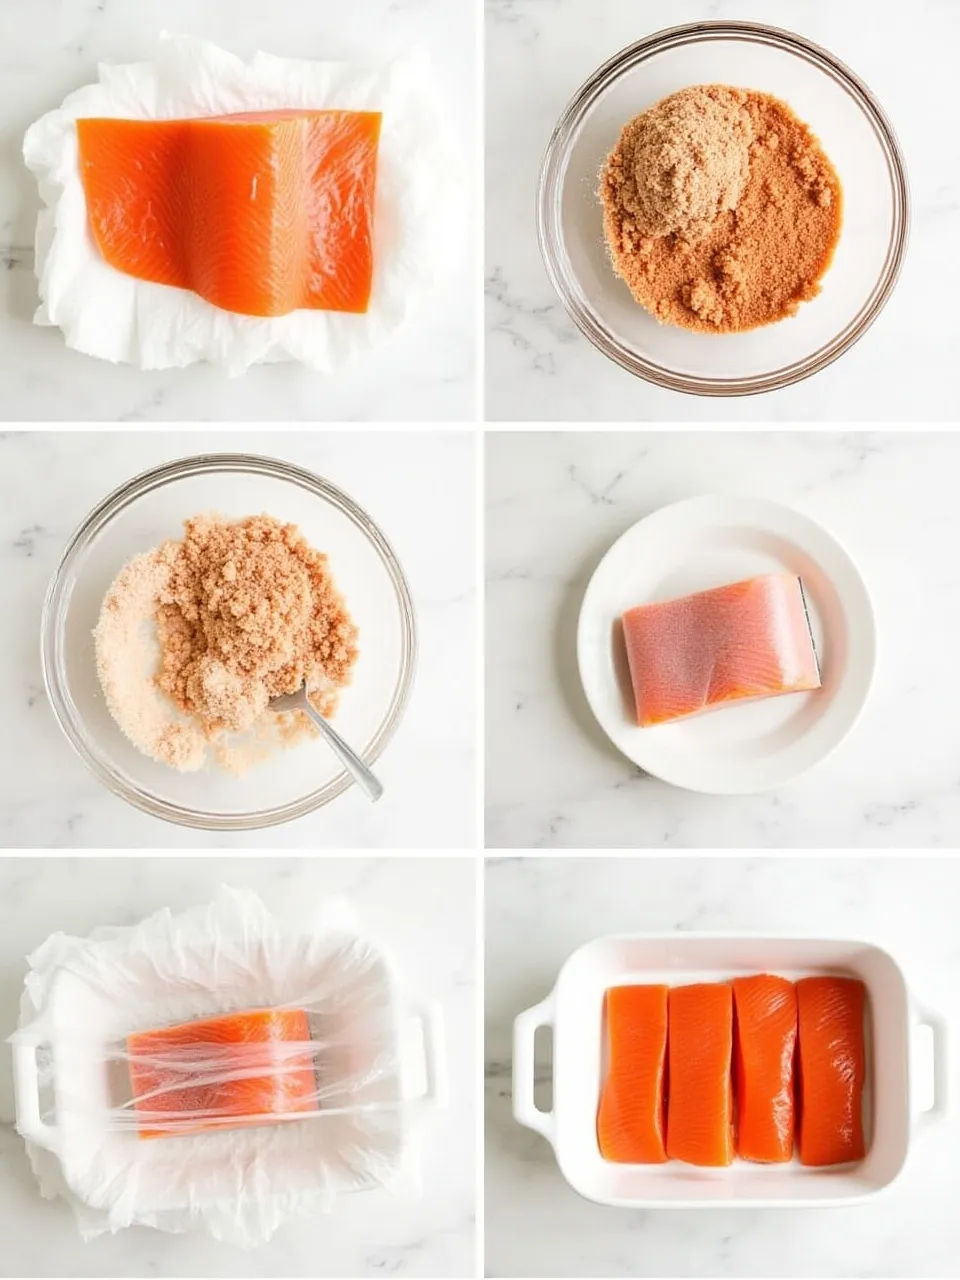
Dry salting is the most common method for curing salmon, especially for dishes like gravlax. It involves rubbing a dry mix of salt and sugar directly onto the fish, allowing it to cure in its own moisture.
🧑🍳 Here’s how to do it step by step:
✅ 1. Prepare the Salmon
- Use a fresh, skinless salmon fillet (or skin-on if preferred).
- Pat the fillet thoroughly dry with paper towels. This helps the salt adhere better.
🧂 2. Make the Cure
- Mix equal parts kosher salt and sugar in a bowl.
- Example: ¼ cup salt + ¼ cup sugar per pound of salmon
- Optional: Add spices, citrus zest, or herbs for extra flavor (e.g. dill, peppercorn, lemon zest).
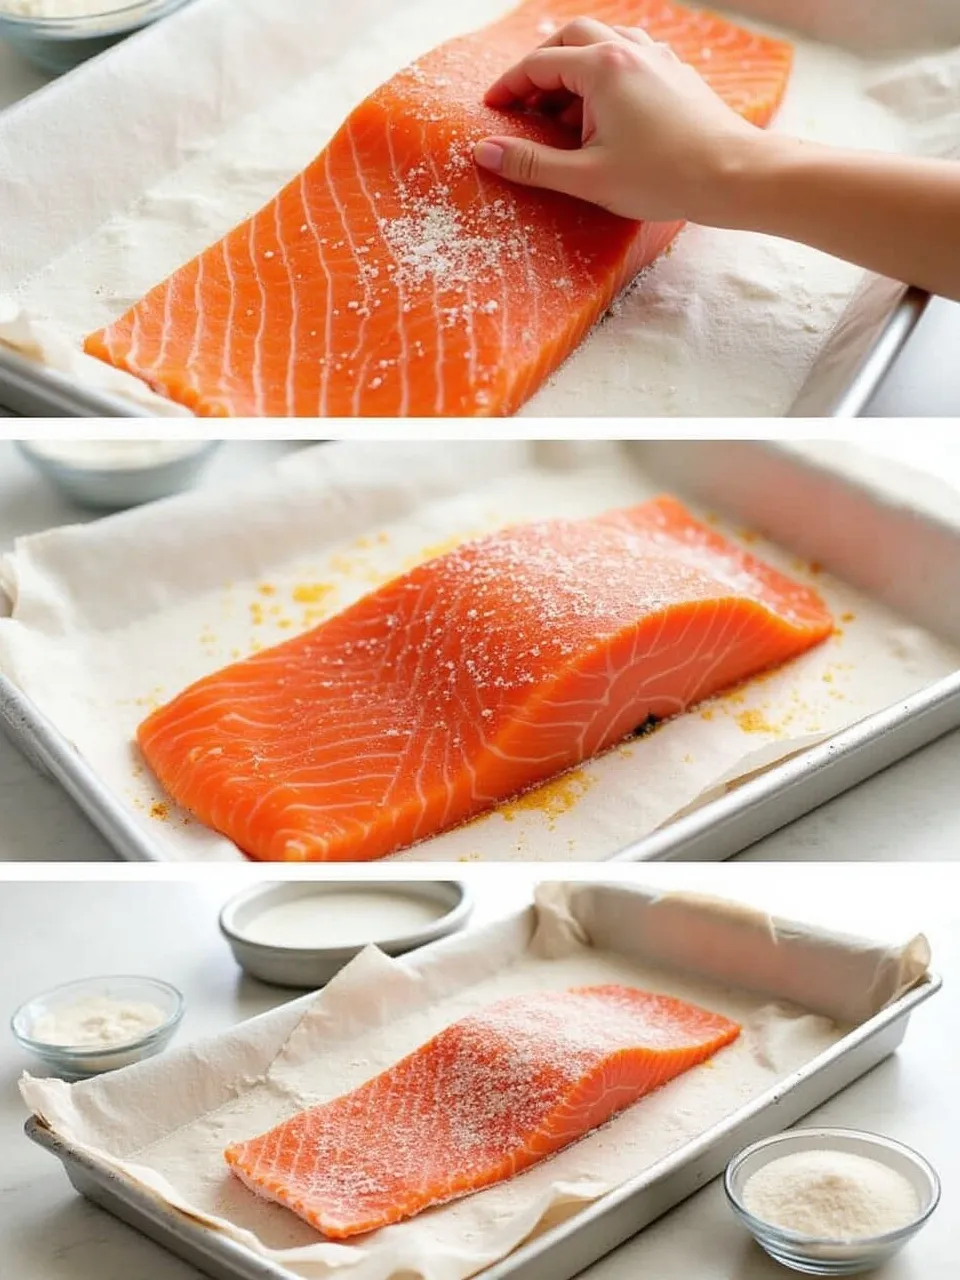
🧴 3. Apply the Cure
- Lay the salmon flat in a shallow dish or on plastic wrap.
- Evenly coat both sides of the salmon with the cure mixture, pressing gently to ensure full contact.
- Wrap the salmon tightly in plastic wrap or place it in a sealed container.
❄️ 4. Refrigerate to Cure
- Place the wrapped salmon in the fridge.
- Optionally, weigh it down with a cutting board or plate to help firm it up.
- Cure for 12 to 24 hours, depending on thickness and desired firmness.
💦 5. Rinse & Dry
- Unwrap the salmon and rinse off the cure under cold water.
- Pat it dry with paper towels.
- Slice thinly, or store wrapped in clean paper/plastic until ready to serve.
🧠 Why it works: Salt and sugar draw out moisture, which firms up the fish and enhances flavor while reducing bacterial growth. The result is silky, flavorful salmon that’s perfect for serving cold, on toast, or as part of a larger dish.
💧 Wet Brining Method for Salmon – Juicy, Flavorful Results
If you’re looking for a moist, tender result with even seasoning throughout, wet brining is your go-to technique. Unlike dry curing, which draws moisture out, wet brining allows the salmon to absorb a salty-sweet liquid solution, keeping it juicy and flavorful. 🐟💦
This method is especially useful if you’re preparing salmon for smoking or want a milder, more hydrated cure.
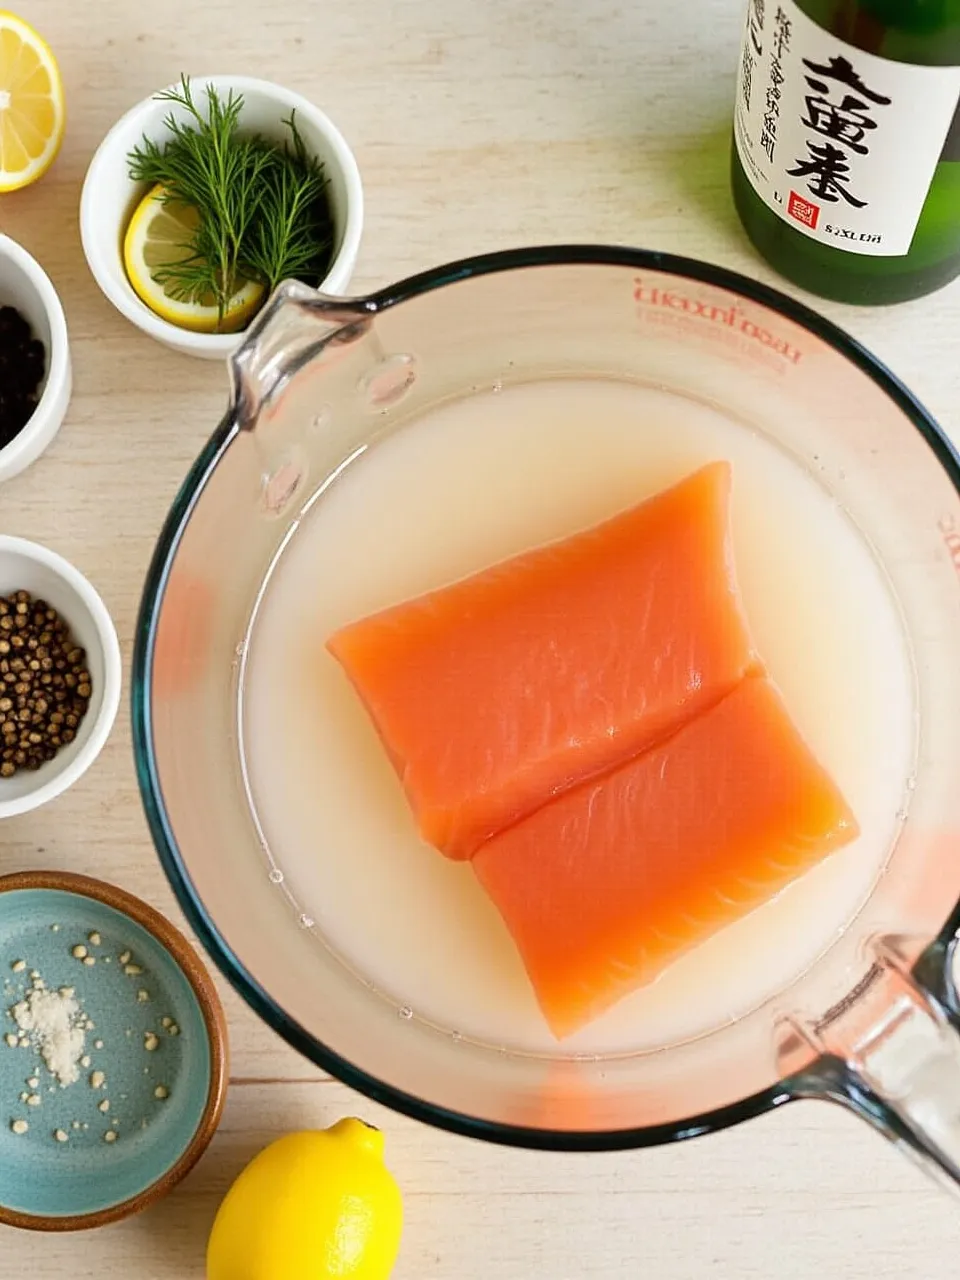
🧴 What Is Wet Brining?
Wet brining involves submerging the salmon in a brine — a mix of water, salt, and sugar — often with optional aromatics or flavor boosters like sake, peppercorns, or citrus peel.
🧂 Basic Brine Recipe:
- 4 cups cold water
- ¼ cup kosher salt
- ¼ cup sugar (white or brown)
🌀 Stir until completely dissolved.
🧑🍳 How to Wet Brine Salmon – Step by Step
✅ 1. Prepare the Salmon
- Use a fresh fillet with or without skin.
- Rinse gently and pat dry with paper towels.
🥣 2. Make the Brine
- Mix water, salt, and sugar in a large bowl or container until dissolved.
- Optional flavorings:
- 🧄 Garlic cloves
- 🌿 Dill sprigs
- 🍶 Sake or mirin
- 🍋 Citrus zest
- 🌶️ Peppercorns or chili flakes
🐟 3. Submerge the Salmon
- Place the salmon skin-side down in the brine.
- Ensure it’s fully submerged (use a plate or plastic wrap on top if needed).
❄️ 4. Refrigerate and Brine
- Cure in the refrigerator for 4 to 6 hours.
- Less for thinner fillets
- Longer for thick, fatty cuts
⏳ Avoid over-brining, or the salmon can become overly salty and lose texture.
🧺 5. Dry the Fish
- Remove from the brine, gently rinse, and pat dry.
- Place on a rack in the fridge for 1–2 hours to air dry.
- This helps form a pellicle — a tacky surface ideal for smoking or searing.
💡 Wet brining gives a juicier result than dry curing and offers consistent seasoning throughout the fillet. It’s perfect for smoked salmon, grilled dishes, or any recipe where you want moist, tender fish with depth of flavor.
🧂 Tips for Even Salt Distribution – Balanced Flavor Every Time
Proper salt distribution is one of the most important — and often overlooked — aspects of curing salmon. Applying salt evenly ensures the fish cures safely, consistently, and without unpleasantly salty spots. It also helps you control texture and avoid waste. 🎯🐟
Follow these tips for a smooth, even cure with perfect results every time:
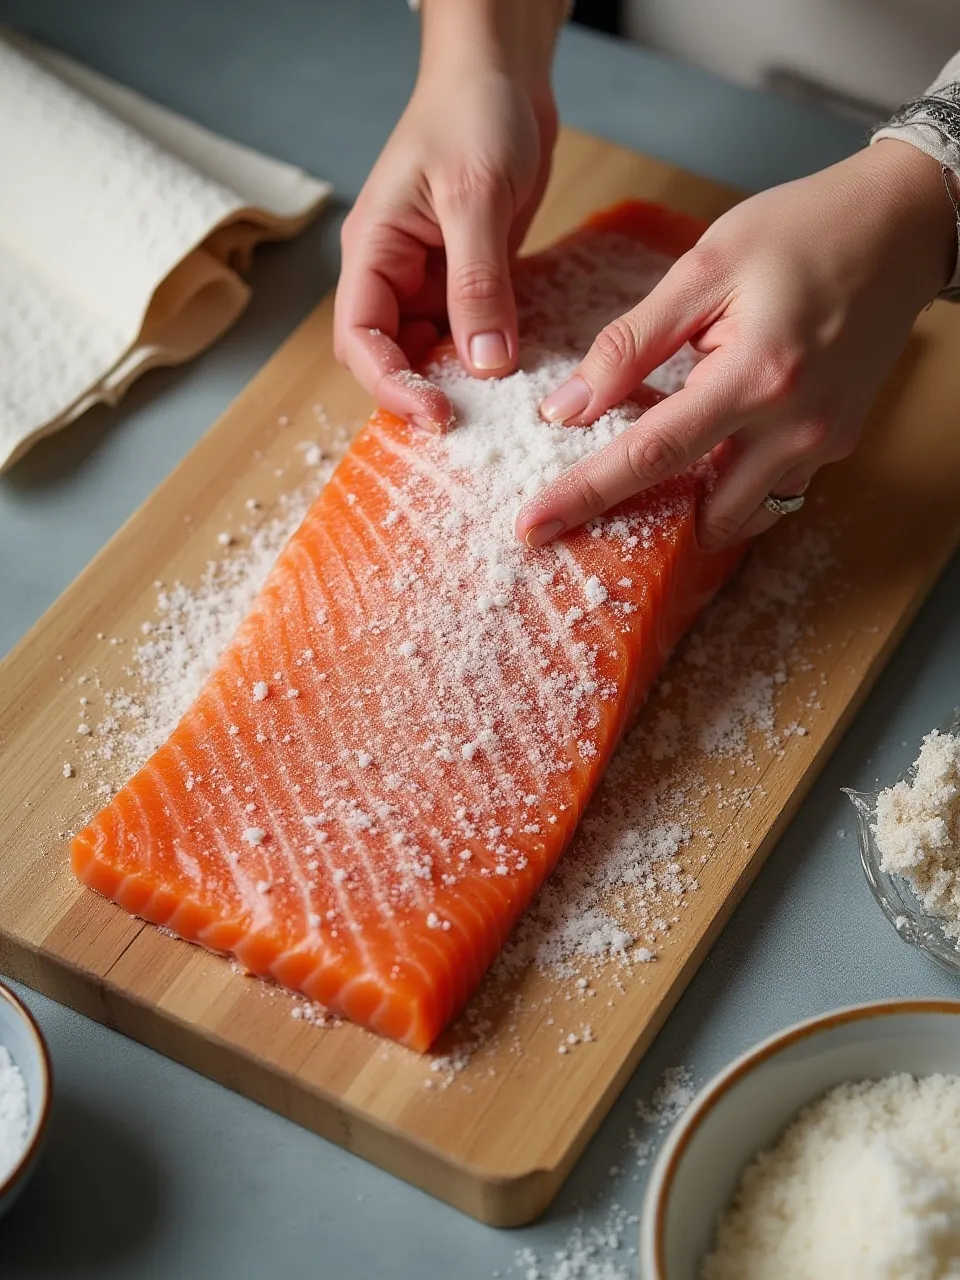
📏 1. Apply a Thin, Even Layer
- Spread the salt (or salt-sugar mix) in a uniform layer across all surfaces of the salmon — top, bottom, and sides.
- Avoid clumping or piling on — more salt doesn’t mean better results.
🧤 Use clean hands or a spoon to press the salt gently into the flesh. This helps it stick without tearing the fillet.
🧂 2. Use the Right Salt Type
- Coarse kosher salt or rock salt is ideal — its slow-dissolving crystals release flavor gradually and reduce the risk of over-curing.
- Avoid fine table salt, which dissolves too fast and can make the fish excessively salty.
🔁 3. Flip Midway (Optional)
- For extra consistency, flip the fillet halfway through curing, especially if you’re not pressing it.
- This helps redistribute the salt and ensures even firmness throughout.
❄️ 4. Keep It Cold
- Always cure salmon in the refrigerator, ideally at 34–38°F (1–3°C).
- Cold temperatures slow bacterial growth and keep the fish safe and fresh during the curing process.
🧊 Place the fillet in a shallow, non-metallic tray lined with paper towels or a rack to help drain excess liquid as it cures.
⚠️ Final Tip
More salt ≠ better. It’s technique, not quantity, that makes the difference. A light but thorough coat, the right salt type, and steady temperature are all you need for a perfect cure.
⏱️ How Long to Salt Salmon – Timing for Perfect Texture
One of the most important factors in curing salmon is timing. Salt too long, and you’ll end up with dry, overly salty fish. Too short, and the cure won’t fully penetrate, leaving it soft and underdeveloped in flavor. ⏳🐟
Here’s how to get the timing just right, based on the size and desired outcome of your salmon.
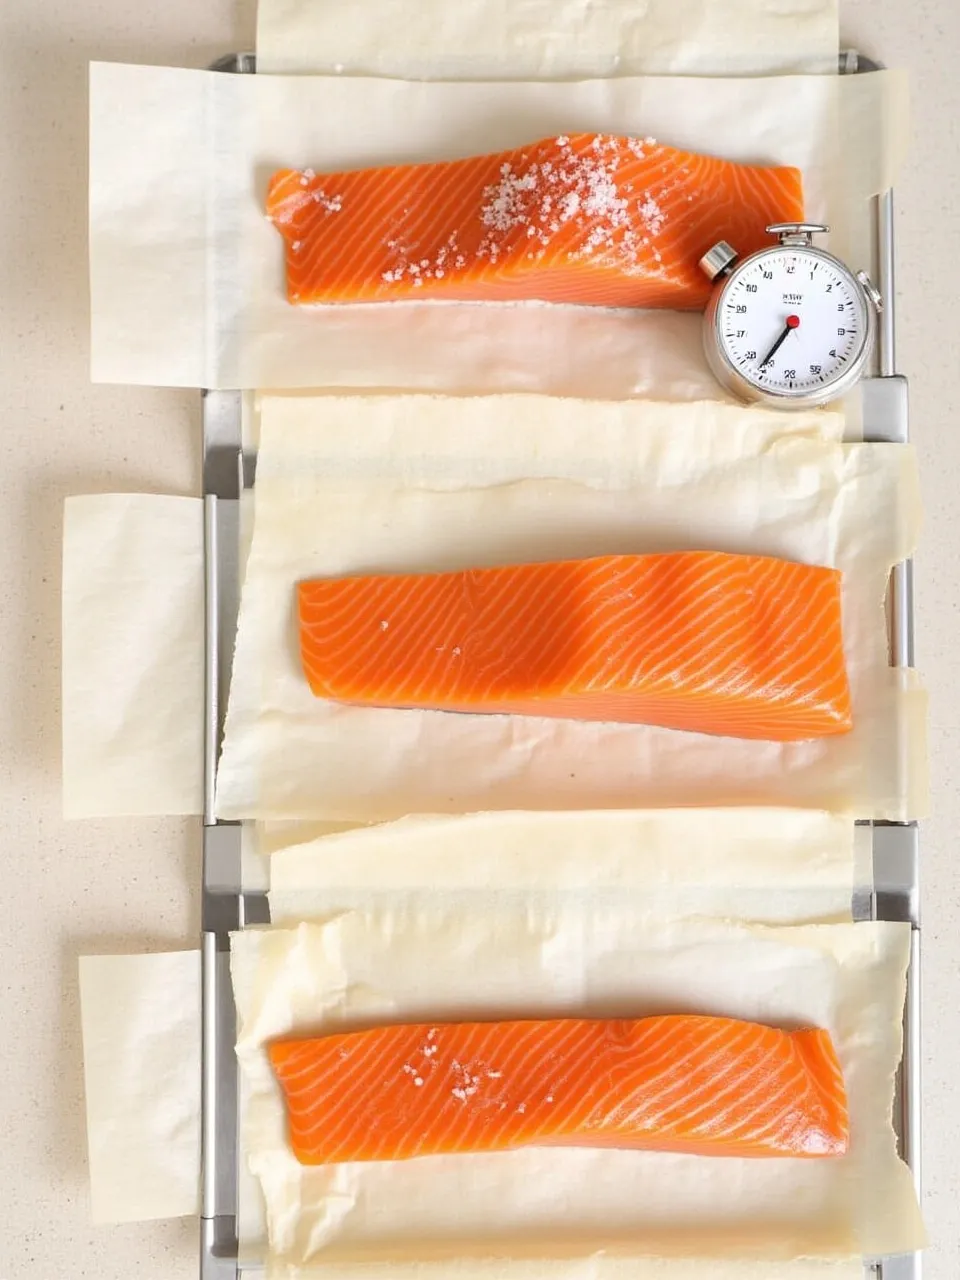
📐 Curing Time by Thickness
🟢 Thin fillets (under 1 inch thick):
- 8 to 12 hours in the fridge
- Great for quick cures, mild flavor, and delicate texture
🟡 Standard fillets (1–1.5 inches thick):
- 12 to 24 hours
- Balanced texture and flavor, ideal for gravlax or light smoking
🔴 Thick fillets or steaks (over 1.5 inches thick):
- 24 to 48 hours
- Deep cure, firm texture, bold flavor — best for slicing or smoking
🧂 Don’t Overdo It
- Over-curing can cause the fish to become tough, dry, or overly salty.
- If in doubt, start with less time and adjust your method in the future.
- You can always cure longer next time — but you can’t reverse a cure that’s gone too far.
💧 Post-Cure Handling
Once the curing time is complete:
- Rinse briefly under cold water to remove excess salt and surface seasoning.
- Pat dry with paper towels.
- Rest the salmon in the refrigerator for 30 minutes to 1 hour.
- This allows the flavors to settle and the texture to even out before slicing or smoking.
📝 Tip: For smoking, let the fish air-dry on a rack after rinsing to form a pellicle — a slightly tacky surface that helps smoke adhere evenly.
🍽️ Using Salted Salmon in Recipes – Flavor, Versatility & Storage Tips

Salted salmon isn’t just a preserved product — it’s a powerful flavor enhancer that brings rich, umami depth to countless dishes. Whether you’re slicing it thin for gravlax, flaking it into a salad, or serving it warm, this cured fish adds complexity and texture to every bite. 🎯🐟
But to enjoy its full potential, proper handling and storage are just as important as the salting process itself.
🧊 Storing Salted Salmon the Right Way
Once cured, your salmon should be stored carefully to maintain its flavor, texture, and safety:
✅ Refrigeration:
- Wrap the fish tightly in plastic wrap or place in an airtight container.
- Keep in the coldest part of the fridge (ideally below 38°F / 3°C).
- Prevents drying out and protects from absorbing unwanted odors.
🕐 Shelf Life (Refrigerated):
- Properly salted and cured salmon can last up to 2 weeks in the fridge.
- Keep a close eye on texture and smell to monitor freshness.
❄️ Freezing:
- For longer storage, salted salmon freezes very well.
- Wrap in foil, parchment, or vacuum seal before freezing to prevent freezer burn.
- Label with the date — best used within 3 months for optimal taste.
⚠️ Check before use: If the salmon has a sour or off smell, is overly slimy, or looks dull and grayish, it’s time to toss it.
🍽️ Ways to Use Salted Salmon in Your Cooking
Salt-cured salmon is incredibly versatile — you can enjoy it cold, warm, or even smoked:
🔪 Served Cold:
- Thin-sliced on bagels with cream cheese and capers
- Added to salads or grain bowls for protein and flavor
- Used in canapés or sushi-style appetizers
🔥 Served Warm:
- Lightly grilled or pan-seared for a crispy edge
- Mixed into scrambled eggs or quiche
- Folded into pasta or risotto dishes
🌿 Since the salmon is already salty, go light on seasoning when combining it with other ingredients.
🔪 Preparing Salted Salmon for Cooking – Rinse, Rest & Cook with Confidence
Once your salmon is cured, the next step is preparing it for the table — whether you’re planning to slice it thin for cold dishes or cook it warm. Proper prep ensures the final flavor is balanced, not overly salty, and just right for the recipe. 🧂🔥
💧 Rinse & Soak to Reduce Saltiness
Before cooking or serving, it’s important to remove excess surface salt:
- Briefly rinse the fillet under cold running water.
- For a milder flavor, soak the salmon in cold water for 20 to 30 minutes.
- After soaking, pat dry thoroughly with paper towels to remove moisture and help the texture set.
🧊 This simple step helps balance the flavor, especially if your cure was on the stronger side.
🔪 Slice or Cook – Choose Your Method
Depending on your dish, there are a few ways to prepare your cured salmon:
🍣 Thin Slicing (for Cold Dishes):
- Perfect for gravlax, smoked salmon, charcuterie boards, or sushi-style servings
- Use a sharp, long slicing knife
- Cut on a slight diagonal for smooth, even slices
- Serve chilled with garnishes like dill, mustard sauce, or capers
🍳 Cooking (for Warm Dishes):
- After rinsing and drying, pan-sear, grill, or bake the salmon
- Great in dishes like:
- Scrambled eggs
- Pasta
- Rice bowls
- Frittatas or casseroles
⚠️ Avoid adding extra salt when cooking! Salted salmon is already seasoned — always taste before adjusting the final dish.
👨🍳 Final Tip:
Let the salmon rest 5–10 minutes after drying to help equalize moisture and flavor before slicing or cooking. This gives a smoother texture and better taste.
🍴 Popular Dishes with Salted Salmon – Global Favorites & Modern Uses

Salted salmon is a beloved ingredient across the globe, valued for its bold flavor, long shelf life, and culinary versatility. From Scandinavian gravlax to Japanese rice bowls, it brings rich umami depth to a wide variety of dishes — both hot and cold. 🌍🐟
🌿 Classic & Creative Ways to Enjoy Salted Salmon
🇸🇪 Gravlax
- Thinly sliced cured salmon
- Served chilled with a Swedish mustard-dill sauce (hovmästarsås)
- Often paired with rye bread, crispbread, or crackers
🥗 Salted Salmon Salad
- Flaked or chopped salted salmon
- Tossed with fresh greens, cherry tomatoes, cucumbers, and a light vinaigrette
- Optional: Add boiled eggs or roasted potatoes for a hearty twist
🍋 Salt-Baked Salmon
- Whole or fillet salmon baked on a bed of salt and lemon slices
- Creates a delicate, evenly seasoned fish with no need for direct salt contact
- Moist, aromatic, and perfect for special occasions
🍳 More Delicious Ideas
Salted salmon works wonderfully in:
- Open-faced sandwiches with cream cheese, dill, and radishes
- Pasta dishes (like lemon salmon linguine or creamy tagliatelle)
- Breakfast plates with soft-boiled or poached eggs and toast
- Rice bowls with avocado, edamame, and sesame dressing
- Stuffed into omelets or baked into quiches
🧂 Because of its built-in seasoning, salted salmon brings depth and umami without overpowering the dish — making it a perfect way to add richness with minimal effort.


Sounds amazing! Been wanting to try curing salmon myself. What’s the link to the full article?