Contents
- 🧁 What you’ll need (and what you can totally improvise)
- 🍰 Step-by-step: the way I actually make cake pops (no gloss, just real life)
- 💥 Decoration ideas that actually work (and don’t make a mess)
- 🧊 Storage: keep ’em fresh, not funky
- 🧠 Stuff I learned the hard way (aka cake pop confessions)
- 🧪 Flavor combos that slap (yes, I said slap)
- 🤷 Final thoughts? Cake pops are worth the trouble
I didn’t grow up baking. In fact, if you told me a few years ago that I’d be the person writing about cake pops, I’d laugh while burning toast. But here we are. And weirdly enough? I kind of love making them.
Cake pops are one of those things that look way harder than they actually are. They’re cute, sweet, bite-sized little balls of cake-and-frosting happiness, dipped in chocolate and served on a stick. Fancy enough for parties, simple enough for a Tuesday night when you’re bored.
Let me walk you through how I make them at home — casually, realistically, and without turning my kitchen into a scene from a cooking competition show. 🍭
🧁 What you’ll need (and what you can totally improvise)
Let’s keep it real. You don’t need a cart full of baking supplies or professional gear. Most of this stuff you probably already have, or can find in a single trip to the store.
🧺 The core ingredients:
- Cake – Boxed mix, leftover cake from the fridge, or even homemade if you’re in the mood. Just make sure it’s not too dry. Chocolate, vanilla, red velvet, lemon, funfetti… anything goes.
- Frosting – Whatever kind you like. I usually use store-bought vanilla or cream cheese, but homemade buttercream works too. If you’re really out of options, even Nutella or peanut butter can work in a pinch.
- Coating – Candy melts are ideal, but chocolate chips (white, milk, or dark) are fine if you add a teaspoon of oil to thin them out when melted.
- Sticks – I’ve used everything from actual cake pop sticks to toothpicks, straws, and even chopsticks once. Don’t overthink it.
🧁 Extra stuff (if you want to get fancy):
- Food coloring 🧪
- Sprinkles or colored sugar
- Crushed candy, Oreos, or nuts
- Flavor extracts (like almond, lemon, or peppermint)
- Edible glitter or shimmer powder ✨
- Edible pens for drawing faces or designs
Don’t feel pressured to get all of it — the beauty of cake pops is how flexible they are.
🍰 Step-by-step: the way I actually make cake pops (no gloss, just real life)
1️⃣ Bake the cake (or use leftovers)
I usually start with a simple box mix because it’s fast and foolproof. Bake it in a regular 9×13-inch pan. Follow the instructions on the box. Don’t get clever with substitutions unless you know what you’re doing — I once swapped the oil for applesauce and ended up with sponge mush.
After baking, let the cake cool down completely. That means at least an hour. If it’s even a little warm, the frosting will melt later and ruin the texture.
If I’m planning ahead, I bake the cake the night before and leave it covered on the counter overnight. Works perfectly.
2️⃣ Crumble it all up
This part’s satisfying. Break the cake into chunks and rub it between your fingers until it becomes fine crumbs. No big lumps — the smaller the crumbs, the smoother your cake balls will be.
If you’re in a rush or just don’t want to get messy, you can pulse the cake in a food processor for a few seconds. Works like a charm.
3️⃣ Mix with frosting until it feels like dough
Start with about 3–4 tablespoons of frosting. Mix it into the crumbs with a spoon, or honestly, just use your hands. The goal is to make a moldable dough that sticks together when you press it, but doesn’t feel sticky or greasy.
If you overdo the frosting, it’ll turn into goo. If it’s too dry, the balls will crack. It might take a few tries to get it just right — don’t stress it.
📝 Tip: The texture should remind you of play-dough. Smooth, soft, not crumbly.
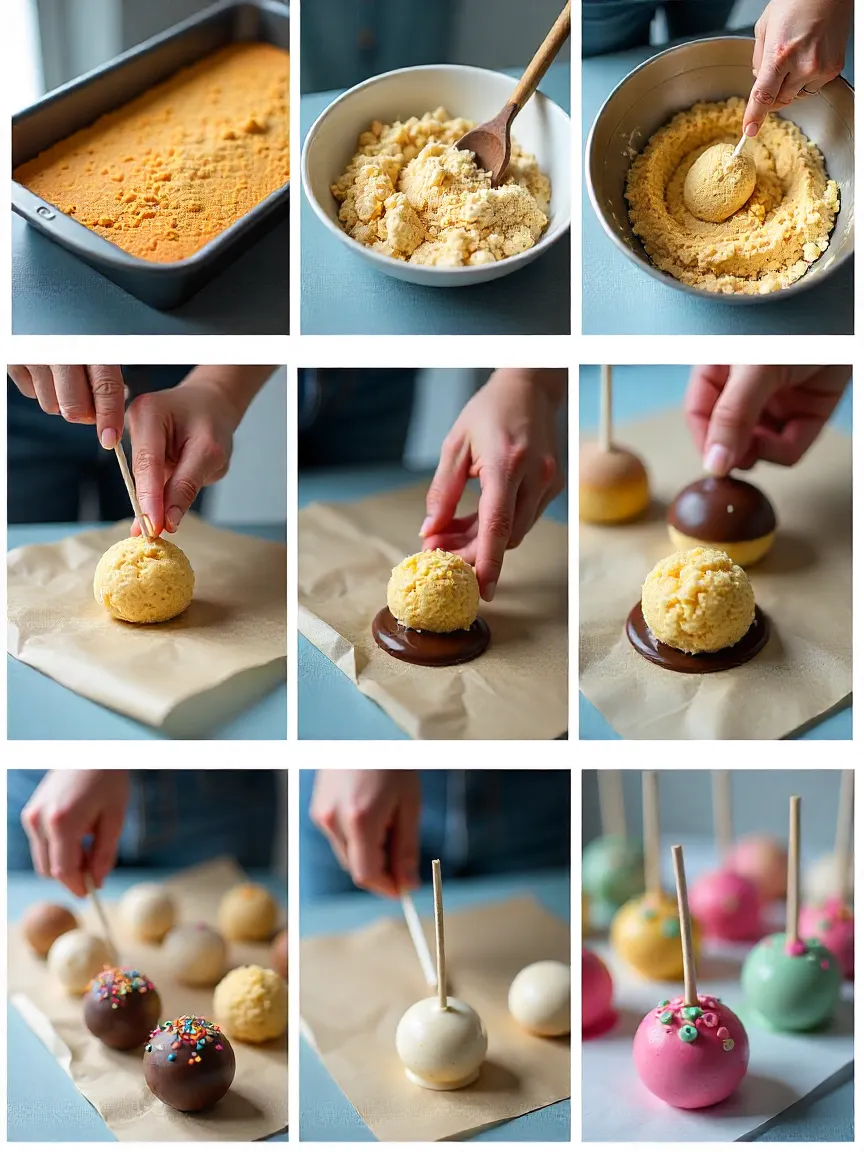
4️⃣ Roll into balls (any size you like)
Use a small cookie scoop or just eyeball it. Roll the dough into balls and place them on a tray lined with parchment paper. I usually aim for about the size of a walnut.
Don’t worry if they’re not perfectly round. You can smooth them later. If you want to shape them into something cute (hearts, stars, animals), this is the time to do it. Silicone molds can help, or just freestyle it.
Chill the rolled balls in the fridge for at least 30–60 minutes. You need them to be firm before dipping.
5️⃣ Stick it and chill again
Melt a bit of your chocolate coating. Dip the tip of each stick into the chocolate, then insert it halfway into the cake ball. This acts like glue and keeps the stick from sliding out later.
Once they’re all stuck, pop them back into the fridge for 15–20 minutes. This step seems minor, but it really helps hold everything together during dipping.
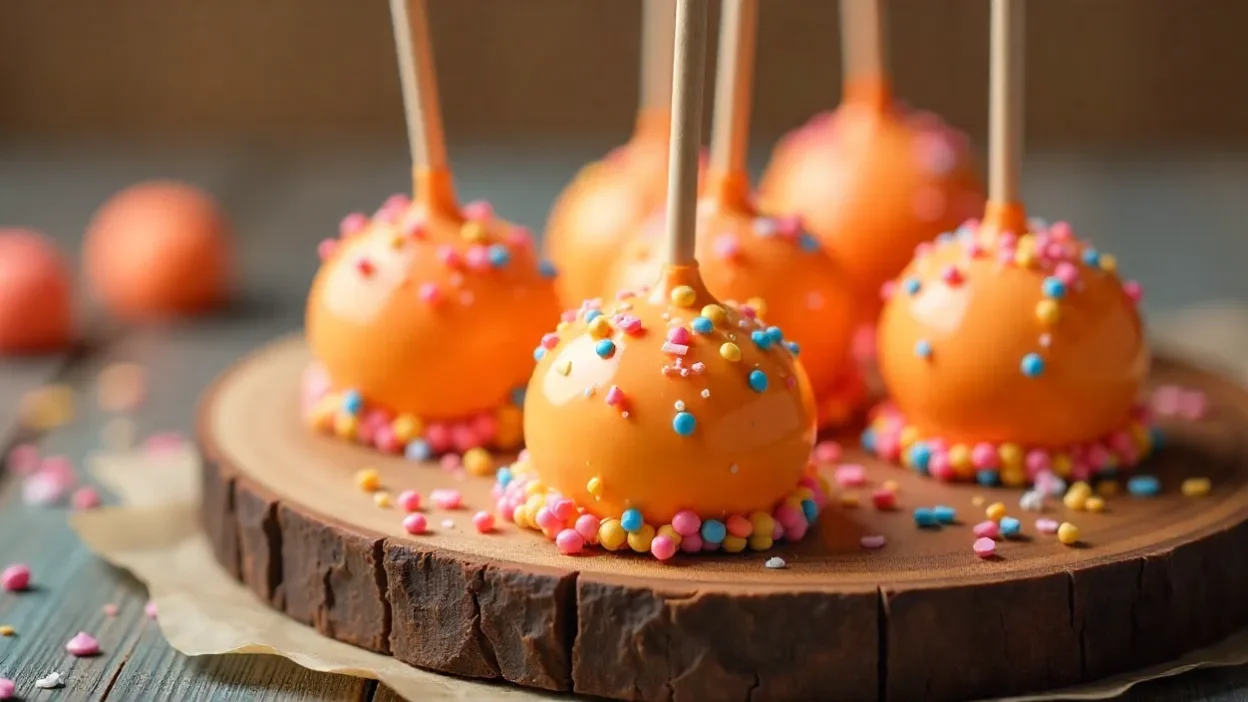
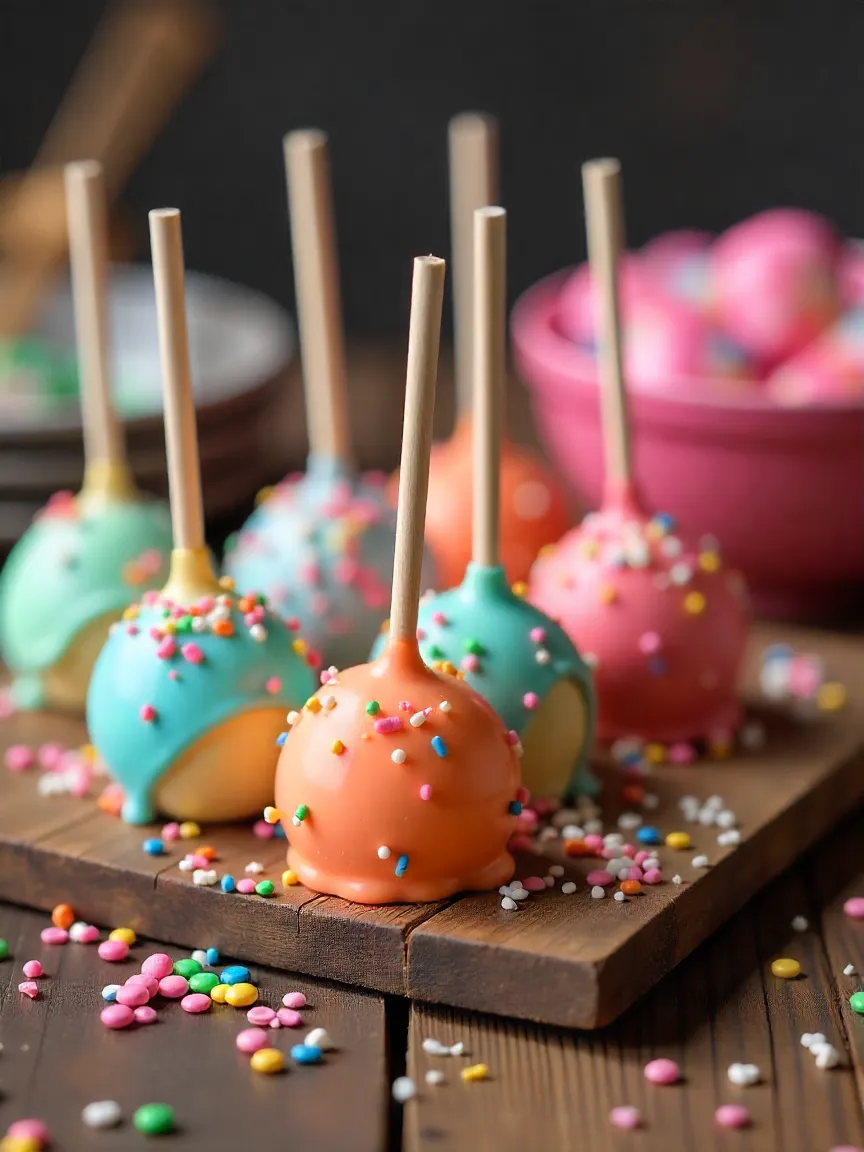
6️⃣ Dip and decorate
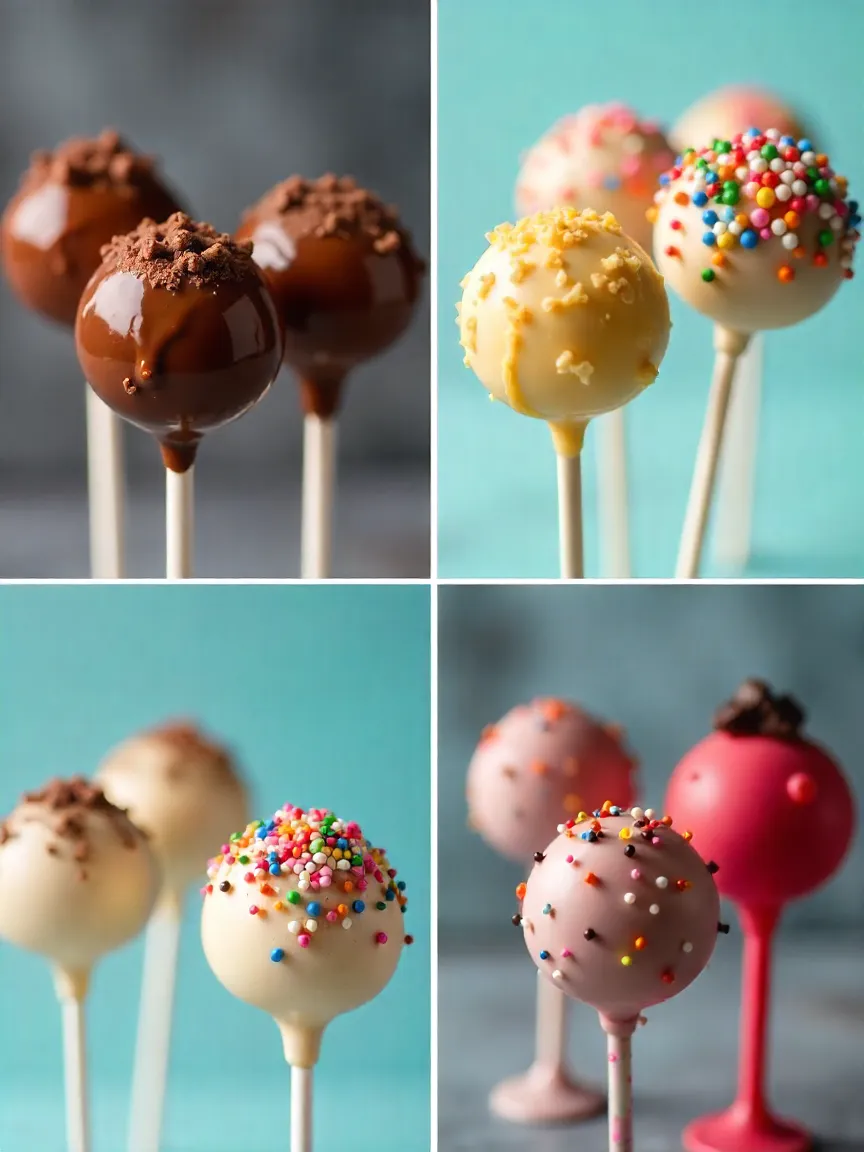
Now for the part that looks impressive but is actually really simple. Melt your chocolate or candy melts in a deep, narrow cup or mug. Microwave in short bursts, stirring often so it doesn’t burn.
Dip each cake pop into the coating, covering it completely. Gently tap off the extra. Then — quickly — add your sprinkles or whatever decorations you want. The coating sets fast.
Stick them upright in something to dry. I use a block of floral foam from the dollar store, but a mug filled with rice or sugar works too.
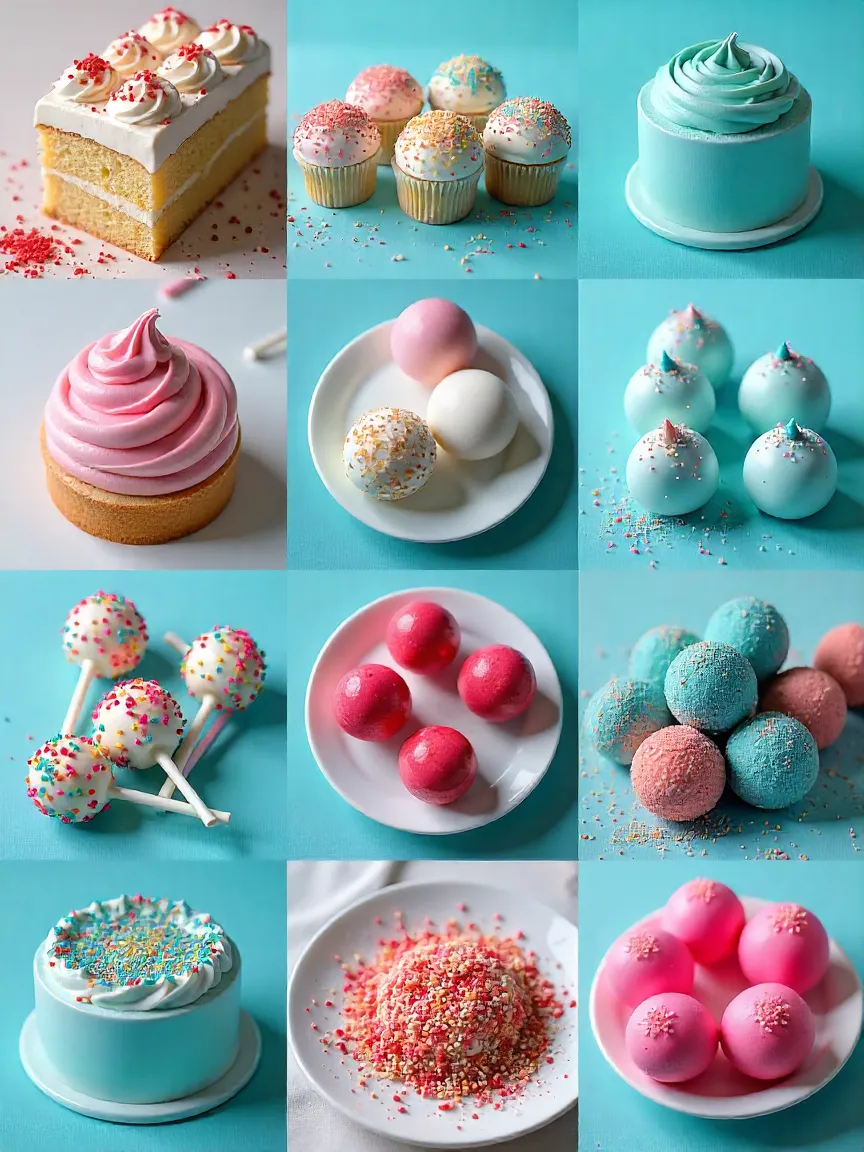
💥 Decoration ideas that actually work (and don’t make a mess)
- For birthdays: rainbow sprinkles, bright colors, candy confetti
- Weddings/Showers: gold dust, white chocolate drizzle, metallic accents
- Kids’ parties: edible googly eyes, cartoon faces, unicorn horns 🦄
- Halloween: orange and black swirls, candy eyeballs, spooky faces
- Valentine’s Day: heart shapes, red drizzle, pink coating

Try drizzling a second chocolate color over the top once the coating sets for a “fancy bakery” look. Or dip just the tops of the pops for a dipped-donut vibe.
🧊 Storage: keep ’em fresh, not funky
Once dry, store your cake pops in an airtight container.
- Room temp (1–2 days): totally fine if your house isn’t too hot.
- Fridge (3–5 days): works well if you made them in advance. Just let them warm up a bit before serving.
- Freezer: technically you can, but I personally don’t. The texture of the cake changes and the coating may crack when thawing.
If I’m making them for an event, I do everything a day ahead. They hold up great.
🧠 Stuff I learned the hard way (aka cake pop confessions)
- Adding too much frosting = sticky, saggy pops that fall apart on the stick.
- Not chilling = disaster during dipping.
- Trying to decorate too slowly = coating dries and sprinkles bounce off.
- Using low-quality white chocolate = lumpy, chalky mess.
Now I keep a cheat sheet in my notes app with ratios and steps, just in case.
🧪 Flavor combos that slap (yes, I said slap)
Here are some combos I’ve tried that turned out surprisingly good:
- Chocolate cake + raspberry jam + dark chocolate coating
- Lemon cake + cream cheese frosting + coconut flakes
- Funfetti cake + vanilla frosting + white chocolate + rainbow sprinkles
- Spice cake + maple frosting + crushed pecans on top
- Red velvet + Oreo frosting + white chocolate drizzle
You can also play with the fillings — sneak in a tiny caramel center, peanut butter core, or even fruit puree.
🤷 Final thoughts? Cake pops are worth the trouble
Making cake pops isn’t “easy” in the way that tossing cookies on a tray is. It takes a bit of time. There’s chilling, dipping, decorating. But honestly? The payoff is big. People love them. They travel well. They look professional even if you’re a total beginner.
I make them every few months — sometimes just for fun, sometimes as gifts. They’ve become one of those go-to treats that impress without being high-stakes. And once you do it once, it only gets easier.
If you’ve never tried it, I say go for it. Start messy. Learn as you go. You might surprise yourself — I definitely did.