Contents
- 1. Upgrade Your Kitchen with a Smart Faucet
- 2. Brighten Your Kitchen with Under-Cabinet Lighting
- 3. Refresh Your Walls with Peel-and-Stick Backsplash Tiles
- 4. Upgrade to a Touchless Trash Can for a Cleaner, Smarter Kitchen
- 5. Refinish Your Cabinets for a Budget-Friendly Kitchen Makeover
- 6. Add Style and Function with a Pot Filler Faucet
- 7. Install Open Shelving for Style and Functionality
- 8. Replace Cabinet Hardware for an Instant Kitchen Refresh
- 9. Add a Kitchen Island for Extra Space and Style
- 10. Install a Chalkboard Wall for Creativity and Functionality
Giving your kitchen a makeover doesn’t have to involve huge budgets or professional contractors. With a few smart and affordable DIY upgrades, you can completely transform your space—boosting both style and functionality.
These projects are perfect for any skill level and can be completed in a weekend or less. Whether you want to modernize your countertops, update your backsplash, or simply add some personality to your space, small changes can make a big visual impact.
DIY kitchen upgrades are not only cost-effective but also a great way to increase your home’s value and create a kitchen you truly love. All it takes is a little creativity and some basic tools to turn your ordinary kitchen into a stunning, Instagram-worthy space.
1. Upgrade Your Kitchen with a Smart Faucet
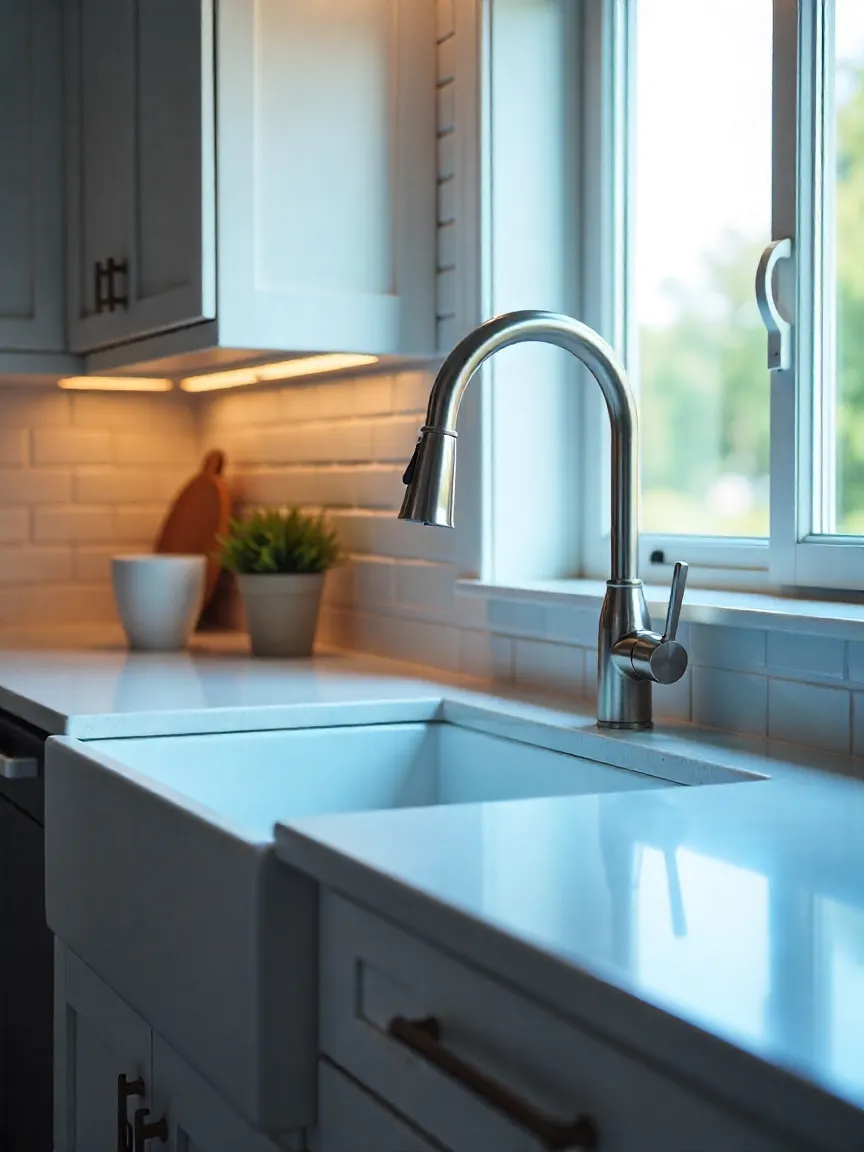
Want to add modern convenience and a touch of luxury to your kitchen? Installing a smart faucet is one of the easiest and most impactful DIY upgrades you can make. These high-tech fixtures are designed to simplify daily tasks, conserve water, and elevate your kitchen’s overall look.
Why Choose a Smart Faucet?
✔ Touchless Operation – Activate water flow with a simple wave, keeping your faucet germ-free and your hands clean.
✔ Water-Saving Technology – Built-in sensors help minimize waste, making your kitchen eco-friendly.
✔ Advanced Features – Many models offer temperature presets, voice activation, and even integration with smart home systems like Alexa or Google Assistant.
DIY Installation: Easier Than You Think
Don’t let the word “smart” intimidate you—installing a smart faucet is a beginner-friendly project. Here’s a quick guide:
- Turn Off Water Supply – Shut off the valves under the sink to prevent leaks.
- Remove Old Faucet – Use a wrench to disconnect the existing fixture.
- Mount the Smart Faucet – Insert it into the sink holes and secure it with the provided hardware.
- Connect Water Lines – Attach the hot and cold lines as instructed.
- Test for Leaks – Turn the water back on and check connections.
Most smart faucets come with step-by-step instructions, and there are plenty of YouTube tutorials to guide you through the process.
Why This Upgrade Works
A sleek new faucet doesn’t just look amazing—it improves hygiene, saves time, and adds resale value to your home. This small investment offers maximum impact with minimal effort, making it one of the best DIY kitchen upgrades you can tackle.
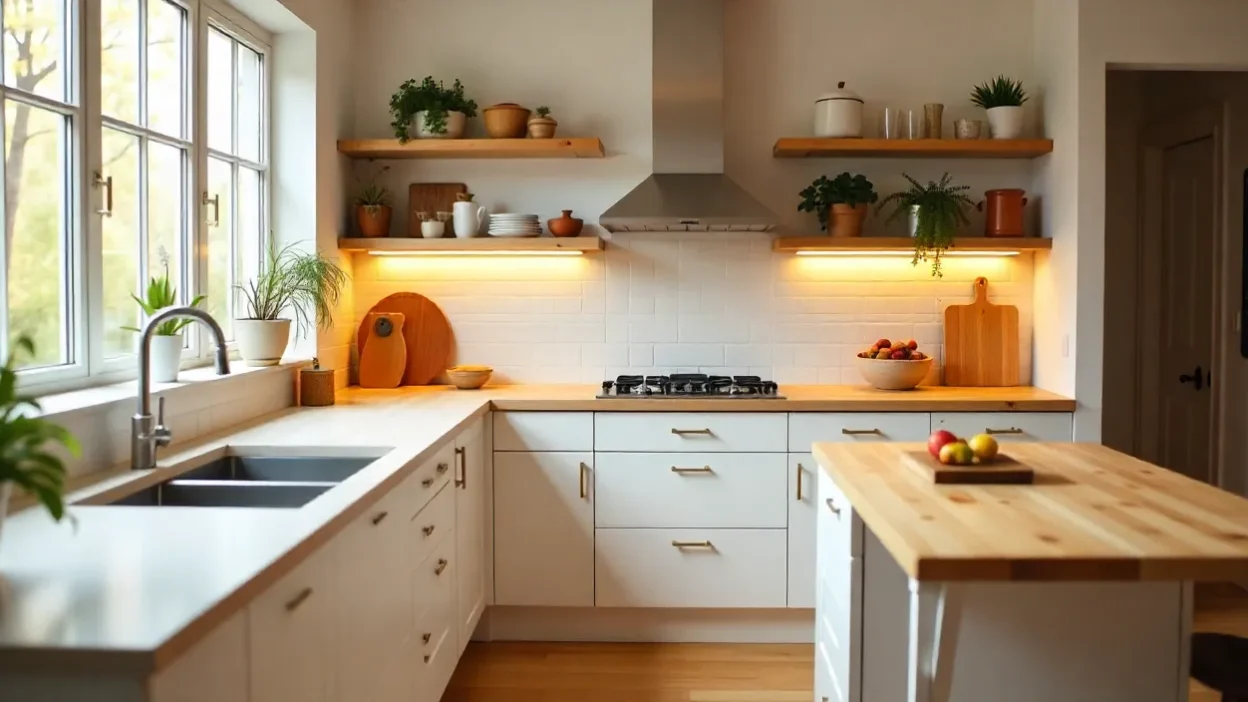
2. Brighten Your Kitchen with Under-Cabinet Lighting
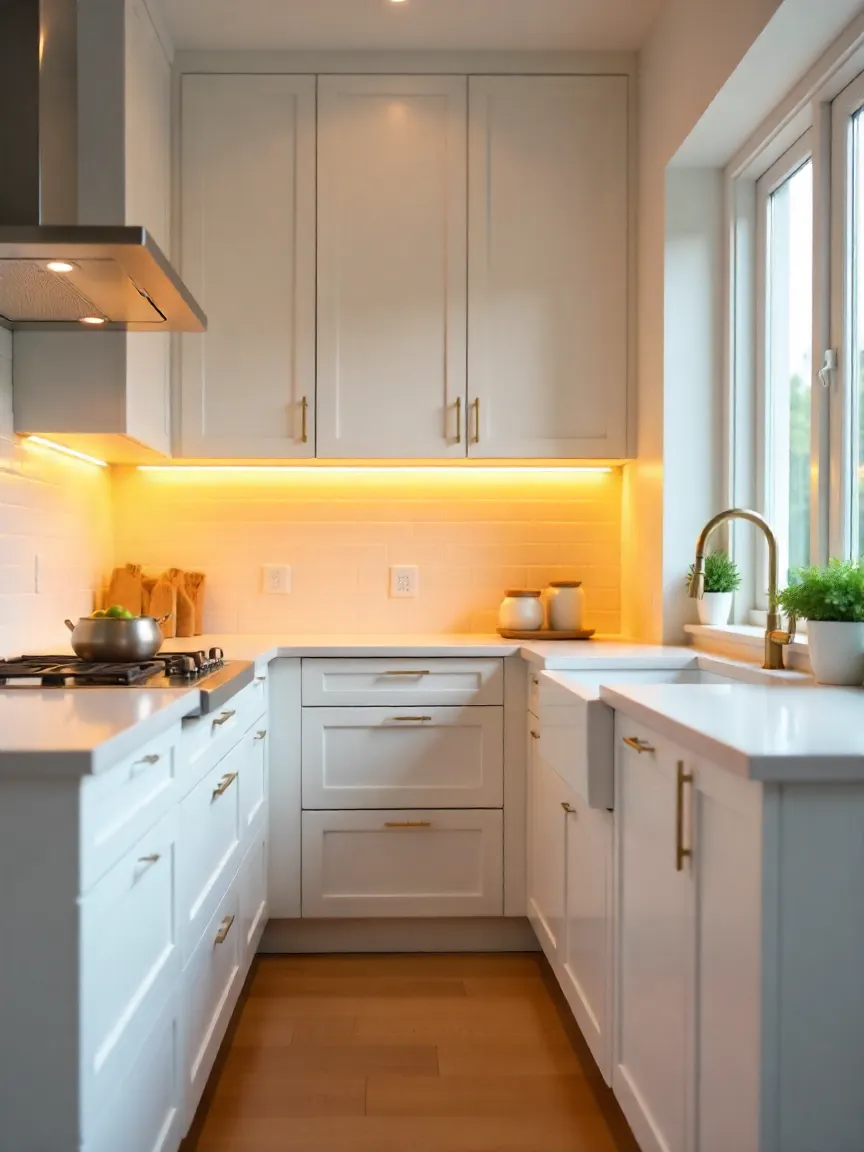
If you want to instantly make your kitchen feel brighter, bigger, and more functional, adding under-cabinet lighting is a game-changer. This upgrade improves visibility for food prep while giving your space a high-end, designer look—all without a major renovation.
Why Add Under-Cabinet Lighting?
✔ Improved Functionality – Illuminates countertops for safer, easier meal prep.
✔ Enhanced Aesthetics – Creates a soft ambient glow that adds warmth and style.
✔ Flexible Options for Any Budget – From plug-in lights to wireless LED strips, there’s a solution for every homeowner.
Best DIY Lighting Options
✔ LED Strip Lights
One of the most popular choices, LED strips are energy-efficient, long-lasting, and super easy to install with adhesive backing. Perfect for a sleek, modern finish.
✔ Battery-Operated Puck Lights
Need a no-wiring solution? Puck lights stick under cabinets with adhesive or screws, making them a quick, renter-friendly upgrade.
✔ Hardwired Lights
If you’re confident with electrical work, hardwired lights provide the cleanest, most professional look. Many guides, like those from Family Handyman, offer clear instructions for safe installation.
DIY Installation Tips
- Plan Your Layout – Measure under-cabinet space for even light distribution.
- Choose Warm or Cool Light – Warm tones create a cozy vibe, while cool tones feel crisp and modern.
- Hide the Wires – Use cable clips or channels for a polished finish.
Adding under-cabinet lighting is a simple, affordable way to elevate your kitchen design while boosting functionality. Whether you opt for plug-and-play strips or hardwired fixtures, this upgrade offers instant impact with minimal effort.
3. Refresh Your Walls with Peel-and-Stick Backsplash Tiles
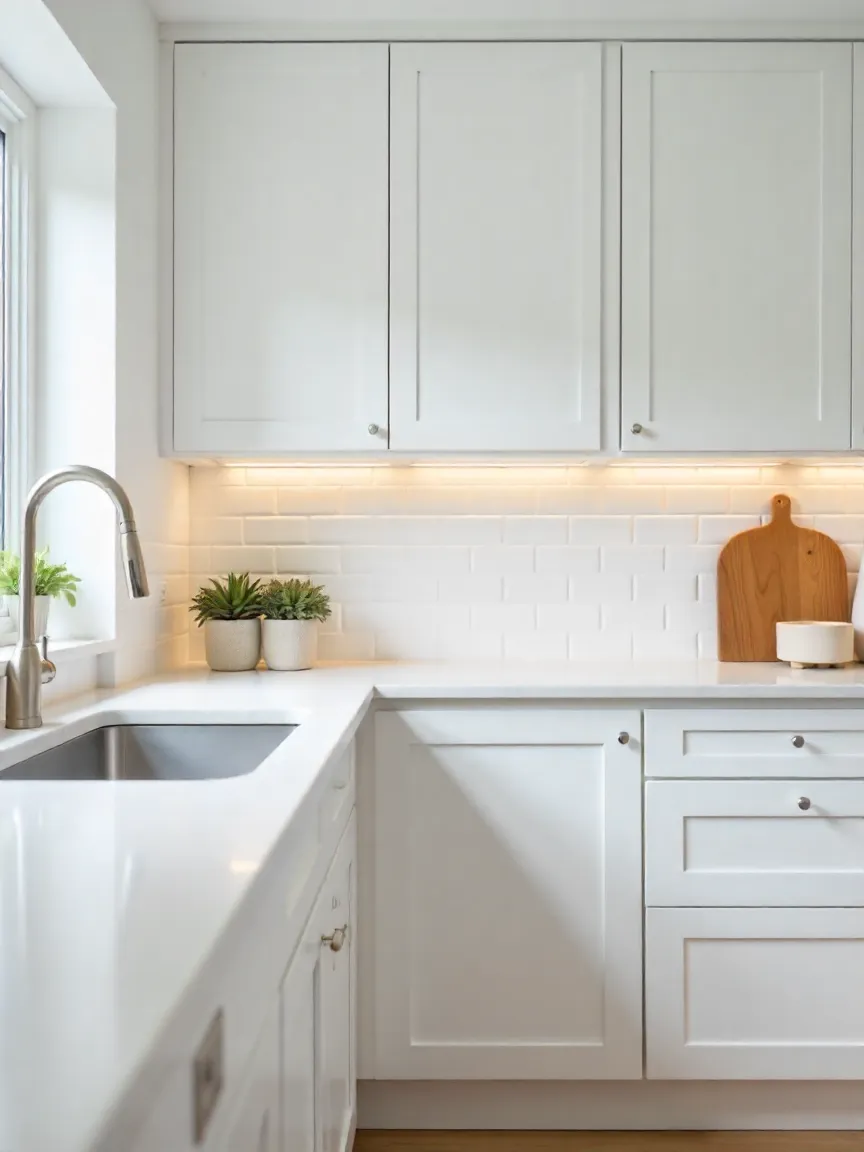
Want a high-impact kitchen makeover without the mess or cost of traditional tile installation? Peel-and-stick backsplash tiles are the ultimate DIY solution. They’re affordable, renter-friendly, and surprisingly realistic—mimicking ceramic, marble, or subway tiles for a fraction of the price.
Why Choose Peel-and-Stick Tiles?
✔ Quick Installation – No grout, no mortar, no mess.
✔ Budget-Friendly – A designer look without the high price tag.
✔ Easy to Remove – Perfect for renters or anyone who likes to refresh their decor often.
Step-by-Step Guide to Installing Peel-and-Stick Tiles
1. Measure Your Space Accurately
Before you shop, measure the area you plan to cover and buy 10–15% extra for cuts and adjustments.
2. Prep the Wall
Clean thoroughly with a mild cleaner and let it dry completely. A smooth, grease-free surface ensures proper adhesion.
3. Apply the Tiles
- Start at your center point for an even layout.
- Peel off the backing and press the tile firmly onto the wall.
- Smooth out any bubbles or wrinkles as you go.
4. Cut for Corners & Outlets
Use scissors or a utility knife for precise cuts. Take your time to maintain a seamless look.
5. Adjust if Needed
Made a mistake? No problem. Gently lift and reposition the tile without damaging your wall.
Pro Styling Tips
- Choose white subway peel-and-stick tiles for a classic, timeless look.
- For a bold design, opt for mosaic patterns or faux marble.
- Pair with under-cabinet lighting (see Idea #2) for extra wow factor.
Peel-and-stick tiles deliver instant visual impact and are perfect for anyone craving a stylish, low-commitment upgrade. In just a few hours, you can transform your backsplash into a statement feature—without hiring a contractor.
4. Upgrade to a Touchless Trash Can for a Cleaner, Smarter Kitchen
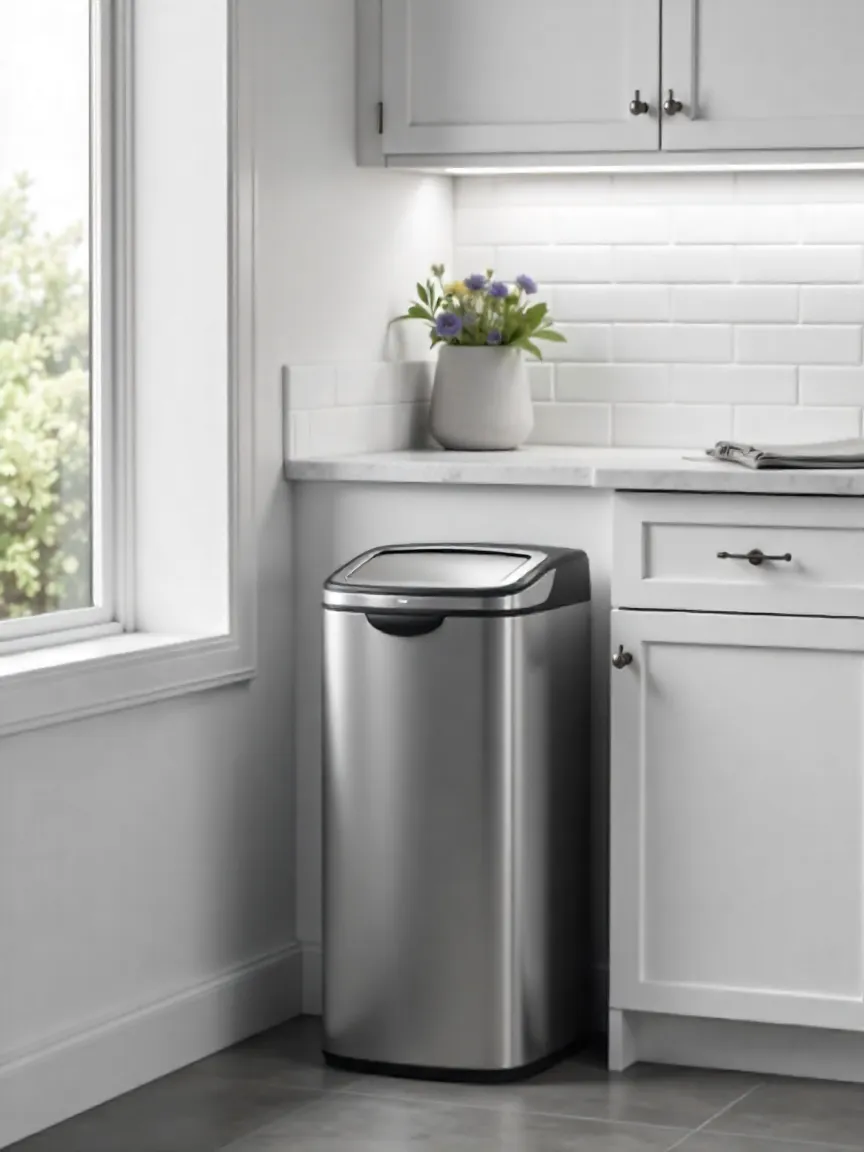
If you’re looking for a small change that makes a big difference in convenience and hygiene, a touchless trash can is a must-have upgrade. This simple addition brings modern functionality to your kitchen while reducing the spread of germs.
Why Choose a Touchless Trash Can?
✔ Hands-Free Operation – Just wave your hand over the sensor, and the lid opens automatically. Perfect for when your hands are full or messy.
✔ Better Hygiene – No need to touch the lid, which helps reduce cross-contamination and keeps your kitchen cleaner.
✔ Odor Control – Most models have tight-sealing lids that lock in unpleasant smells, making them great for busy households.
✔ Sleek Design Options – Available in brushed stainless steel, matte black, and minimalist styles to complement any modern kitchen.
How They Work
Most touchless trash cans operate with a built-in motion sensor and run on batteries or rechargeable power packs. Some premium models even feature voice activation, adding a futuristic touch to your cooking space.
Quick Tips for Choosing the Right Model
- Size Matters – Pick a can that fits your household’s waste output without taking up too much floor space.
- Battery Life – Choose models with long-lasting batteries or USB charging for convenience.
- Extra Features – Some come with bag storage compartments, soft-close lids, or even odor-filtering systems.
Adding a touchless trash can is a low-cost upgrade that delivers major benefits: better hygiene, improved convenience, and a polished look for your kitchen.
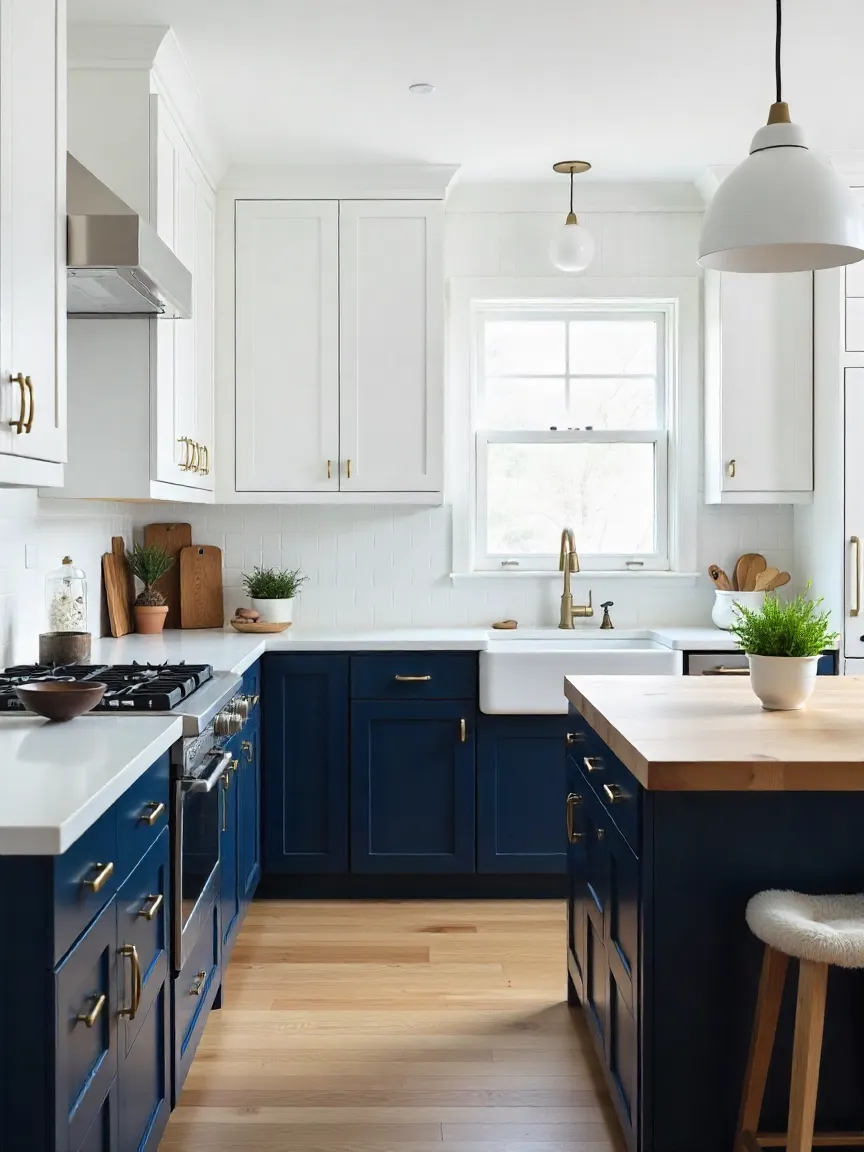
5. Refinish Your Cabinets for a Budget-Friendly Kitchen Makeover
If your kitchen feels outdated, you don’t need to invest in expensive cabinet replacements. Refinishing your existing cabinets is an affordable DIY project that can dramatically transform your space with minimal cost.
Why Cabinet Refinishing Is a Smart Upgrade
✔ Cost-Effective – Save thousands compared to full cabinet replacement.
✔ Customizable – Choose any color, finish, or hardware to match your style.
✔ Eco-Friendly – Reuse what you already have instead of sending cabinets to a landfill.
Step-by-Step Guide to Refinishing Cabinets
1. Remove Doors & Hardware
Take off all cabinet doors, hinges, and knobs. This makes painting or staining much easier and avoids messy drips.
2. Clean Thoroughly
Grease and grime build-up can ruin your finish. Use a mild detergent to get surfaces spotless.
3. Sand for Smoothness
Lightly sand the surfaces to create an even base for your new finish. Wipe away dust with a damp cloth.
4. Apply Paint or Stain
- Paint for a bold, fresh look (think navy, white, or sage green).
- Stain for a warm, natural wood finish.
Apply evenly with a brush or sprayer for a professional-quality result.
5. Upgrade Hardware
Once dry, reattach doors and consider new handles or knobs for a modern, polished touch.
Pro Styling Tip
Two-tone cabinets are trending! Try white uppers and a darker shade on the lowers for a contemporary, designer-inspired look.
Refinishing your cabinets is an affordable way to give your kitchen a completely new personality without gutting the space. A weekend of work can deliver results that look like a full remodel.
6. Add Style and Function with a Pot Filler Faucet

If you love cooking, a pot filler faucet is a game-changing kitchen upgrade. This wall-mounted faucet, usually placed above the stove, allows you to fill pots with water directly where you cook—eliminating the need to carry heavy, water-filled pots across the kitchen. It’s a small luxury that adds both convenience and a high-end design touch to your space.
Why Install a Pot Filler Faucet?
✔ Convenience – Fill large pots right at the stove—no heavy lifting.
✔ Time-Saver – Skip trips to the sink while cooking.
✔ Luxury Appeal – Adds a premium, chef-inspired look to your kitchen.
DIY Installation: How to Do It
Installing a pot filler is slightly more advanced than other DIY projects, but still manageable if you’re comfortable with basic plumbing:
1. Turn Off the Water Supply
Shut off your home’s water supply to avoid leaks.
2. Cut an Opening in the Wall
Mark the location (usually centered above the stove) and cut into the drywall.
3. Connect the Water Line
Run a cold-water line to the faucet location. Use plumber’s tape on connections for a secure, leak-free fit.
4. Mount the Faucet
Attach the mounting bracket securely, ensuring it’s level, and then connect the pot filler faucet to the bracket.
5. Test for Leaks
Turn the water back on and check all connections.
Pro Tip:
Position the faucet so it can extend over all burners, giving you flexibility when filling different-sized pots.
A pot filler faucet isn’t just practical—it’s a statement feature that boosts the value and style of your kitchen. For detailed instructions, consult tutorials like My Plumbing DIY or Mr. Kitchen Faucets.
7. Install Open Shelving for Style and Functionality
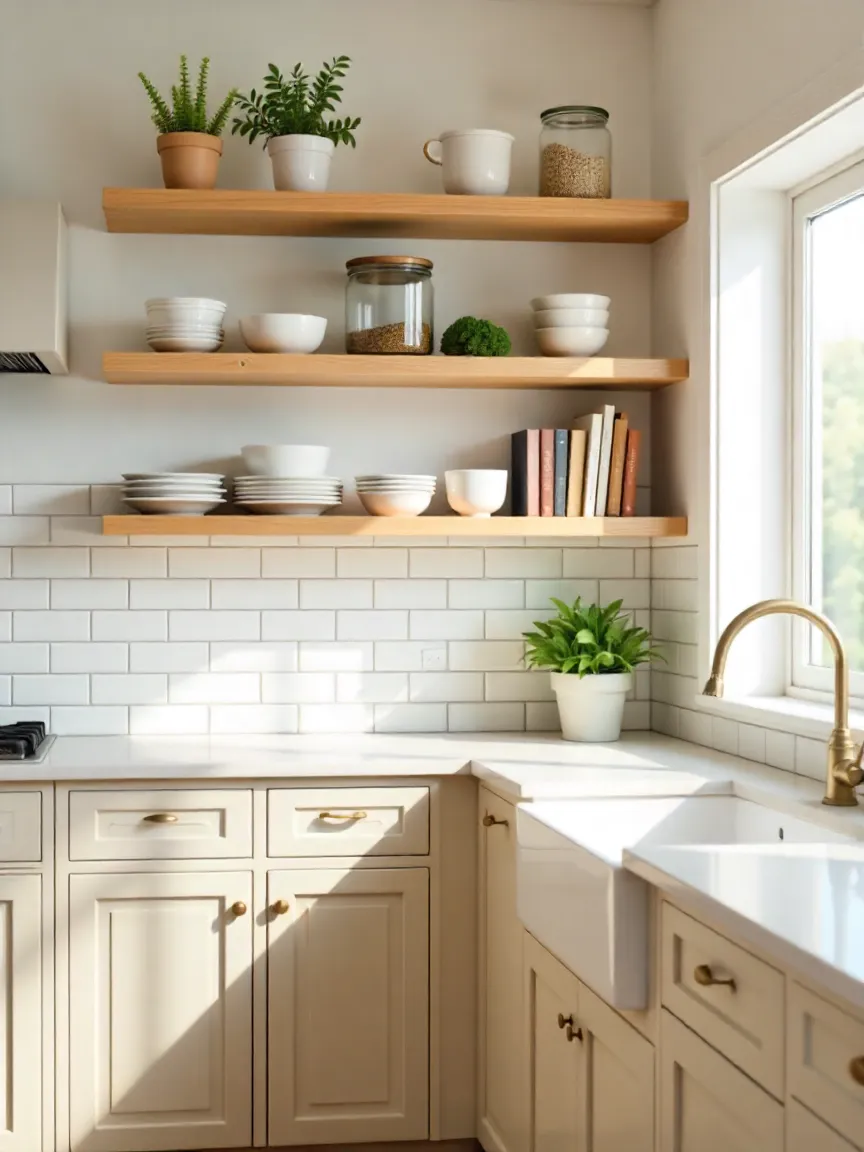
Looking for a quick, affordable way to give your kitchen a fresh, designer look? Open shelving is the answer. This popular trend combines style with practicality, offering easy access to your essentials while showcasing your favorite decor pieces.
Why Choose Open Shelving?
✔ Modern Aesthetic – Creates an airy, open feel in your kitchen.
✔ Practical Storage – Perfect for items you use daily—plates, mugs, spices.
✔ Personalized Decor – Display cookbooks, greenery, and decorative accents for a curated look.
DIY Installation Tips
1. Secure Properly
Always anchor shelves into wall studs for maximum stability. Avoid relying on drywall anchors if you plan to store heavy items.
2. Pick the Right Materials
- Wood Shelves – Add warmth and a rustic touch.
- Metal or Mixed Material Shelves – Ideal for modern or industrial kitchens.
3. Optimize Vertical Space
Install a rail under the shelves to hang utensils or small pots, giving your kitchen a functional and stylish upgrade.
4. Coordinate Hardware
Match the brackets and hardware with your existing finishes (like faucets and cabinet handles) for a cohesive, polished design.
Open shelving is a budget-friendly DIY project that delivers a big visual payoff. Whether you love the farmhouse vibe or a sleek modern look, this upgrade instantly transforms your kitchen into a functional and stylish space.
8. Replace Cabinet Hardware for an Instant Kitchen Refresh
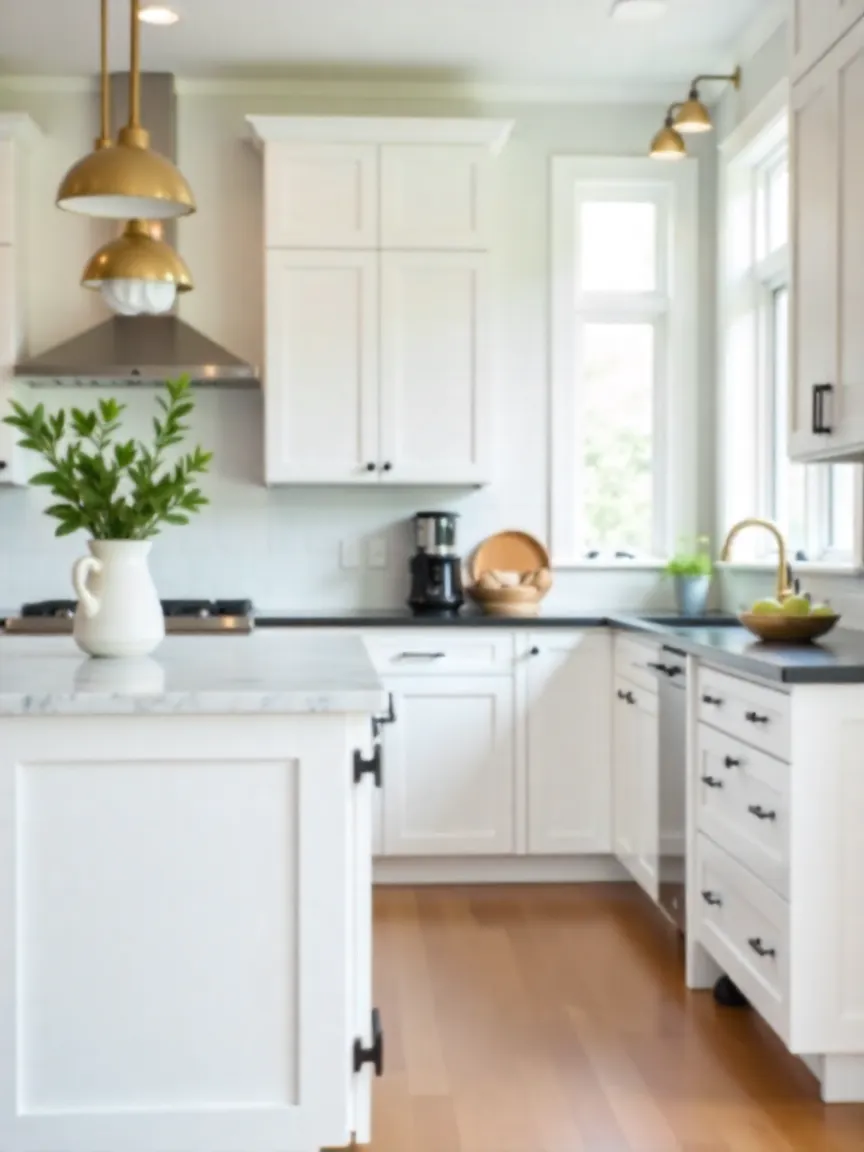
If you want a quick and affordable kitchen makeover, start with the details—cabinet hardware. Simply swapping out old knobs and handles for modern, stylish options can dramatically transform the look and feel of your space without any major renovation.
Why This Upgrade Works
✔ Big Impact, Low Cost – Hardware upgrades are one of the most budget-friendly ways to modernize your kitchen.
✔ Easy DIY Project – All you need is a screwdriver and a few minutes per drawer or cabinet.
✔ Style Upgrade – Modern finishes add sophistication and character to your existing cabinetry.
Trending Hardware Finishes for 2025
- Matte Black – Perfect for sleek, contemporary kitchens.
- Brushed Brass or Gold – Adds warmth and luxury to any space.
- Polished Chrome – A timeless option that pairs well with stainless steel appliances.
- Copper Accents – Great for rustic or farmhouse-inspired kitchens.
Tips for a Cohesive Look
- Match hardware with lighting fixtures, faucets, or appliances for a unified aesthetic.
- If you have two-tone cabinets, consider contrasting hardware for added visual interest.
- Upgrade hinges for a fully polished look.
Pro Tip: Want to go the extra mile? Pair your new hardware with refinished cabinets (see Idea #5) for a complete transformation without breaking the bank.
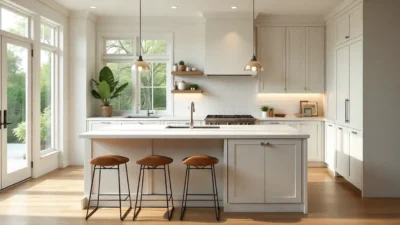
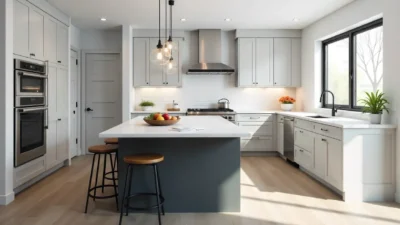
9. Add a Kitchen Island for Extra Space and Style
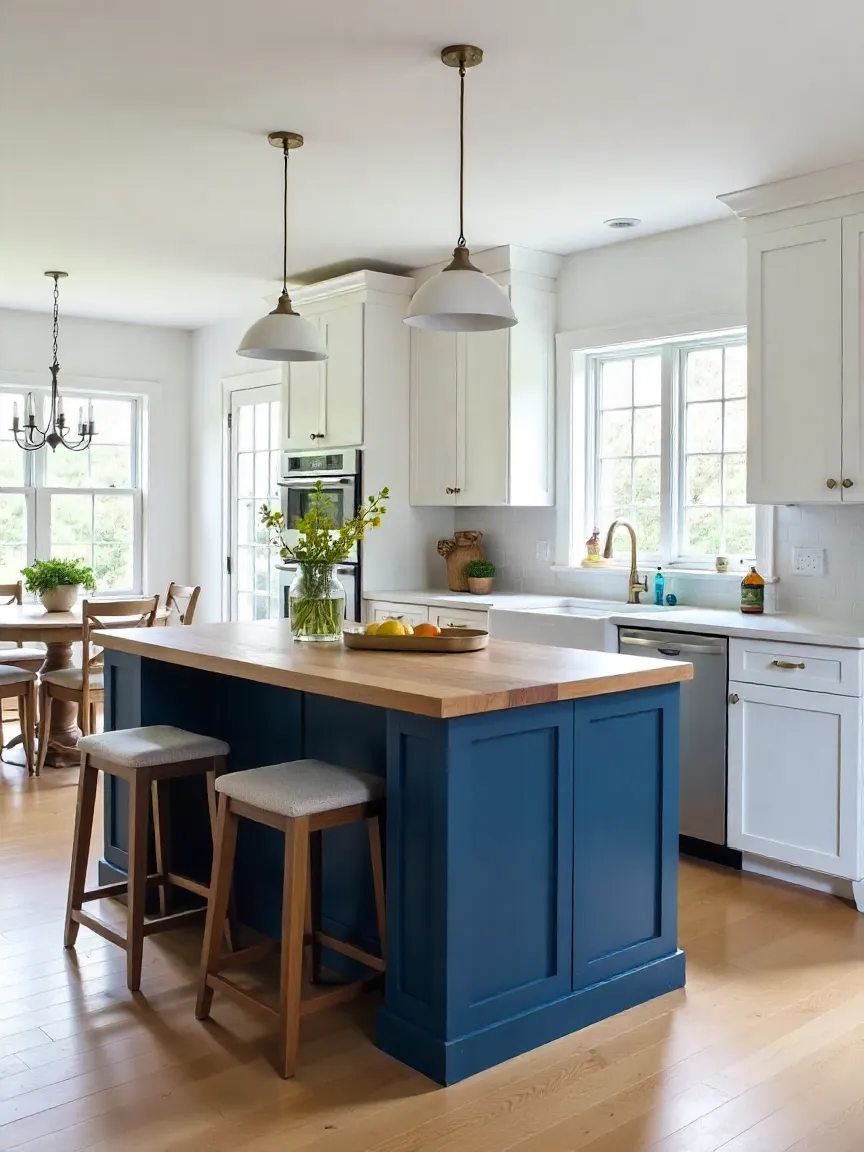
A kitchen island is one of the most impactful upgrades you can make to your kitchen. It instantly boosts functionality, storage, and visual appeal, turning your kitchen into a more practical and stylish hub for cooking and entertaining.
Why Add a Kitchen Island?
✔ More Counter Space – Perfect for meal prep, baking, or even working from home.
✔ Extra Storage – Add shelves, drawers, or cabinets for improved organization.
✔ Flexible Design – Use as a breakfast bar, buffet station, or centerpiece for family gatherings.
DIY-Friendly Options for Every Budget
1. Refresh an Existing Island
- A fresh coat of paint in a trendy shade like navy or sage green can completely change the look.
- Add new hardware, trim, or molding for a custom, high-end finish.
2. Repurpose Materials
- Use reclaimed wood planks or old church panels for a unique, character-rich island.
- Pair with a butcher block or stone countertop for a stylish yet practical surface.
3. Build from Scratch
- Combine stock cabinets from your local hardware store to create a base.
- Top with a countertop that matches or contrasts with your existing kitchen for a cohesive look.
- Add corbels or decorative legs for an elevated design.
4. Go Small for Tight Spaces
- Try a mini island or rolling cart for extra prep space without overwhelming a small kitchen.
Pro Styling Tips
- Add pendant lights above the island for both style and functionality.
- Use a contrasting color for the island to make it the focal point of your kitchen.
- Include open shelving or wine racks for added storage and personality.
Adding a kitchen island is a high-value upgrade that improves workflow and makes your kitchen more inviting. Whether you refresh an old island or build a new one, this project delivers major impact on a reasonable budget.
10. Install a Chalkboard Wall for Creativity and Functionality
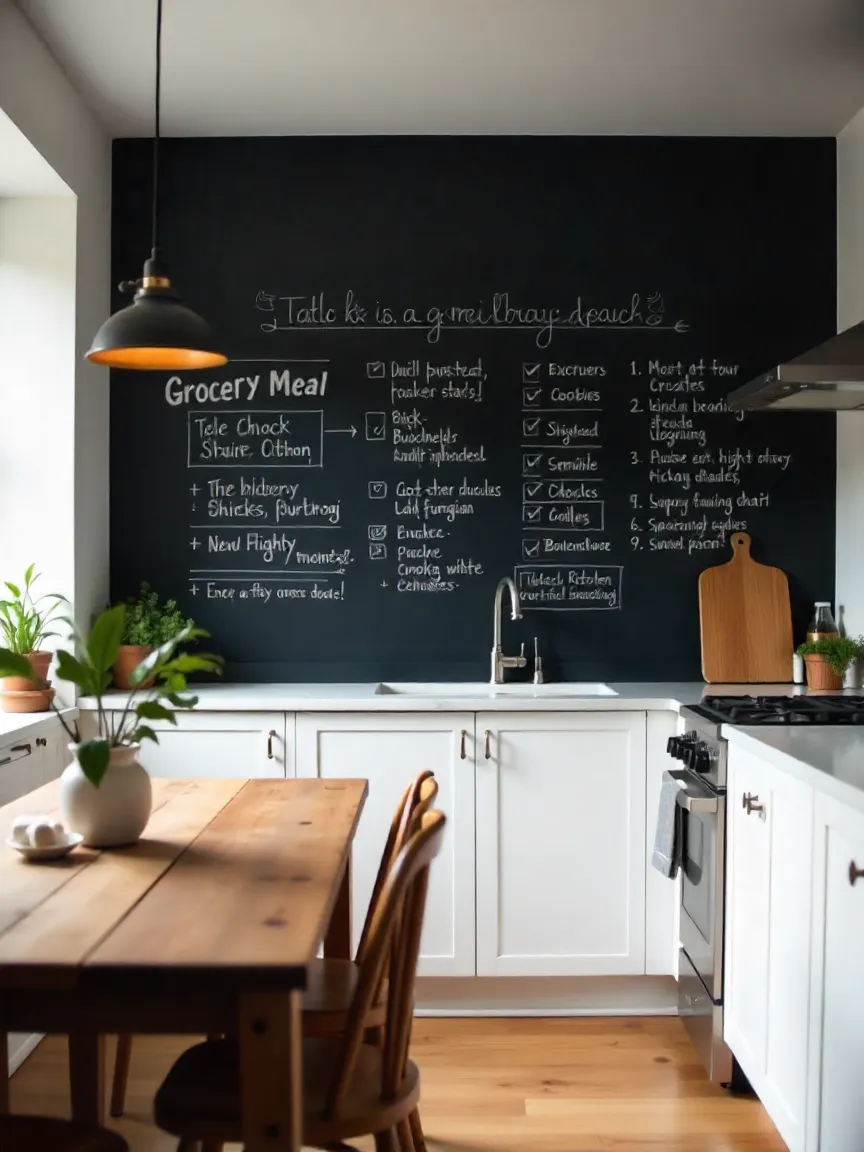
Looking for a fun and functional upgrade that doubles as a design statement? A chalkboard wall is a perfect addition to any kitchen. It’s practical for everyday notes while giving your space a unique, personalized touch.
Why Add a Chalkboard Wall?
✔ Multi-Purpose – Use it for grocery lists, meal plans, recipes, or kids’ doodles.
✔ Stylish Accent – Works with modern, rustic, and farmhouse kitchens alike.
✔ Budget-Friendly Upgrade – A single can of chalkboard paint can transform an entire wall.
How to DIY a Chalkboard Wall in Your Kitchen
1. Measure Your Space
Calculate the square footage (height × width) to know how much paint you need.
2. Prep the Surface
Clean thoroughly and apply a primer if required. Some chalkboard paints adhere without primer, so check the manufacturer’s instructions.
3. Apply the Paint
Use a roller for large areas and a brush for corners. Apply at least two coats for durability.
4. Cure and Condition the Wall
Let the wall cure for 3 days, then rub chalk over the entire surface to condition it. This ensures easy erasing later.
Creative Styling Ideas
- Frame the chalkboard wall with wood trim for a polished look.
- Use it as a coffee bar backdrop with handwritten menus.
- Add chalkboard labels to jars and shelves for a cohesive theme.
A chalkboard wall is more than a practical upgrade—it’s an interactive feature that brings personality to your kitchen. Whether you use it for organization or as a creative outlet, it’s a simple project with big design impact.